


User stories with acceptance criteria help teams to determine what functionalities to implement. When they are unclear, developers start building based on assumptions, and QA teams test again with different expectations. Furthermore, validation scenarios, edge cases, and error handling are often overlooked.
This all happens when teams don’t know the exact process for writing the acceptance criteria. That’s why we have written this blog and covered what acceptance criteria are, how to write them within Azure DevOps, different types of acceptance criteria, how good and bad acceptance criteria look, and how to use AI tools to write acceptance criteria that are clear, complete, and concise.
What Is Acceptance Criteria in Azure DevOps?
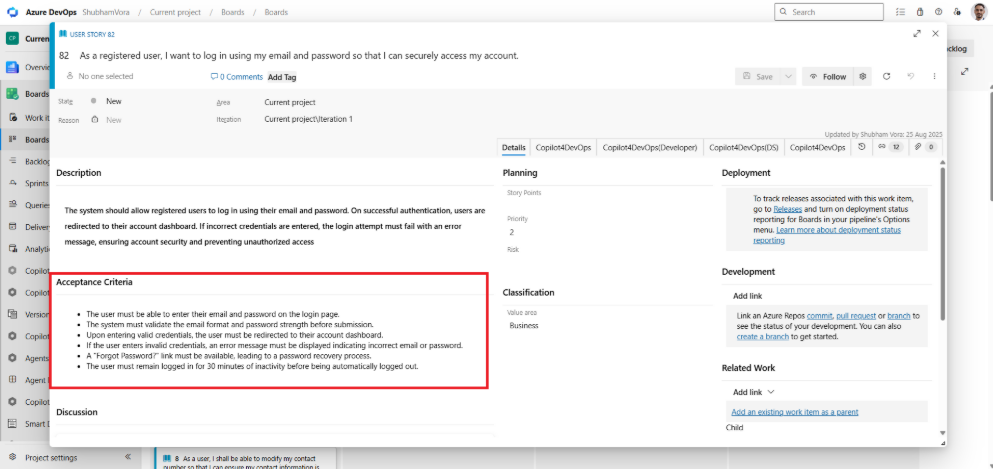
Acceptance criteria are the high-level goals or conditions that the user story must satisfy before it is accepted by the user, customer, product owner, project manager, business analyst, developer, or other team members. It helps in removing ambiguity from the story and defining exactly what functionalities development teams need to implement.
Generally, acceptance criteria are written by the product team members during the sprint planning or backlog refinement. In Azure DevOps, there is a dedicated field inside the user story work item to add acceptance criteria. The field is separate from the description area and supports formatted content, making it easier for every team member to review the same expectations in a single place.
The examples of acceptance criteria can be:
- Website loading time must be less than 1.5 seconds.
- The password must be encrypted with AES standards.
Good acceptance criteria usually answer questions like:
- What kind of user interactions and functionality should be implemented?
- What business rules or validations must be applied?
- What conditions should a user story fulfill to be considered complete?
- What callback behavior should be implemented if something fails?
So, without clear acceptance criteria, the definition of done becomes subjective. The developer may focus on functionality, and QA doesn’t know what to validate for edge cases.
Two Formats for Writing Acceptance Criteria in Azure DevOps
There are two formats in which teams can write acceptance criteria:
1. Plain Text Acceptance Criteria
The plain text acceptance criteria describe what the features should do in short, direct conditions. This format is generally used for smaller story sprint discussions and when teams are using automated testing frameworks.
Example User Story 1
As an iPhone user, I want to unlock my phone with Face ID so I can access the device without entering a passcode.
Critères d'acceptation :
- The device should only unlock when the registered user’s face is recognized.
- The system should allow a maximum of three attempts. After that, ask the user to enter the passcode.
- The user must be able to control Face ID from the settings.
Example User Story 2
As a Netflix subscriber, I want to continue watching a web series from where I stopped, so I don’t need to search for the episode again.
Critères d'acceptation :
- The platform must save the playback position automatically.
- In multiple devices, the system must sync the progress.
- The user must be able to continue watching from where they left off.
2. Given-When-Then (Gherkin Format)
The Given-When-Then format converts acceptance criteria into an executable test scenario. This is helpful for teams using BDD, Cucumber, or SpecFlow, as these scenarios map closely to automated test states.
Here, Given-When-Then means:
- Given = First, it defines the initial state.
- When = This part defines the user’s action.
- Then = Defines the expected result.
Let’s take the same user story we took in the previous example for iPhone users. For that, a Given-When-Then scenario could be:
Scenario: Successful Face ID unlock
- Given Face ID is enabled on the device.
- And the registered user is looking at the screen.
- When the user raises the phone to unlock it.
- Then the device unlocks successfully.
Scenario: Failed Face ID attempts
- Given Face ID is enabled on the device.
- When an unrecognized user attempts to unlock the phone three times.
- Then the device requests the passcode.
So if your team is using automated testing, then it would be good to write acceptance criteria in a given-when-then format. Otherwise, teams can choose to write AC in plain text.
What Makes Acceptance Criteria Good vs Bad?
There is no specific definition for the good and bad acceptance criteria. Generally, good acceptance criteria are:
- Specific enough to avoid multiple interpretations
- Testable with a clear pass-or-fail result
- Focused on outcomes instead of technical implementation
- Short and direct without unnecessary detail
It ensures all team members understand requirements in the same way and keeps everything on the same page.
On the other hand, bad acceptance criteria are often vague, subjective, or impossible to validate during testing.
Let’s understand it with acceptance criteria examples:
- Bad AC: The app should load quickly.
- Good AC: The app dashboard must load in 1 second on a regular internet speed.
- Bad AC: The user should get a notification.
- Good AC: The user must get a notification within 30 seconds of payment debit.
Many teams validate acceptance criteria using the INVEST framework. In the INVEST framework, “T” stands for Testable, so if QA cannot verify whether ACs are passed or failed, then it still needs rework.
How Copilot4DevOps Generates Acceptance Criteria Inside Azure DevOps
Manually writing acceptance criteria for a few user stories is manageable, but writing for hundreds of backlog items across multiple sprints is where the team starts rushing and misses edge cases.
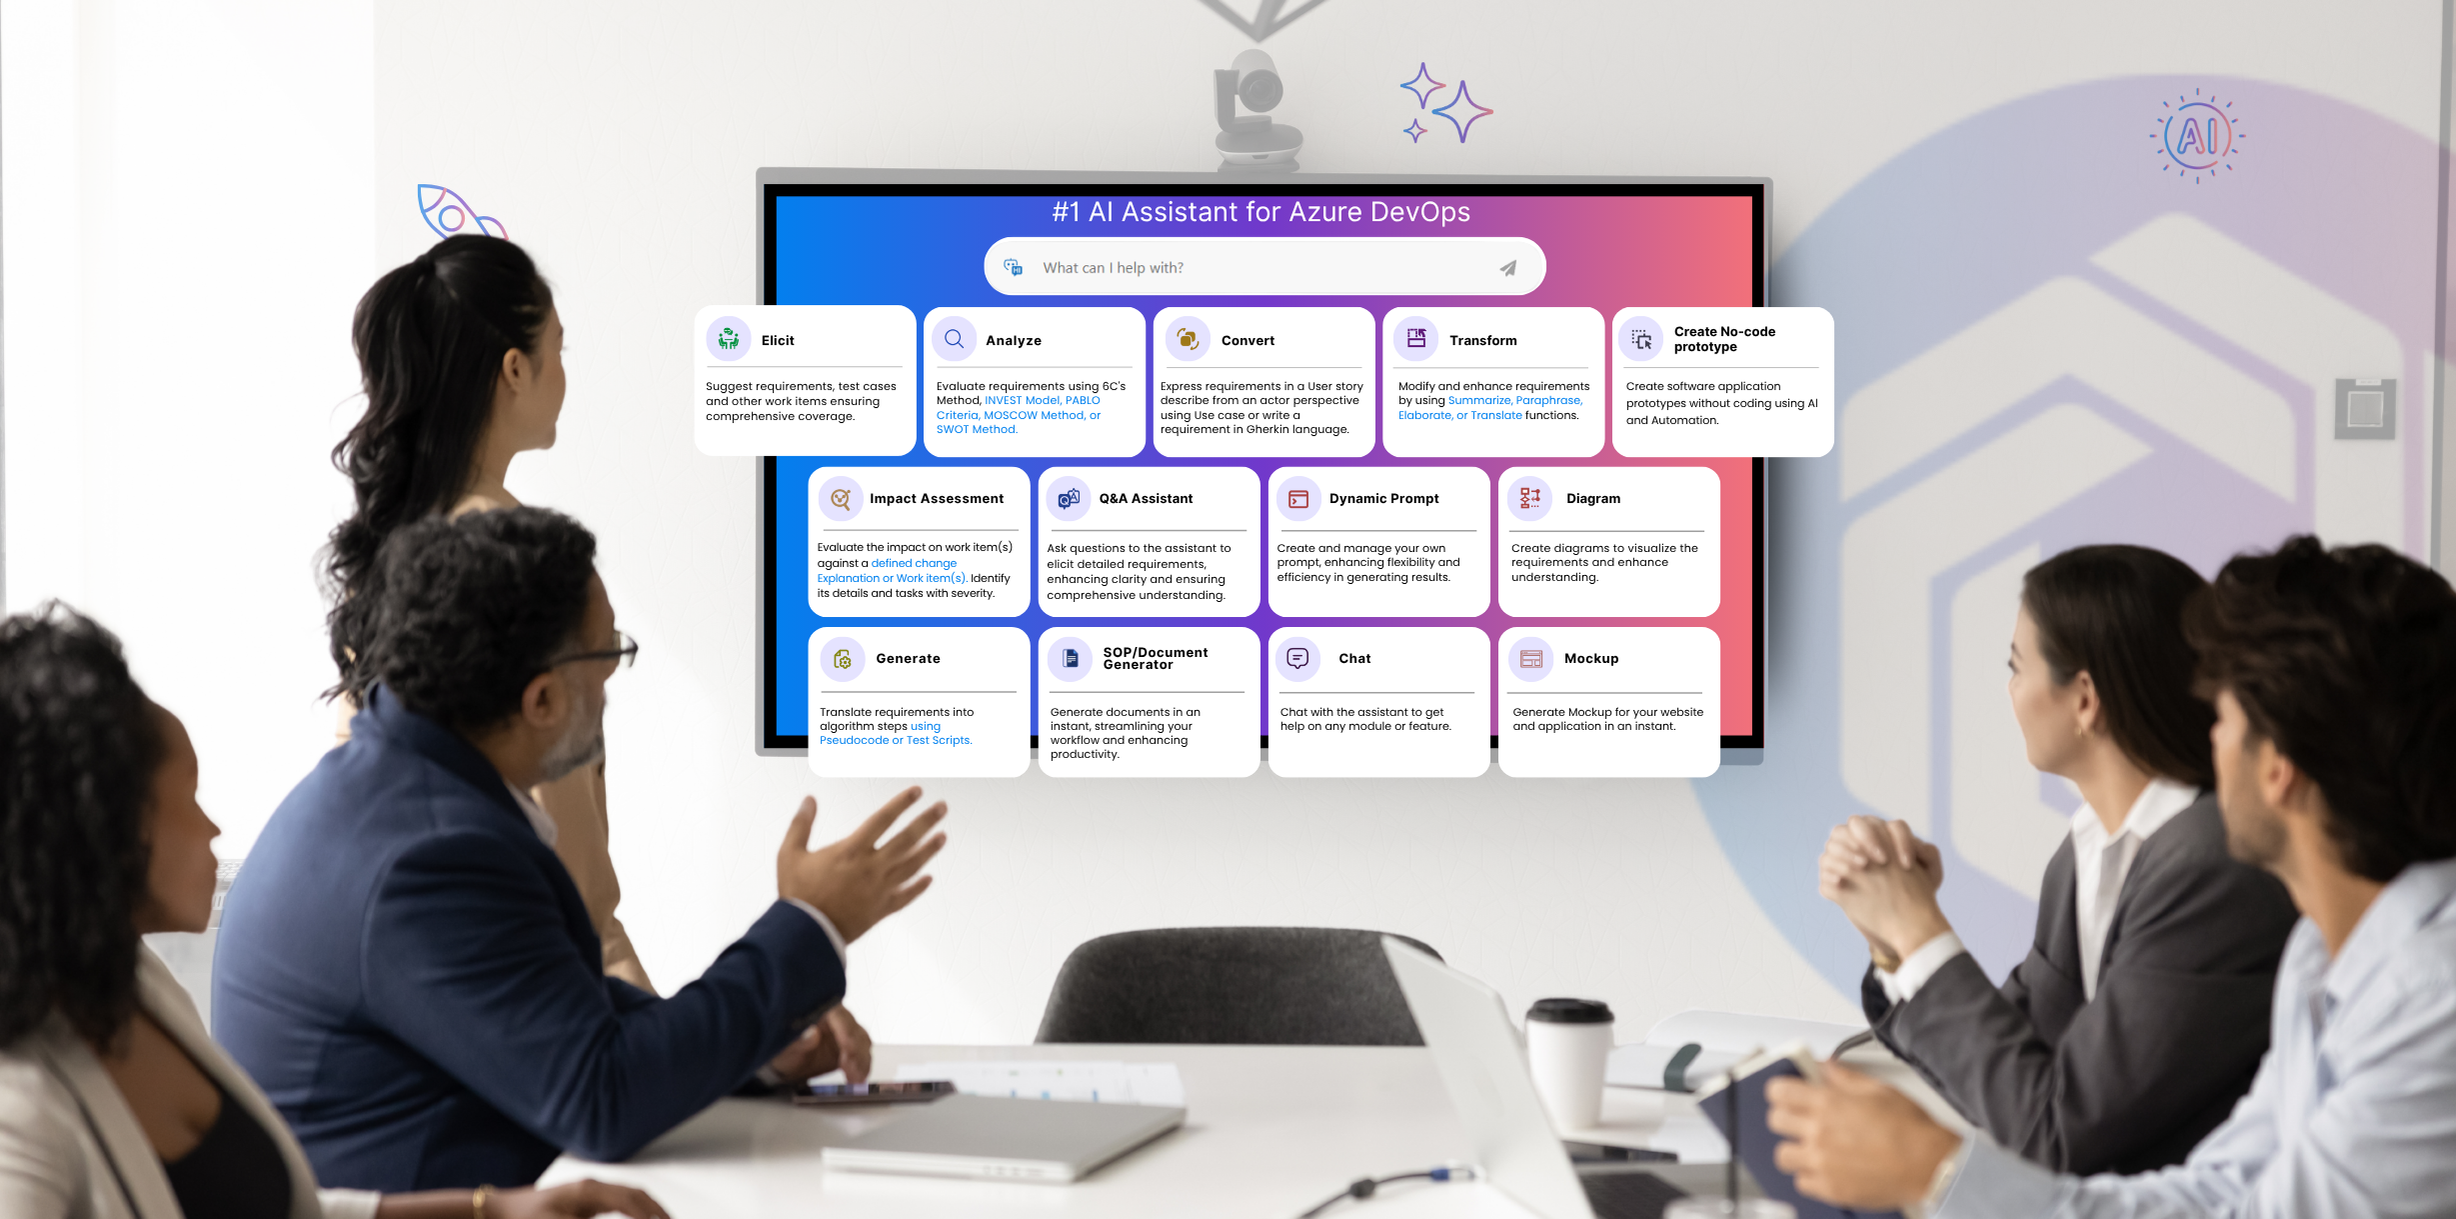
An AI acceptance criteria generator like Copilot4DevOps works directly within Azure DevOps and converts any descriptions into user stories and acceptance criteria into the required format. Here is how it works:
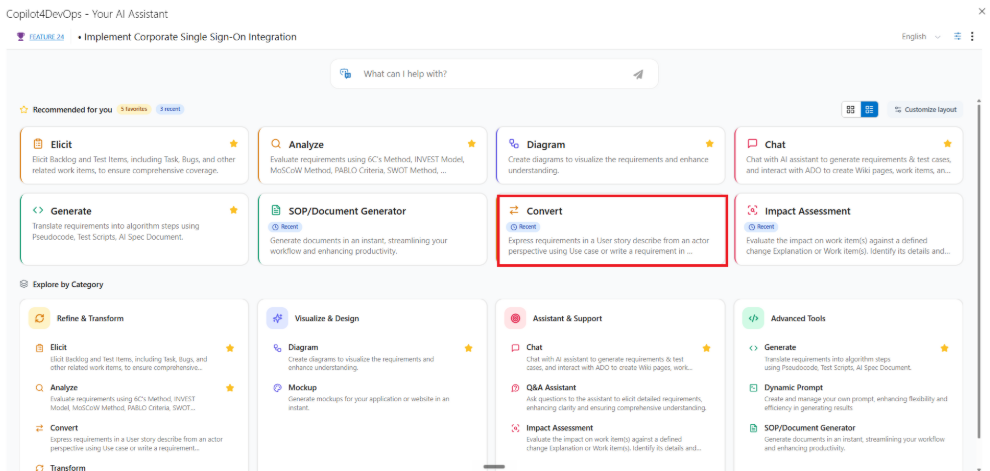
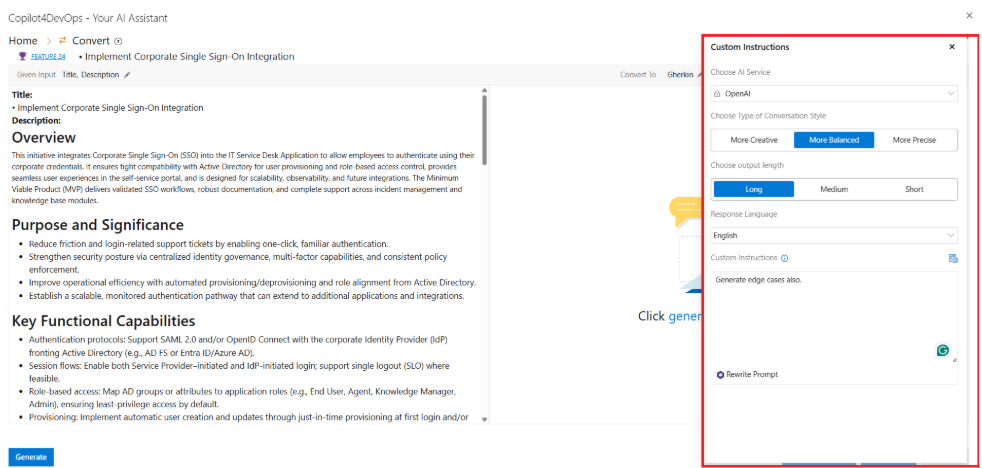
Step 1: Open the Convert module in CoPilot4DevOps.
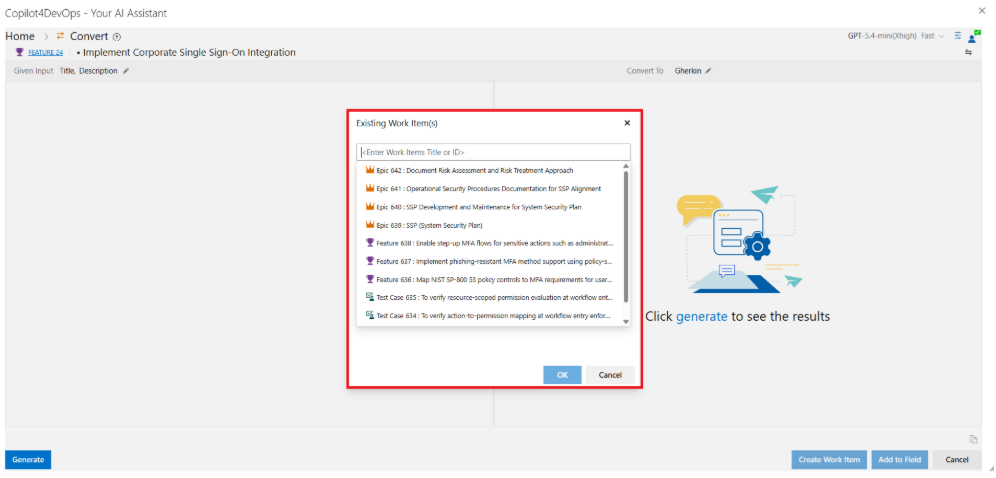
Step 2: Select any Azure DevOps work item using title, ID, or query to convert it into user stories with acceptance criteria.
Step 3: Next, you can provide custom instructions in plain language. For example, the product owner can ask it to write edge cases also while generating the acceptance criteria. You can even select the output language among 40+ languages, output length, and conversational style.
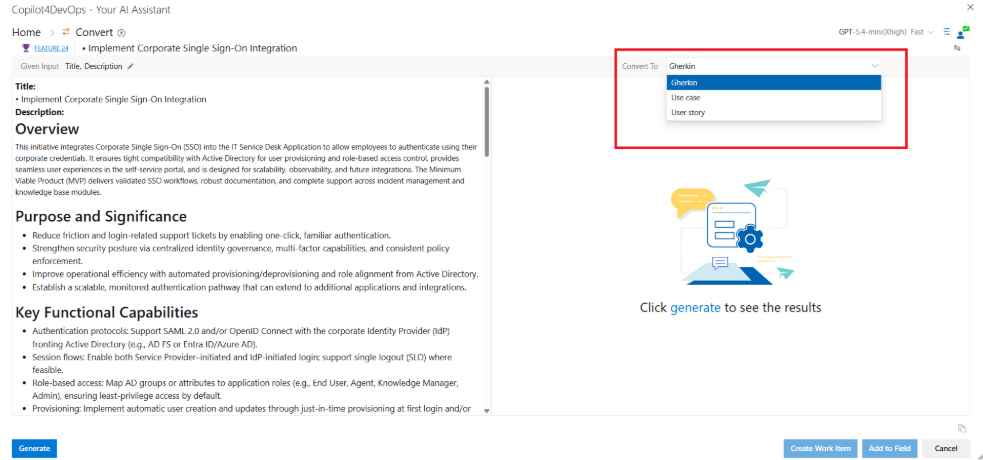
Step 4: After that, from the “Convert To” drop-down menu, you can either select Gherkins, Use Cases, or the User Story option based on which format you want to convert your requirements.
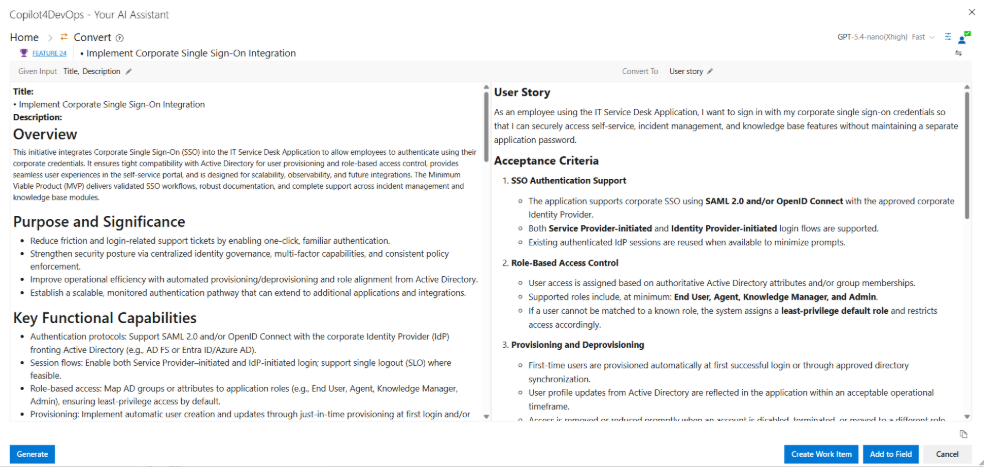
Step 5: Next, click on the generate button. Once generated, you can observe that it covers all acceptance criteria with edge cases.
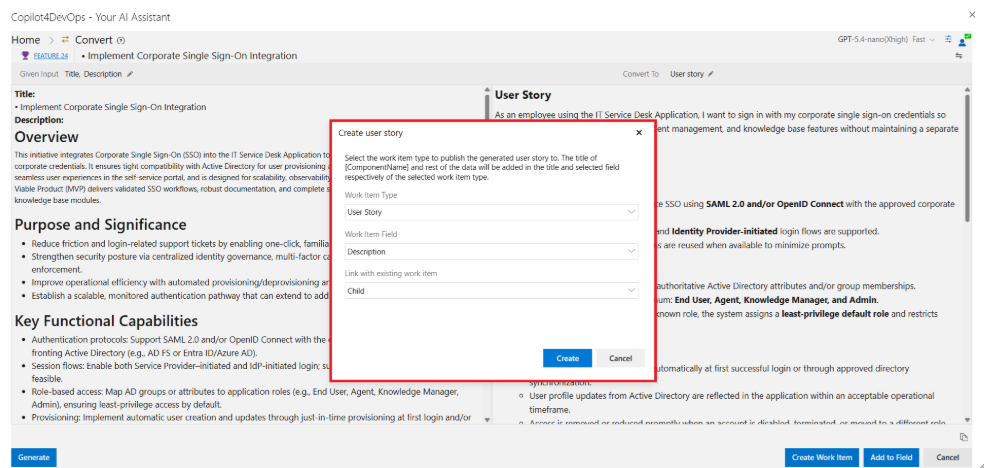
Step 6: You can either add this user story/acceptance criteria to Azure DevOps by creating a new work item or add it to any field of the existing work item.
Foire aux questions
Yes, Azure DevOps allows teams to link user stories/acceptance criteria with test cases. So, QA teams can validate whether the user story fulfills all acceptance criteria.
Of course, strong acceptance criteria always contain edge cases and failure scenarios.
Yes, AI tools like Copilot4DevOps can generate Given-When-Then scenarios directly from existing work item content inside Azure DevOps. The generated scenarios can include positive paths, negative paths, and additional edge cases.
No, AI can generate the first draft of acceptance criteria, but teams still need to perform a human review.
Essayez-le vous-même
Prêt à transformer votre DevOps avec Copilot4DevOps ?
Profitez dès aujourd'hui d'un essai gratuit.