Q&A Assistant
Note: This feature won't generate results based on the selected work item. Instead, you'll need to manually insert the topic to elicit and then questions related to the entered topic will be generated in the left panel.
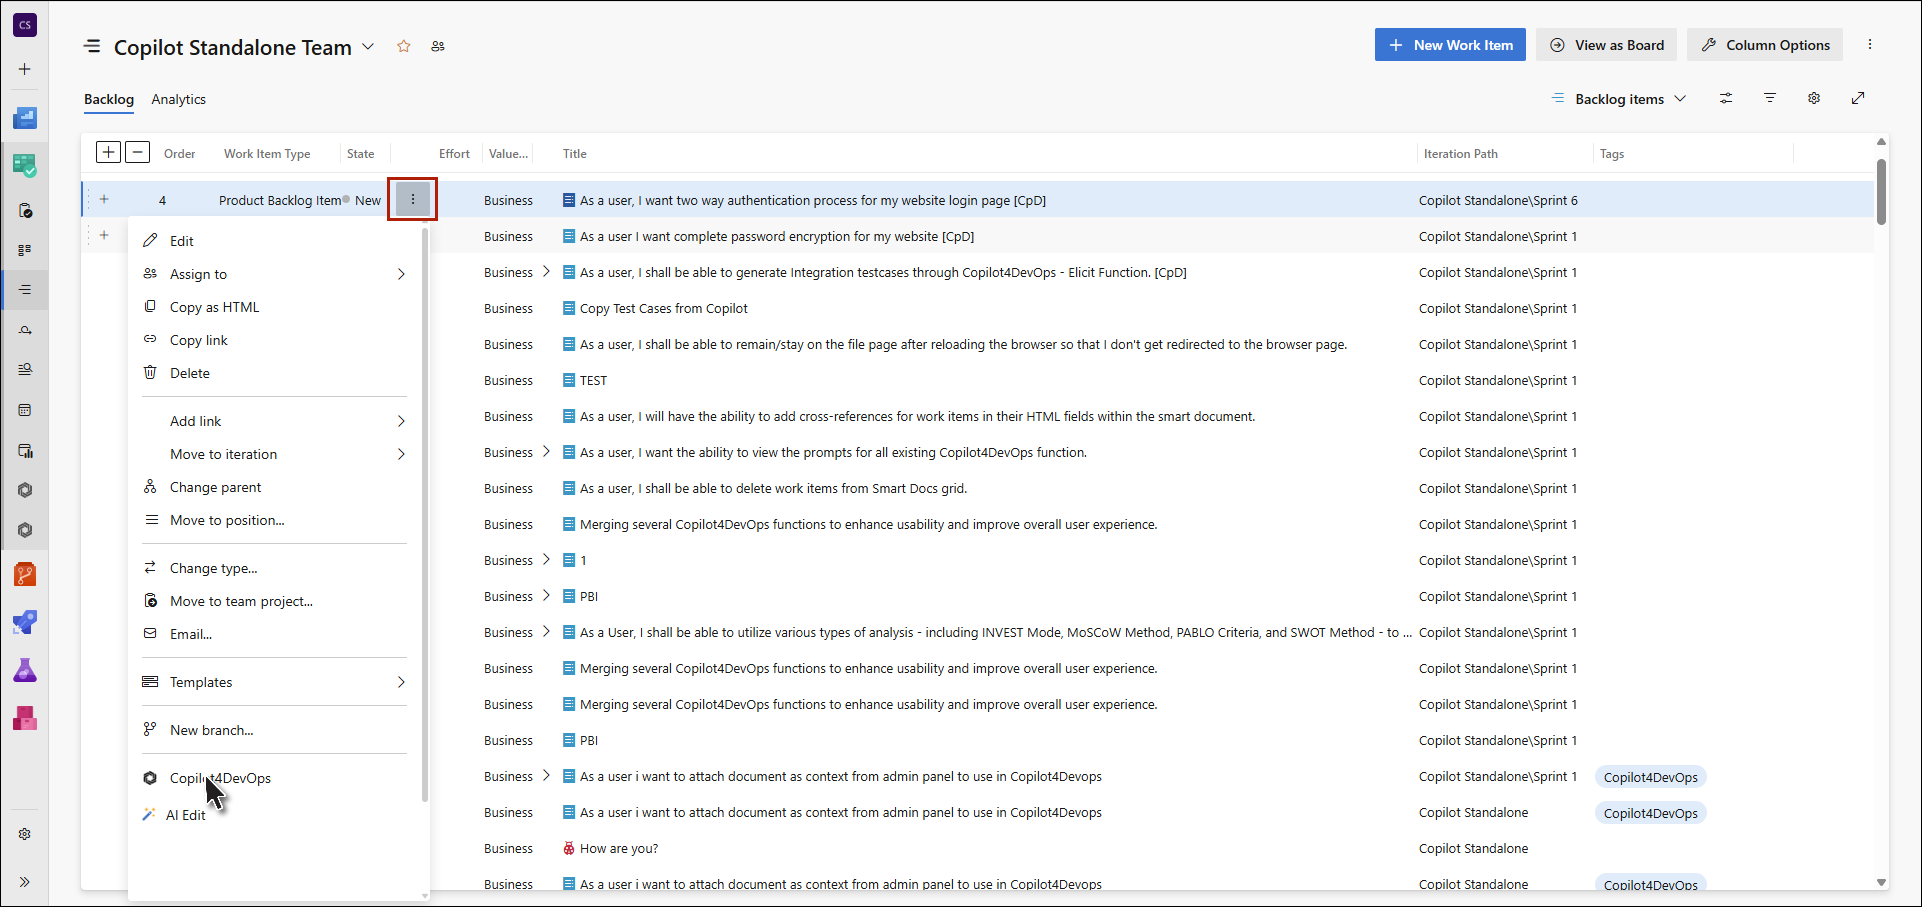
1. To access the Q&A Assistant feature in Copilot4DevOps, navigate to the context menu of any work item within either the Queries or Backlog and click on the Copilot4DevOps option.
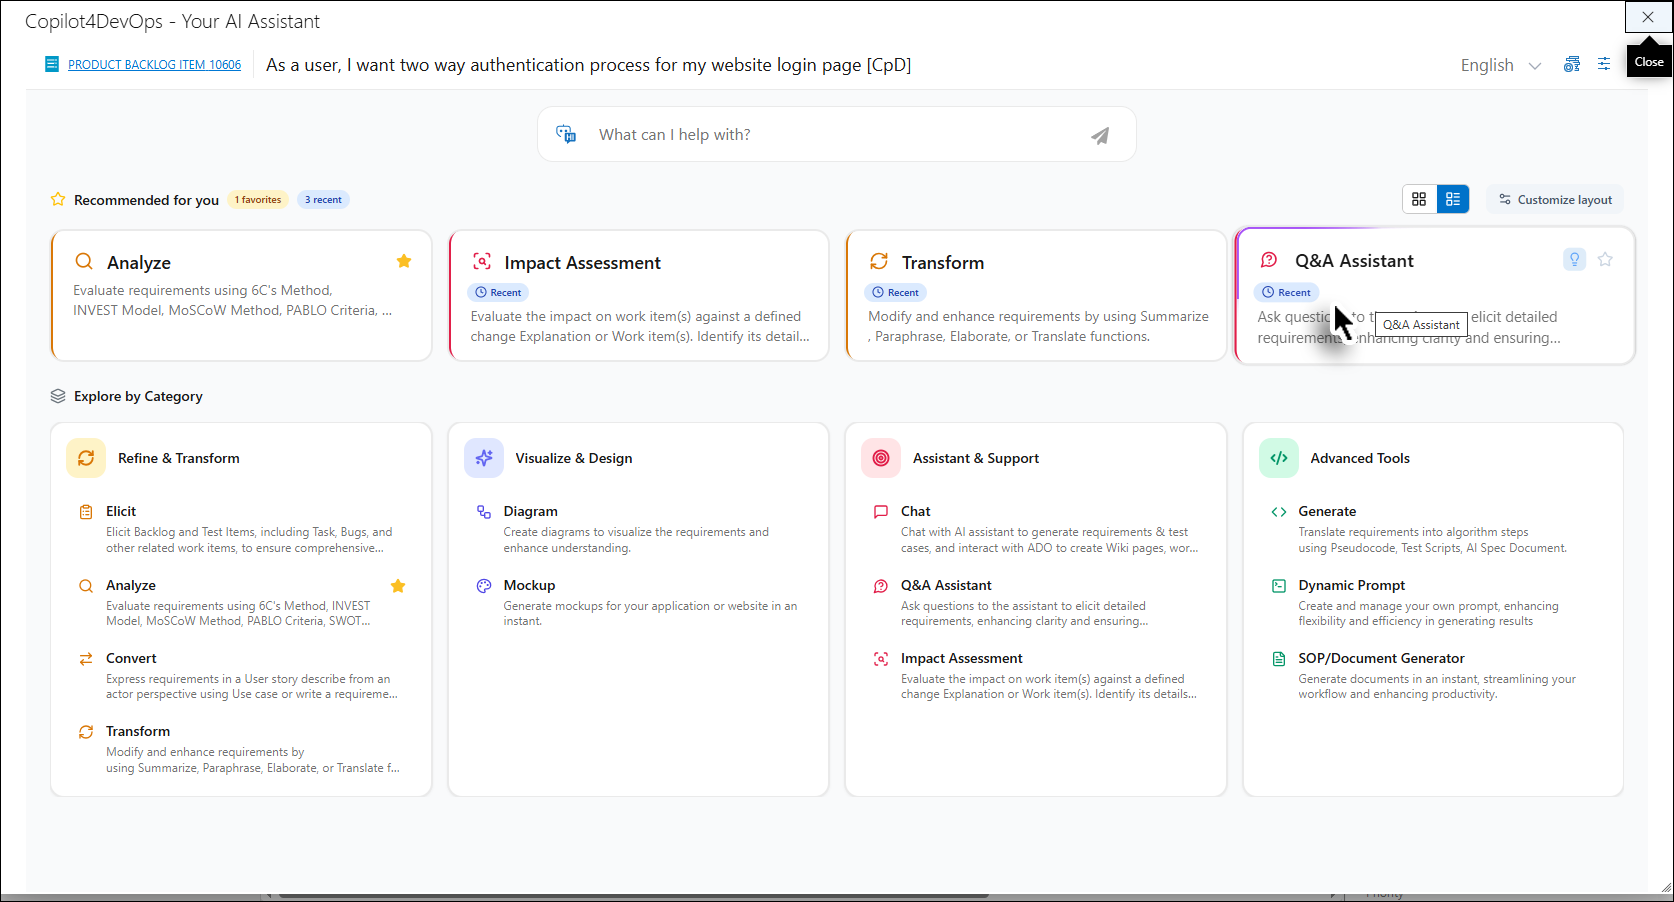
2. The Copilot4DevOps pop-up window will appear.

3. Click on the Q&A Assistant function shown on the Copilot4DevOps popup window.
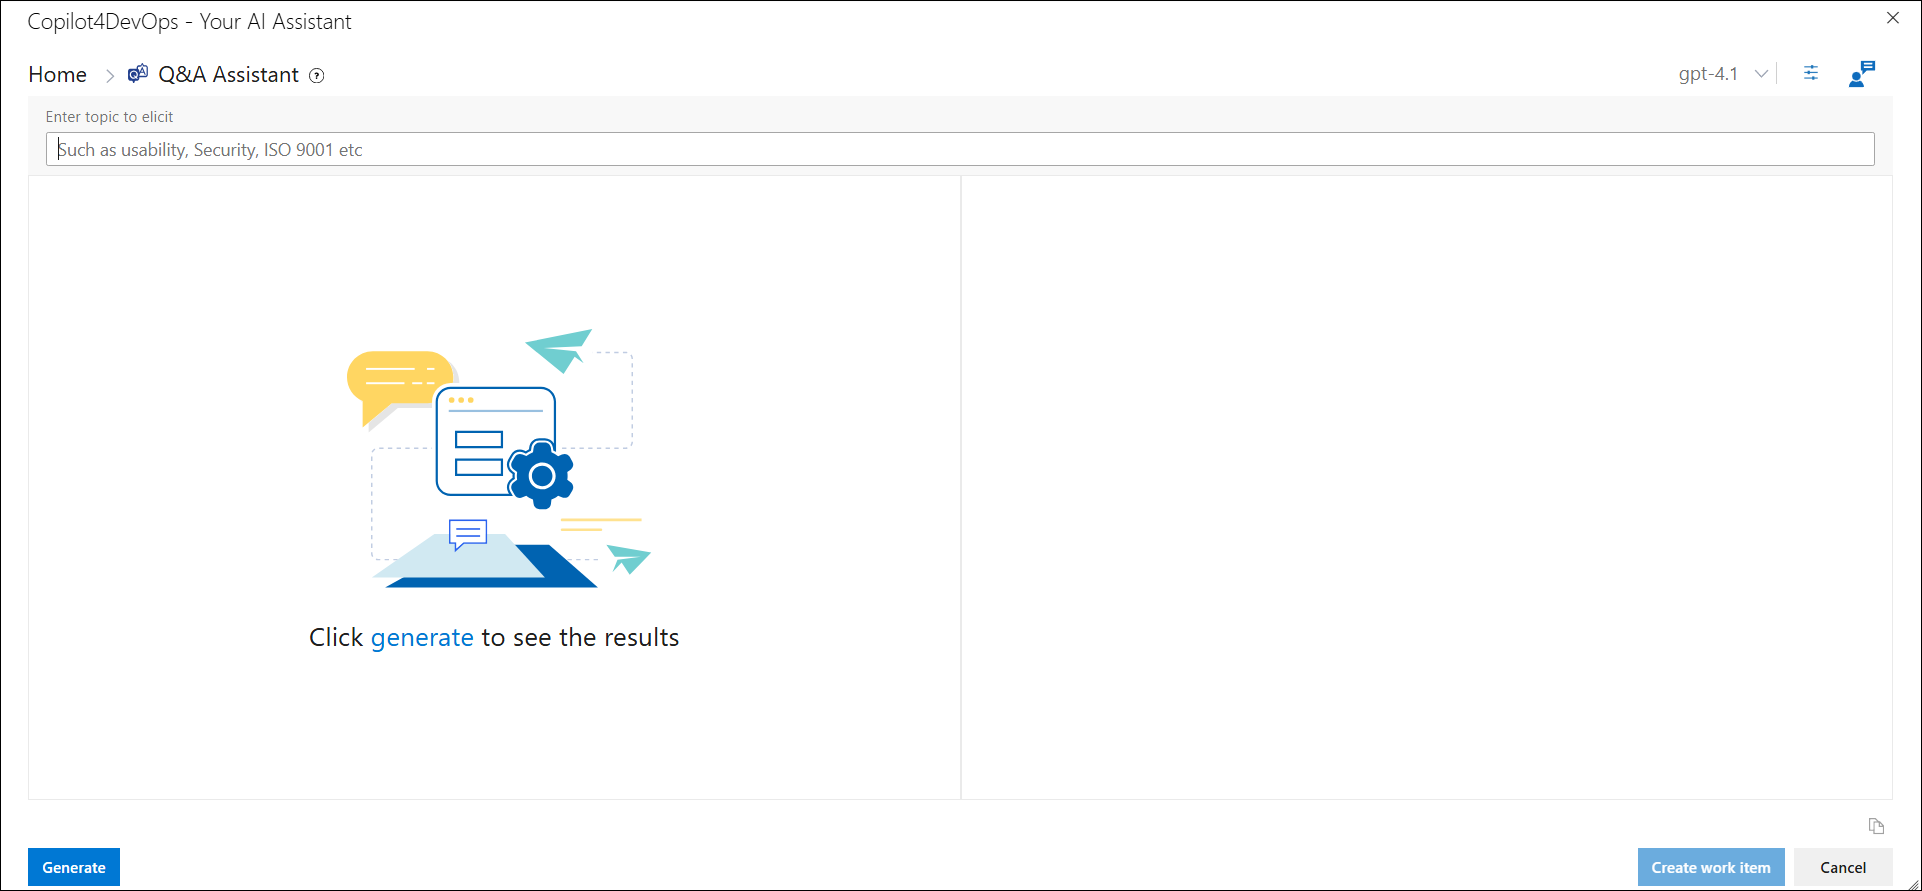
4. The Q&A Assistant pop-up window will open.
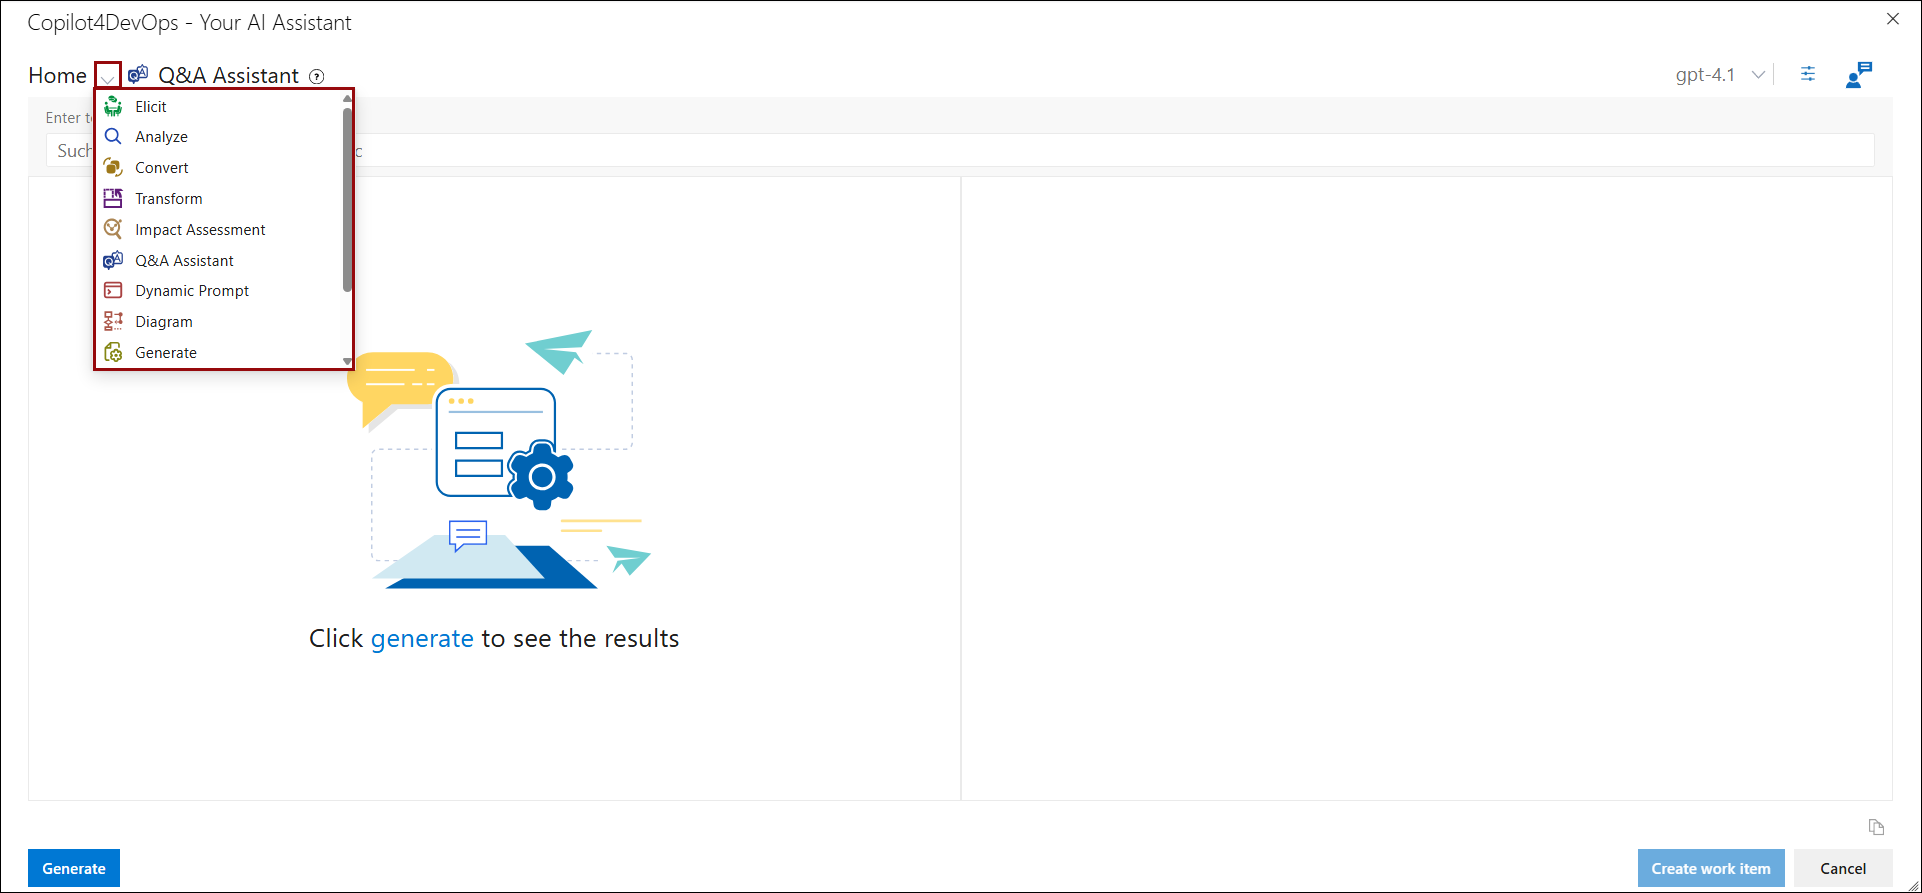
5. Additional functions available within the Copilot4DevOps pop-up can be accessed through the breadcrumb dropdown menu.
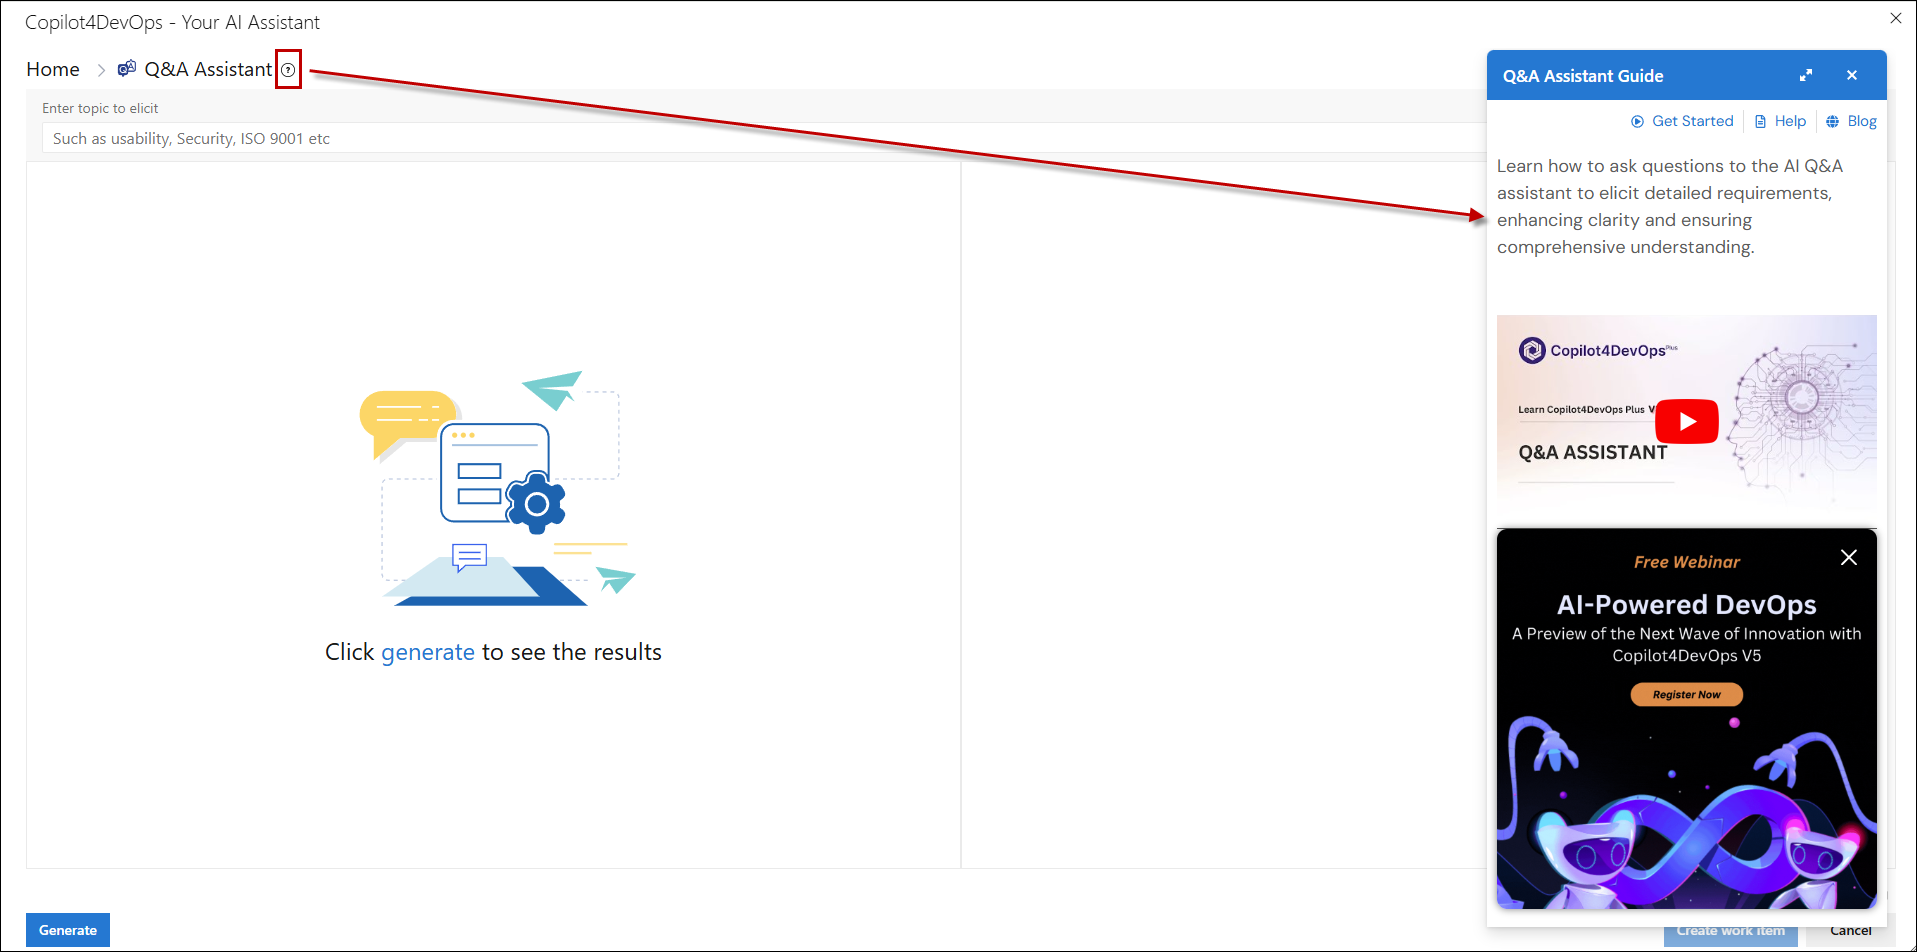
6. Clicking the Help icon adjacent to the breadcrumb will open the right panel, which displays help content relevant to the currently open function.
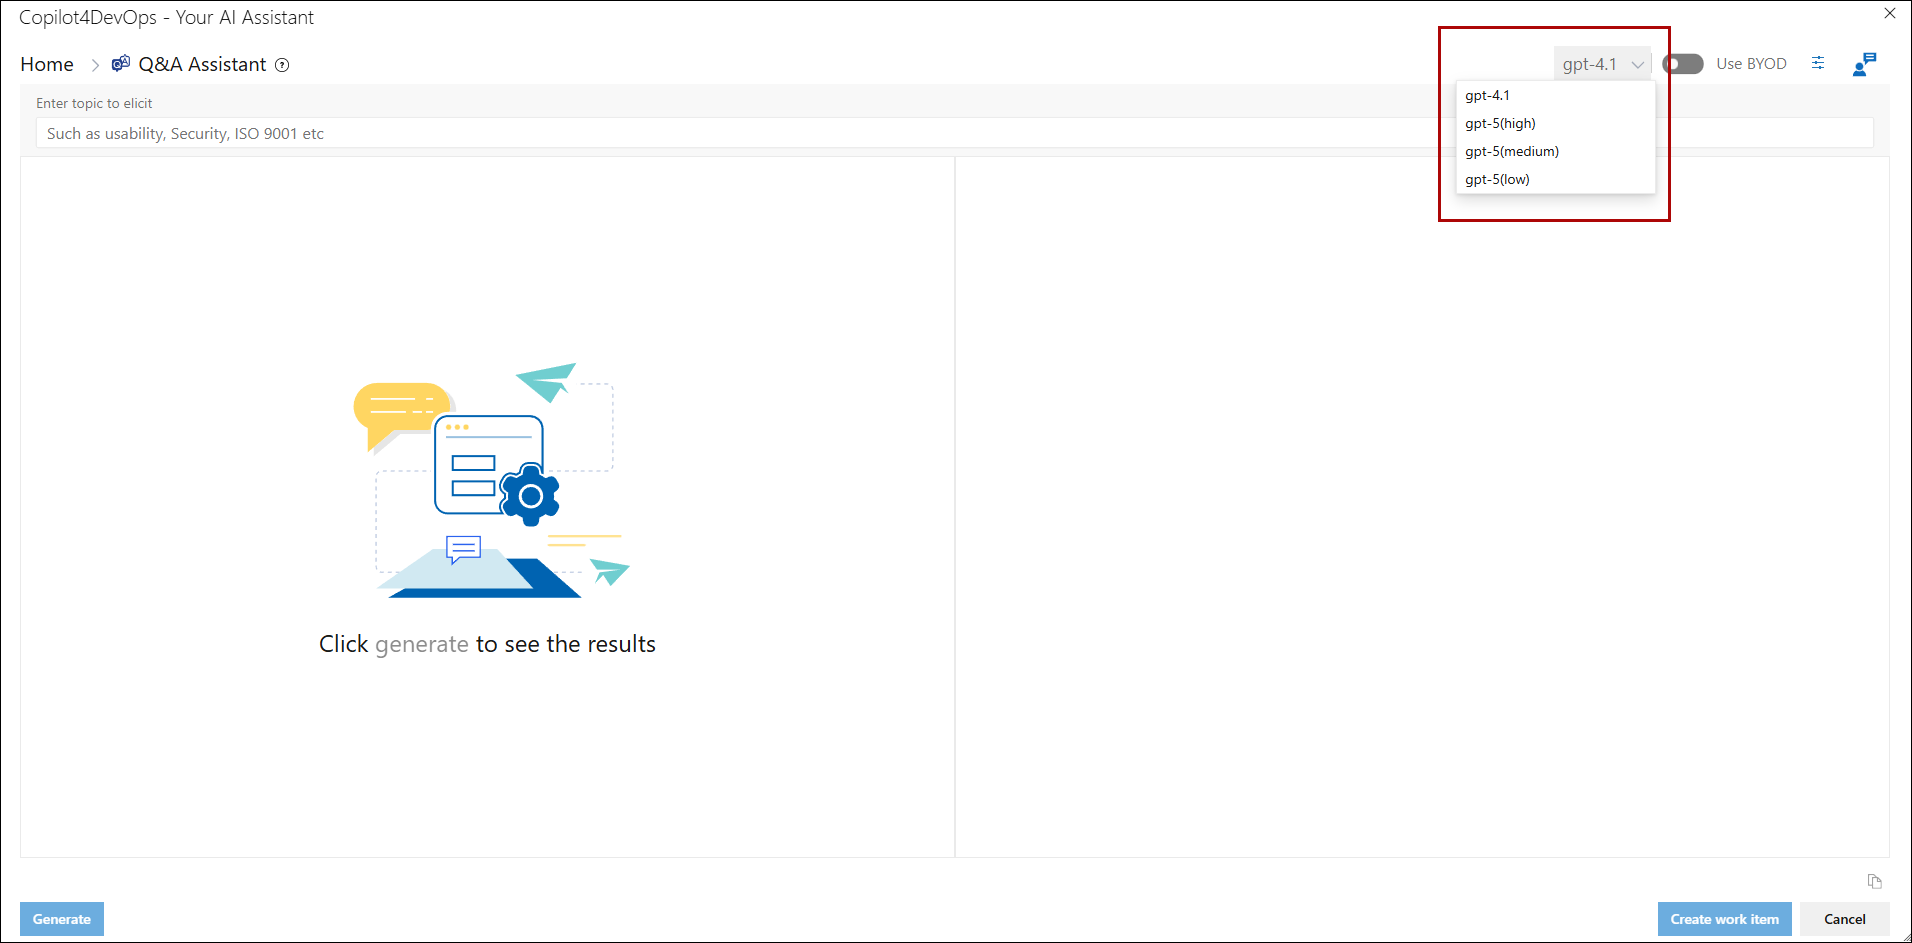
7. Ranked AI models configured in the Admin Panel will be displayed for each corresponding feature on the Home Page.
8. Click on Custom Instructions option at top right of the breadcrumb, a right panel opens.
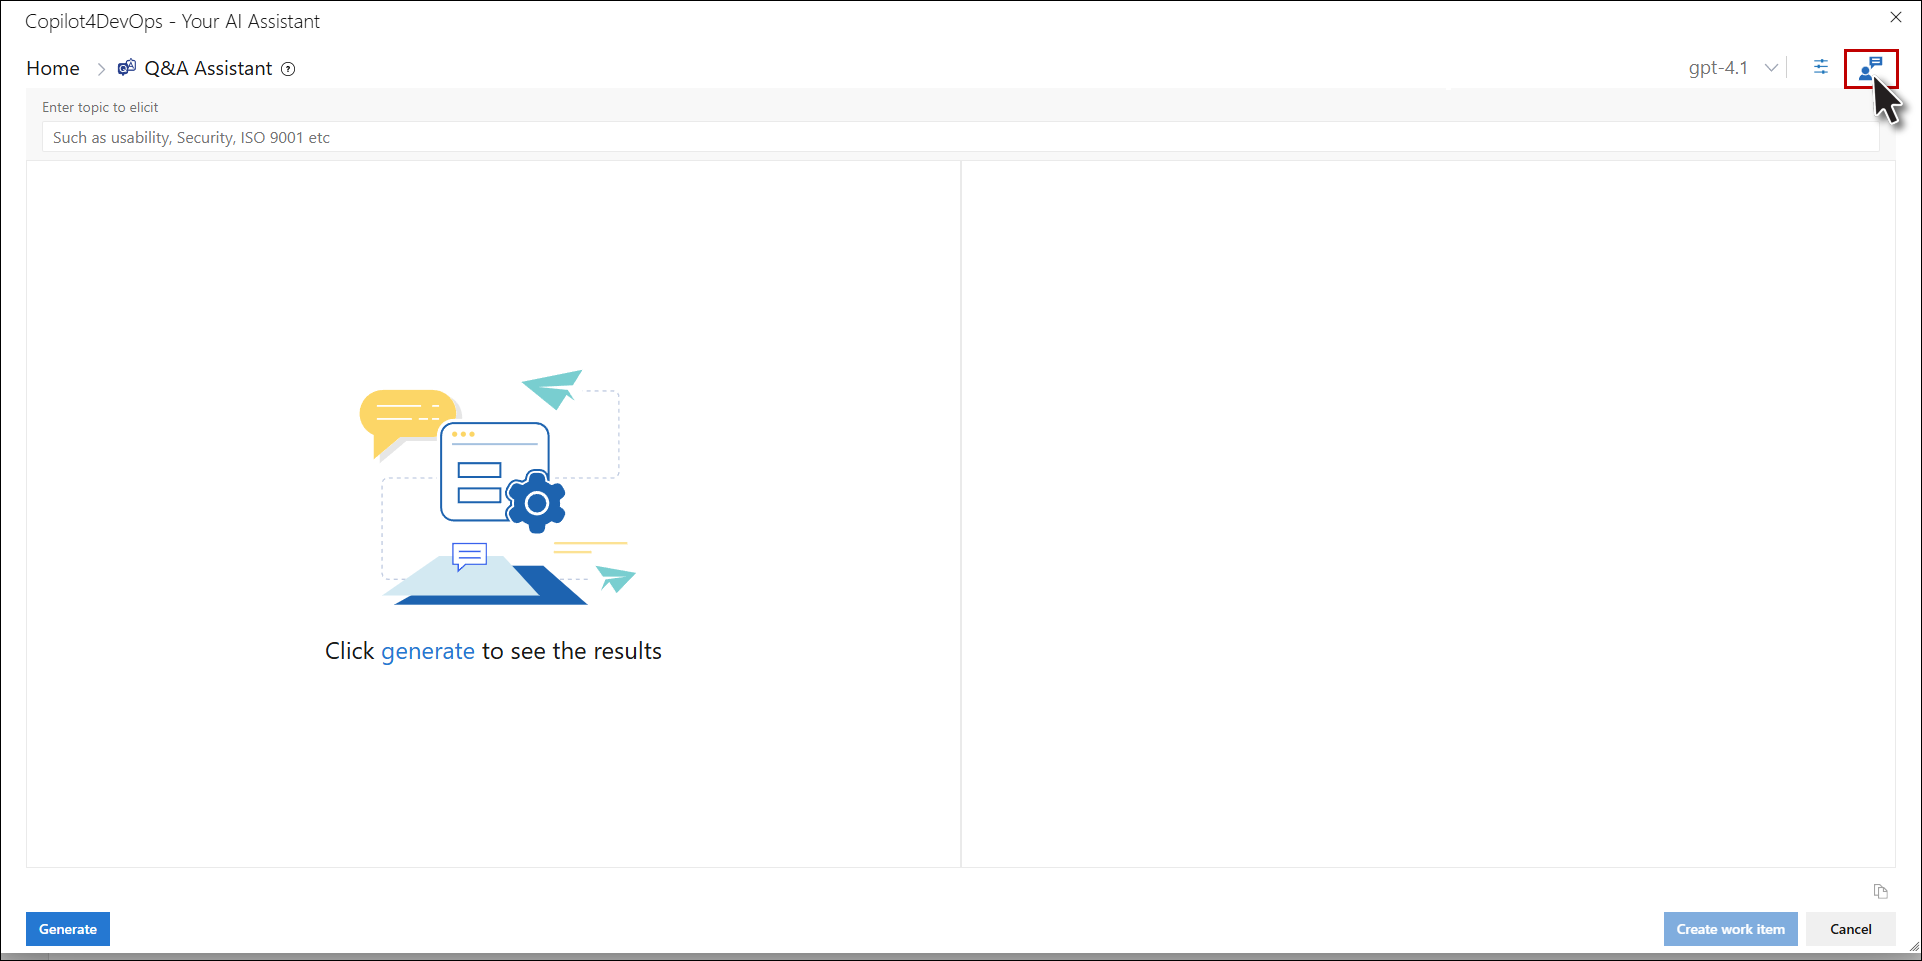
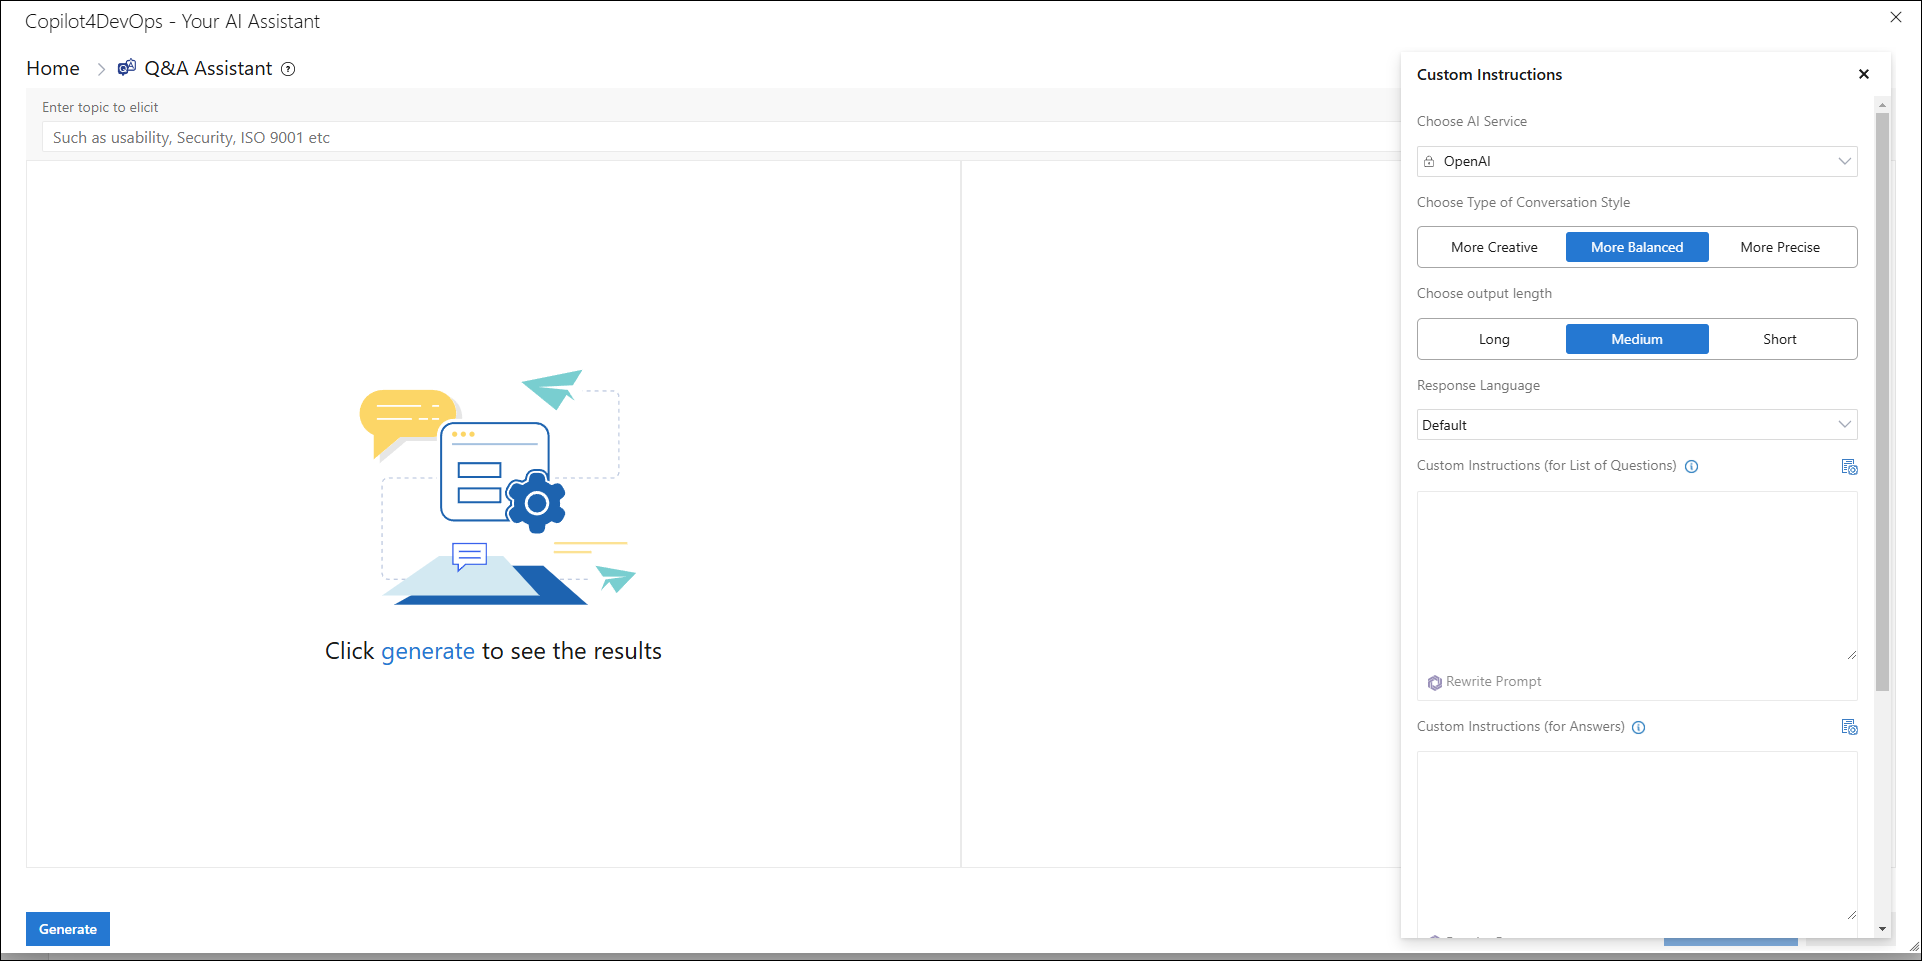
9. From the right panel user will be able to see the AI Service selected in the Admin also able to Choose Type of Conversation Style such as “More Creative”, “More Balanced” or “More Precise”. Furthermore, user can Choose Output Length such as “Long”, “Medium” or “Short”. Users also have the option to specify the Response Language and even include any Custom instructions which will be added with the default prompt for both list of questions and answers.
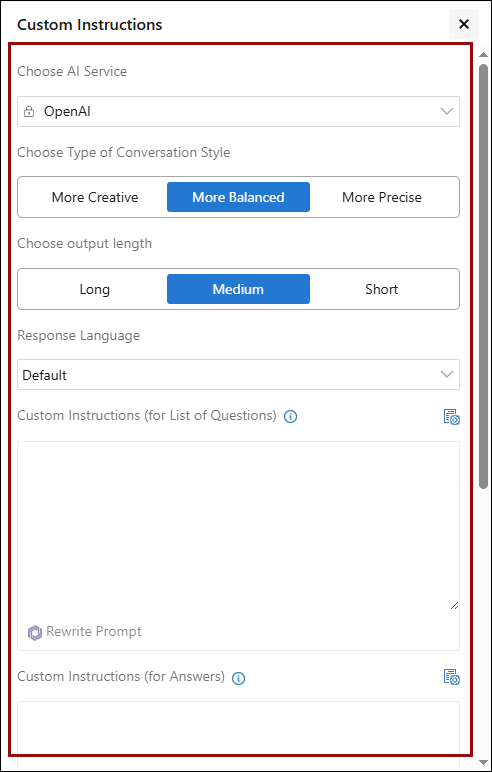
a. Users can rewrite their custom instructions using Rewrite Prompt option for both list of questions and answers in the Q&A Assistant function with a single click, producing structured, complete, and accurate instructions—using the AI model selected from the "AI Model Auto Selection and Ranking" section for “Rewrite Prompt” under the General tab in Admin panel.
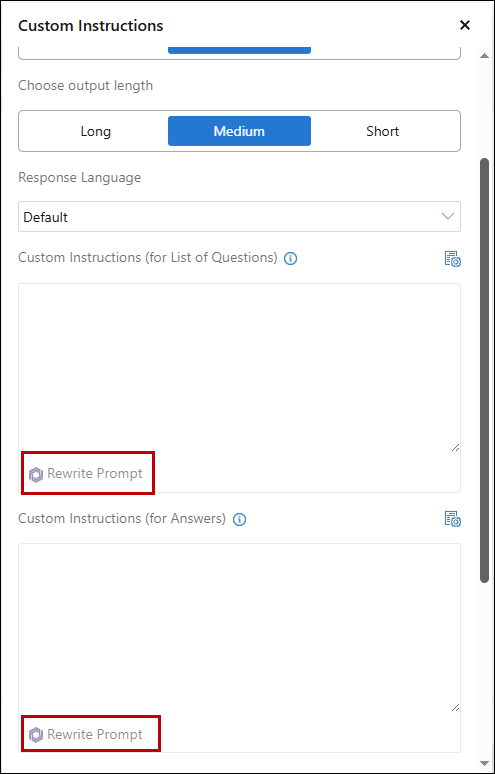
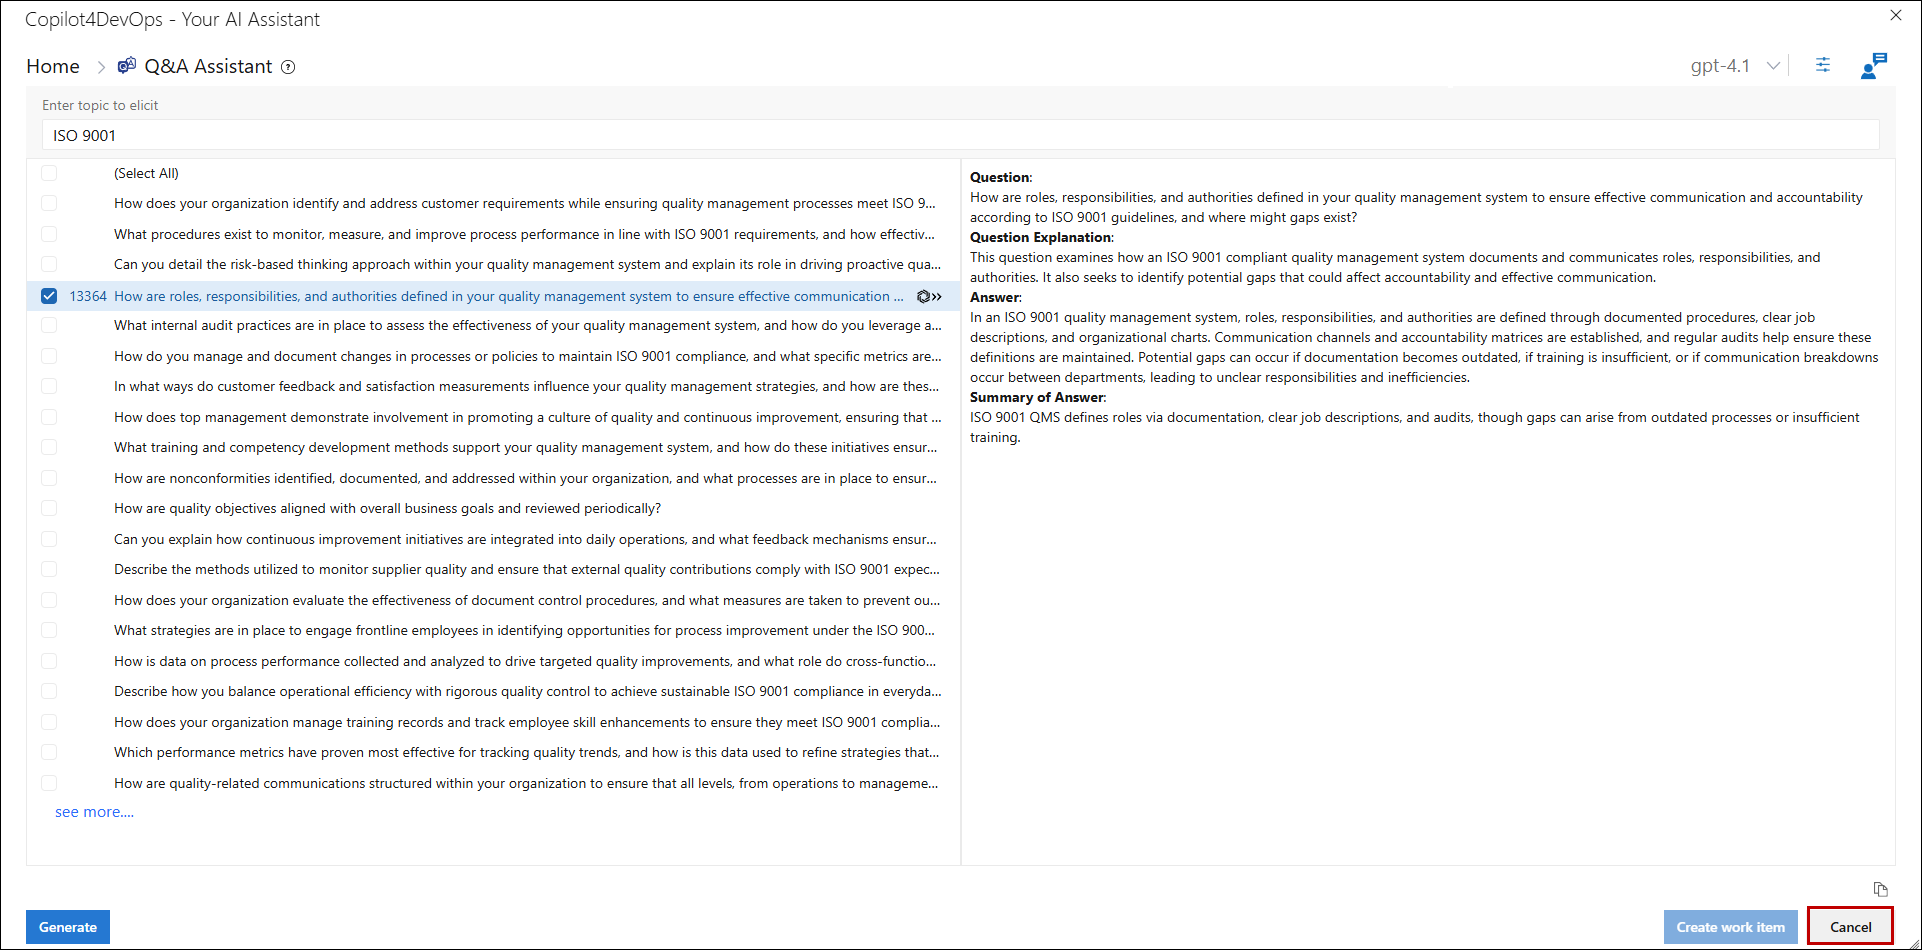
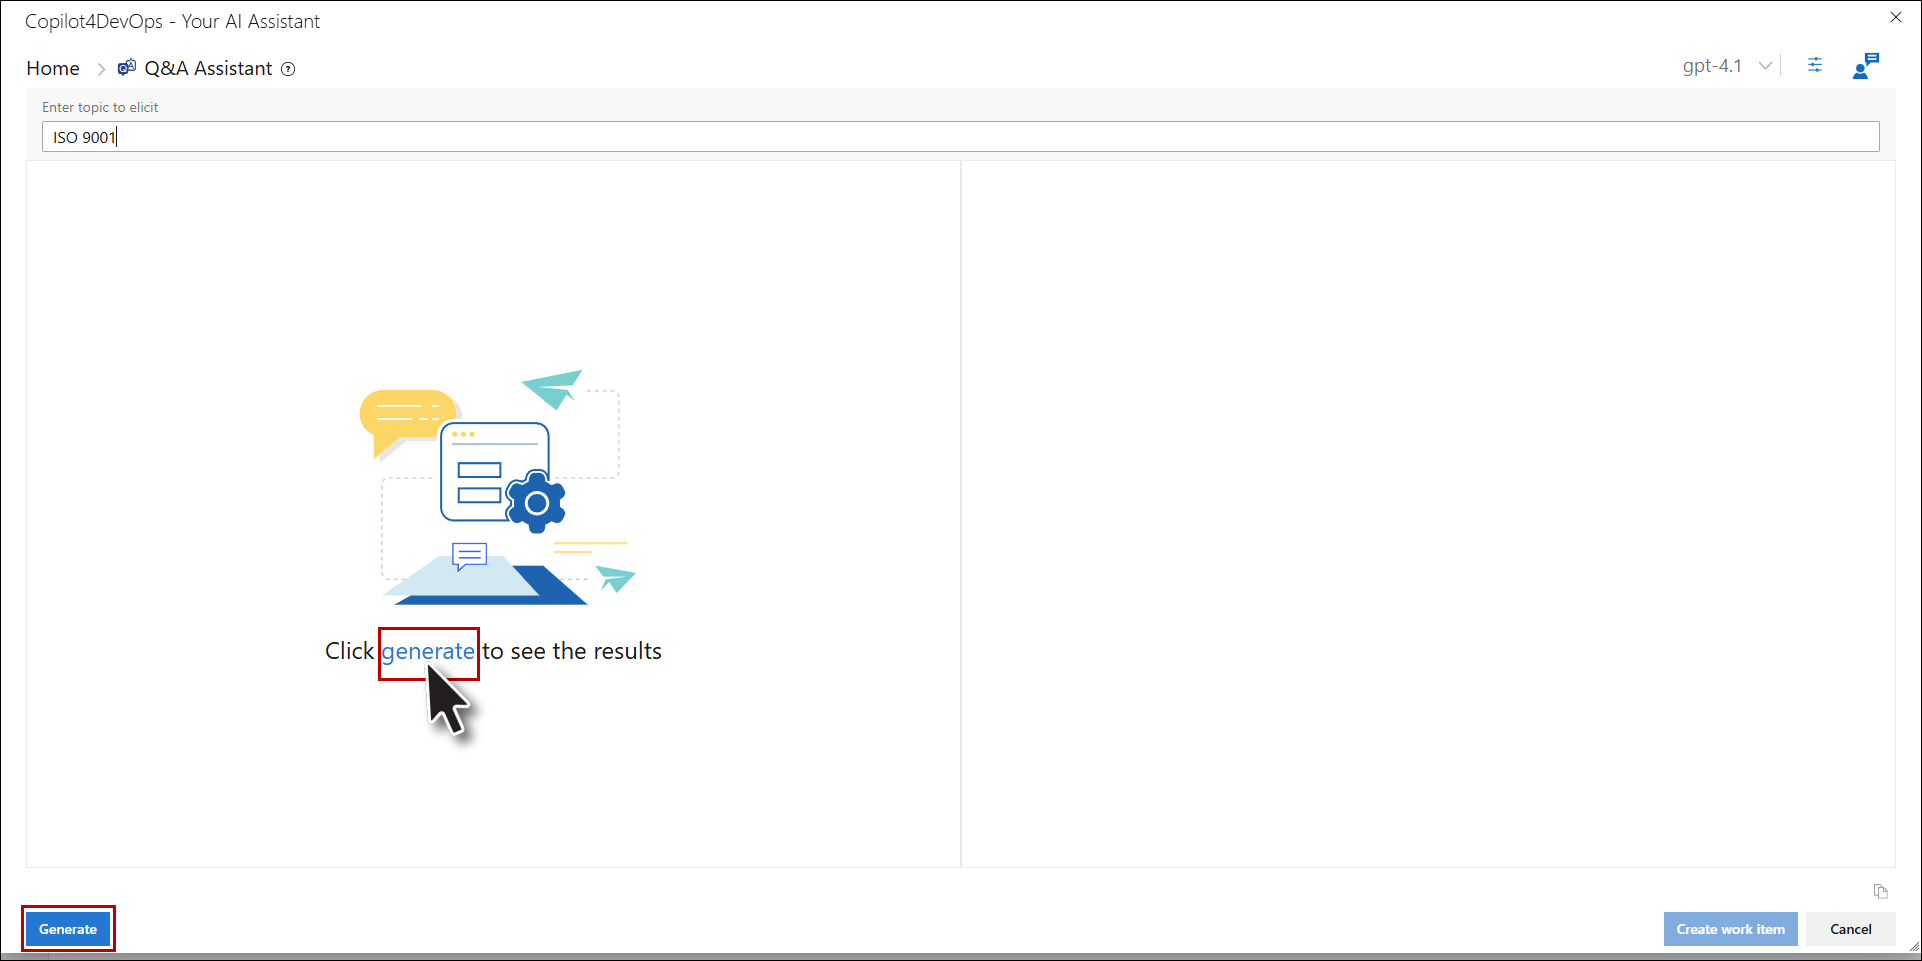
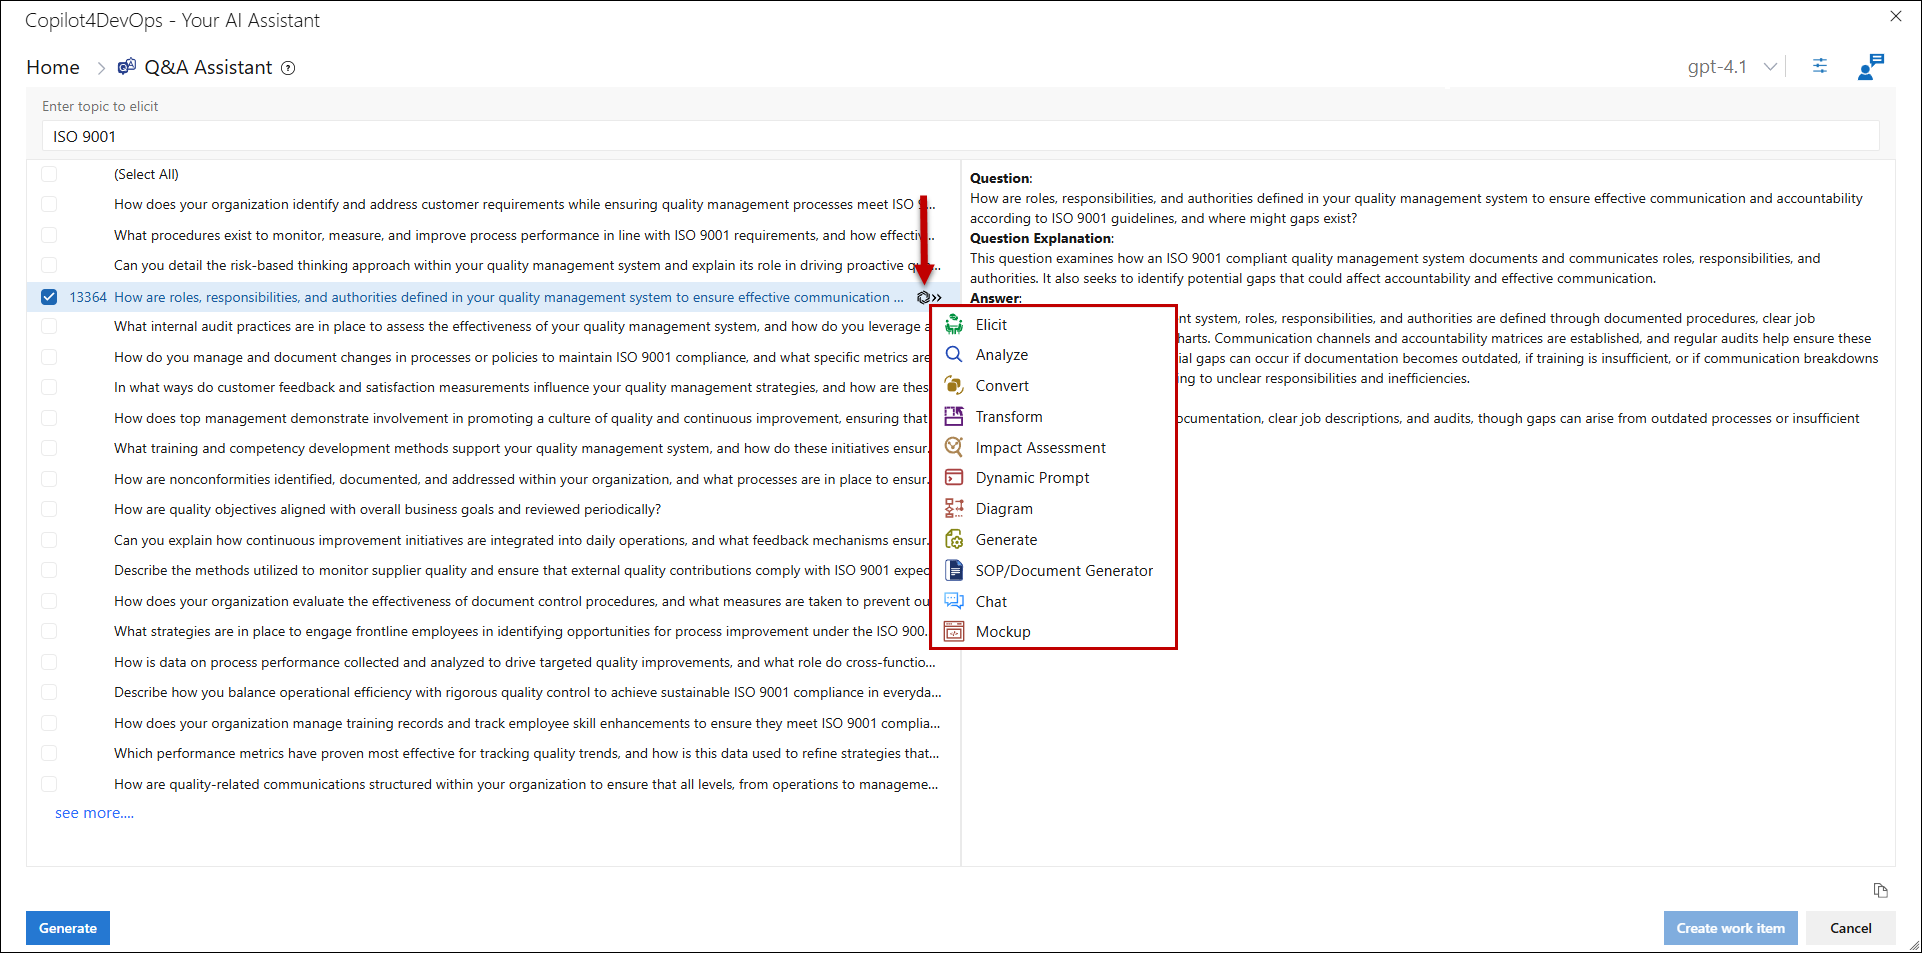
10. Enter a topic to elicit in the textbox.
11. Click the "Generate" button or link to display all questions related to the entered topic in the left panel, with checkboxes preceding each question.
12. Click the "Select All" checkbox to choose all questions displayed in the left panel, OR select individual questions as needed.
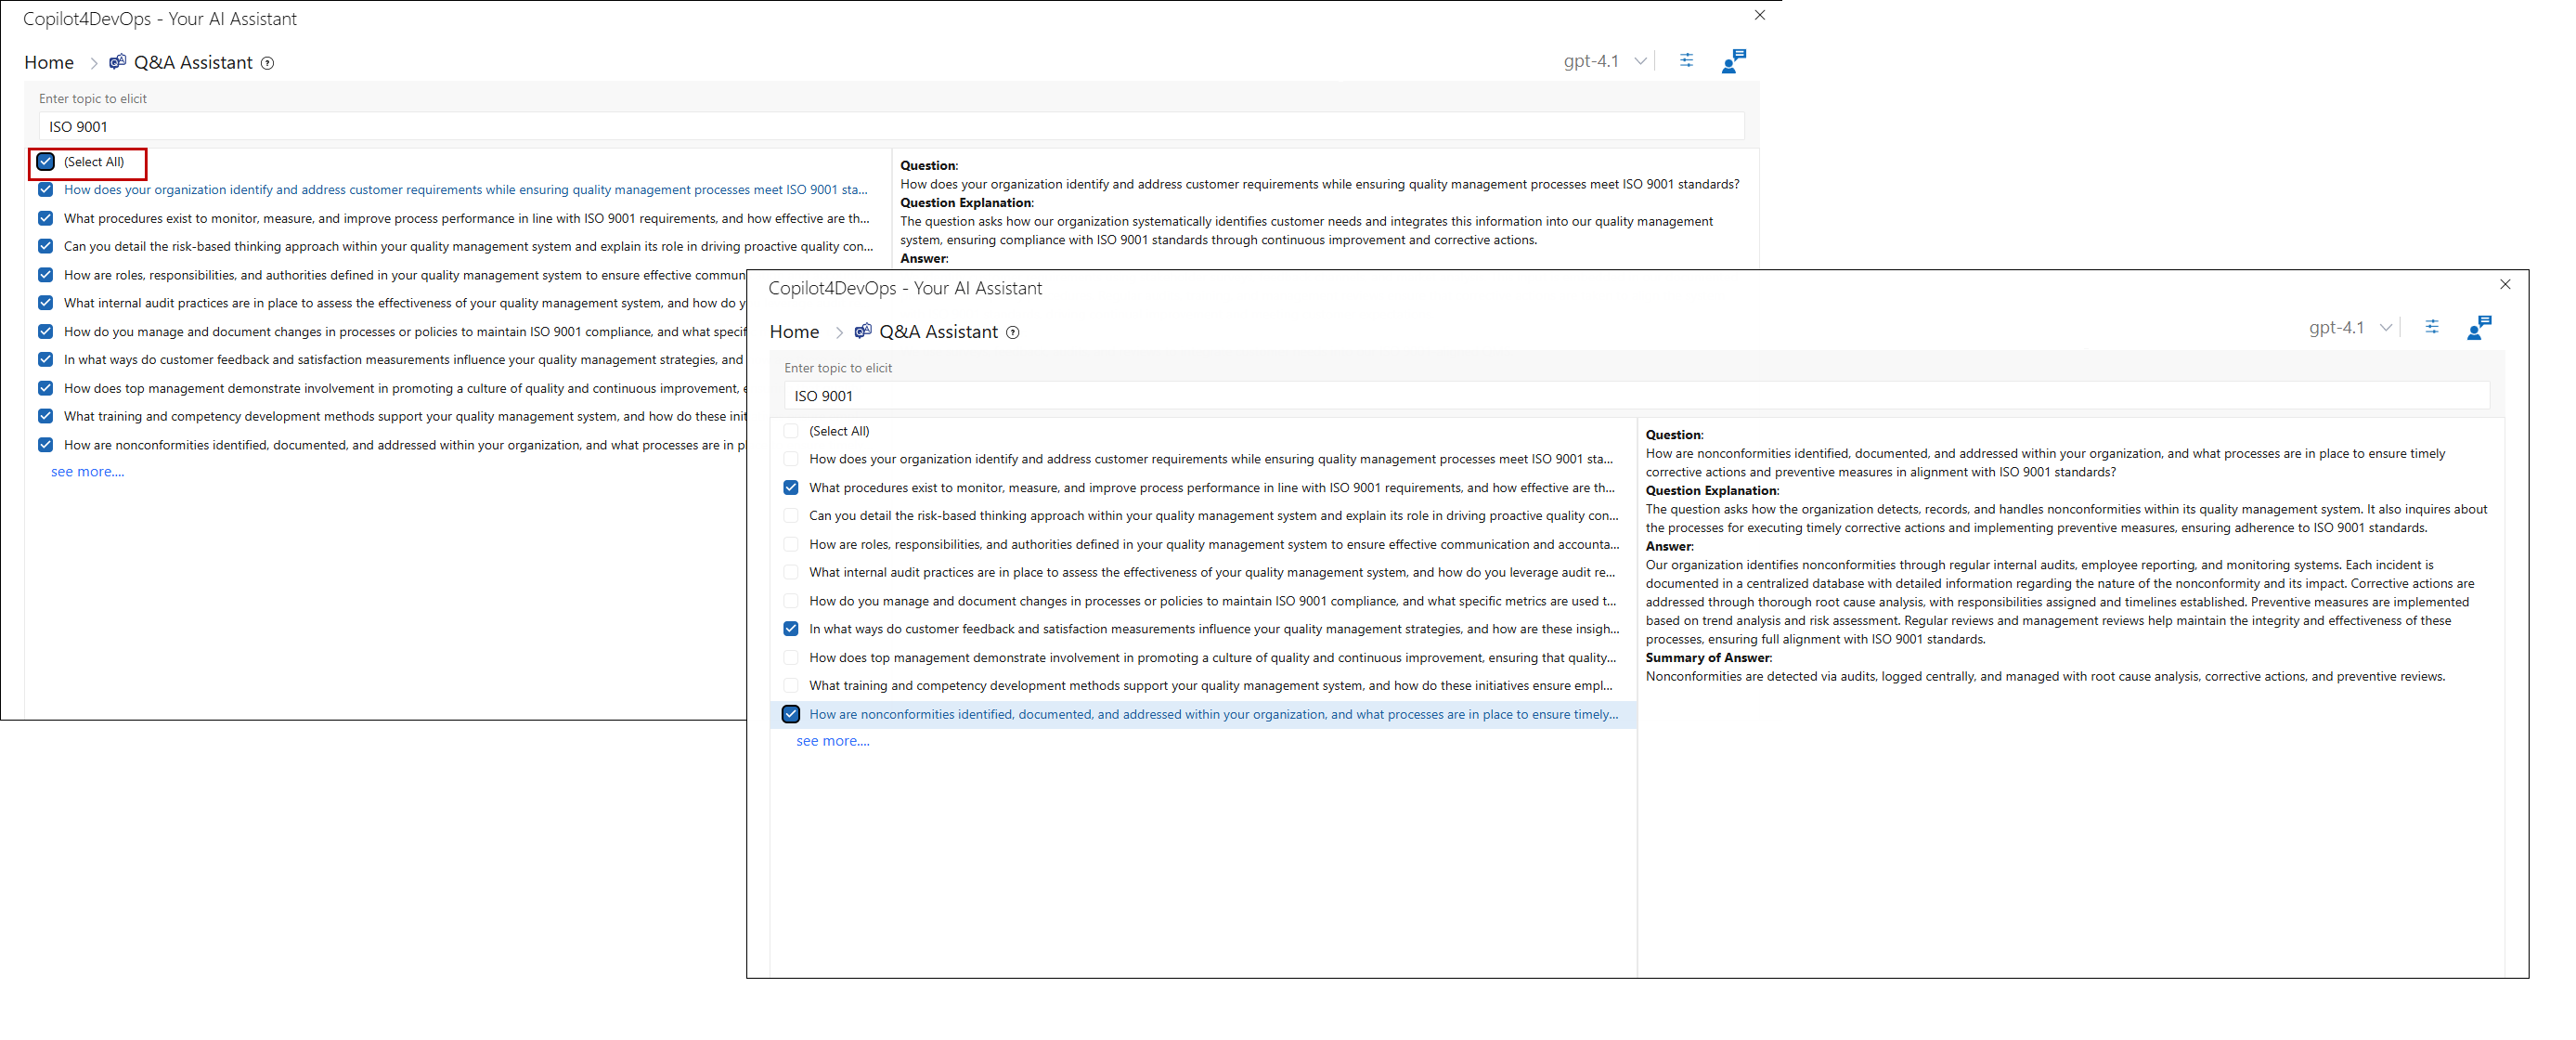
13. Click the "See more…" option located below the initially generated questions to display an additional 10 questions.
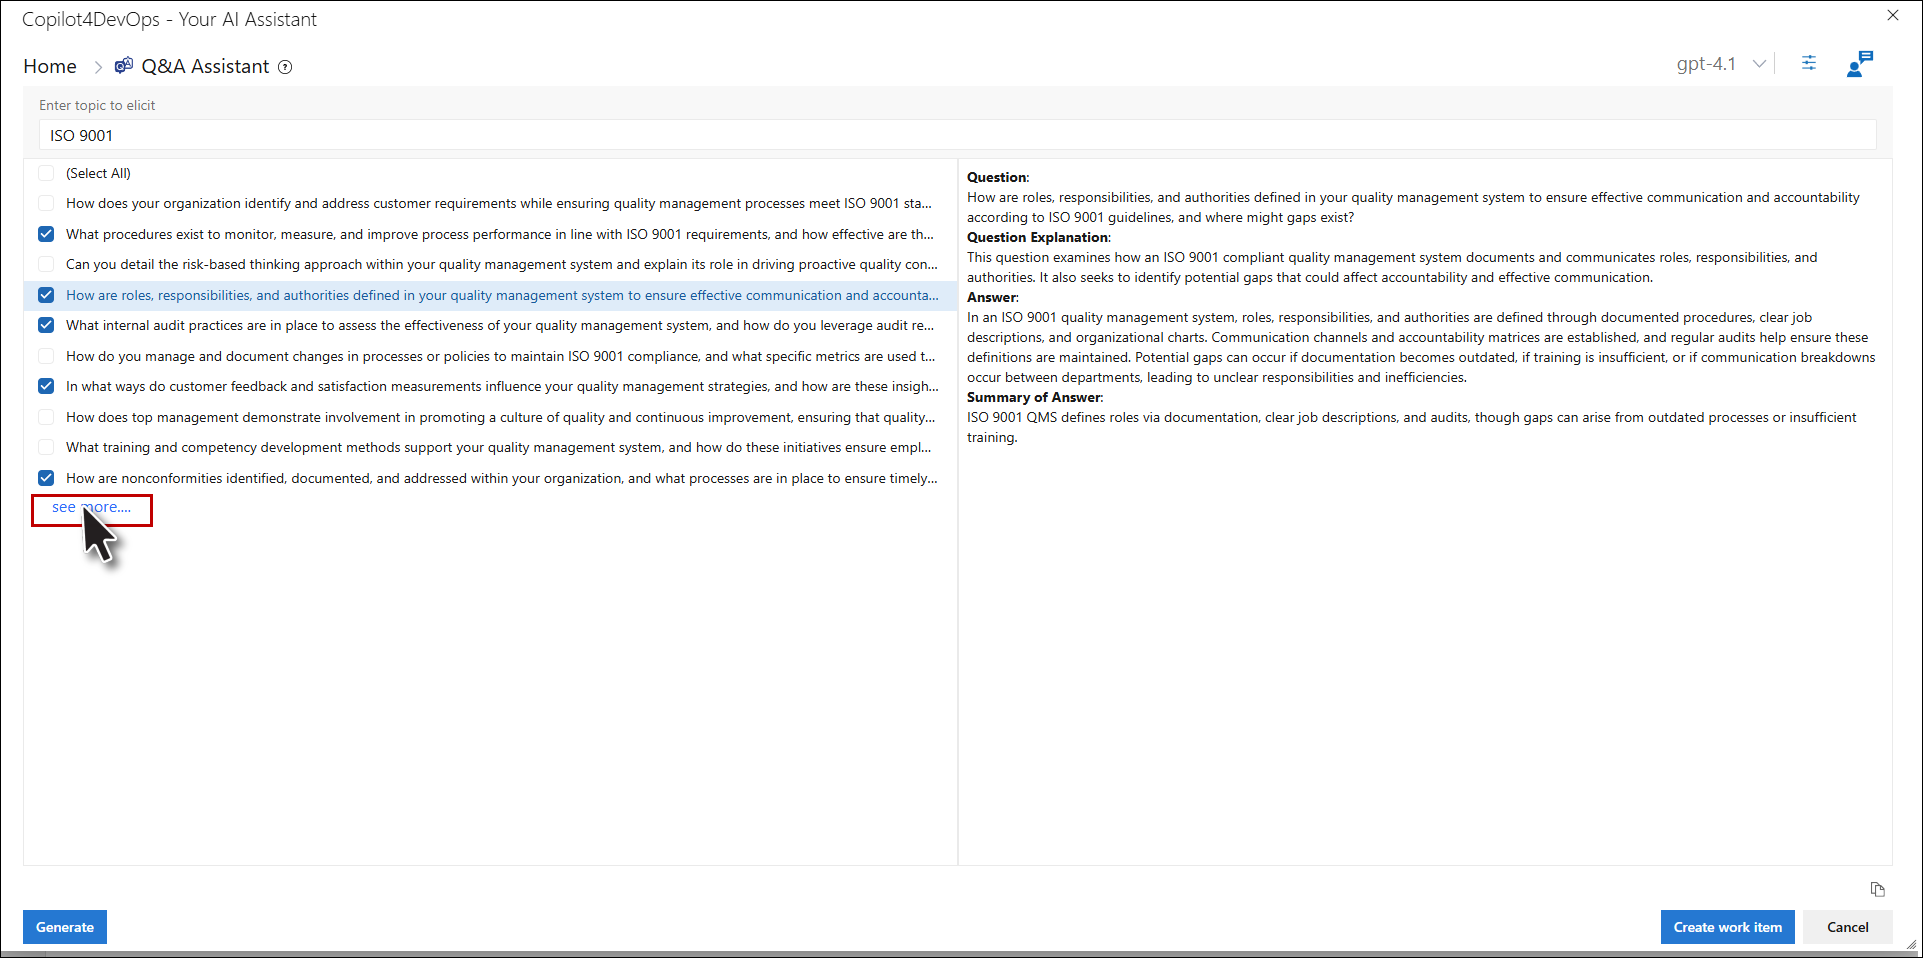
14. Clicking on any question in the left panel will display the corresponding data in the right panel under the following headings:
a. Question
b. Question Explanation
c. Answer
d. Summary of Answer

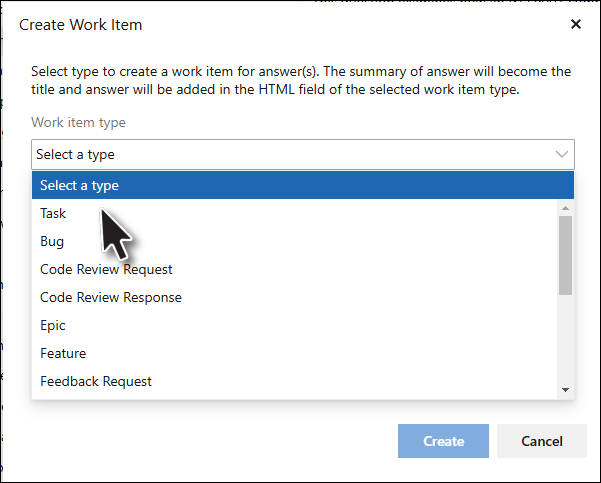
15. Click the "Create Work Item" button to open the "Create Work Item" pop-up window.
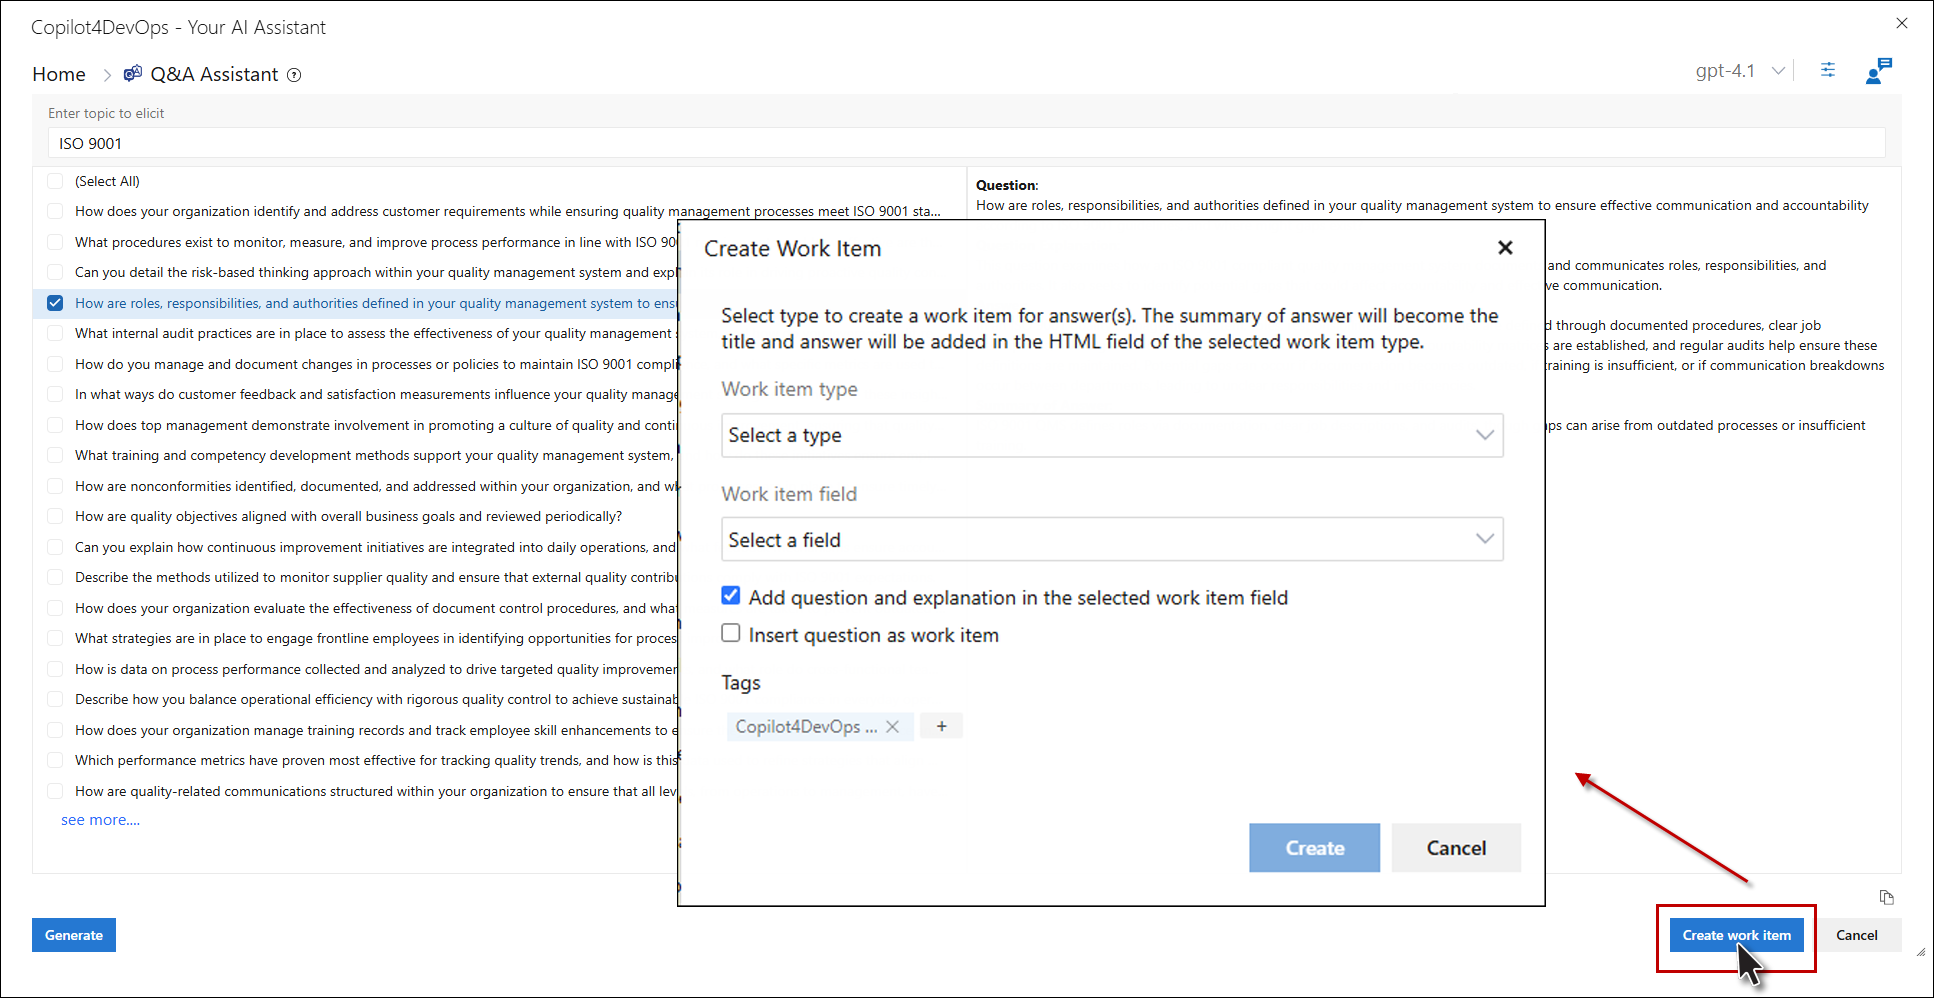
a. Select the work item type from the dropdown menu to publish the answer(s).
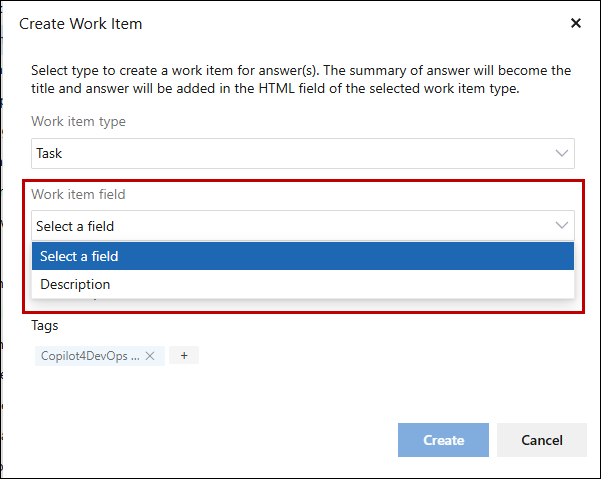
b. Select the Work item field from the dropdown to publish other data to.
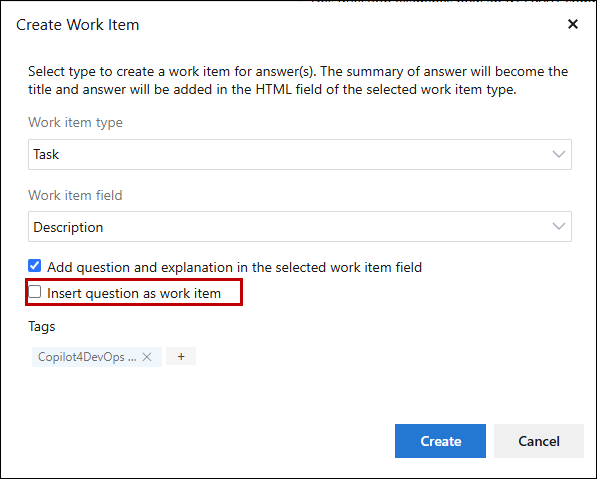
c. In the pop-up, there is a checkbox labeled "Add question and explanation to the selected work item field." By selecting this checkbox, the chosen question and its explanation will be added to the specified field of the published work item.
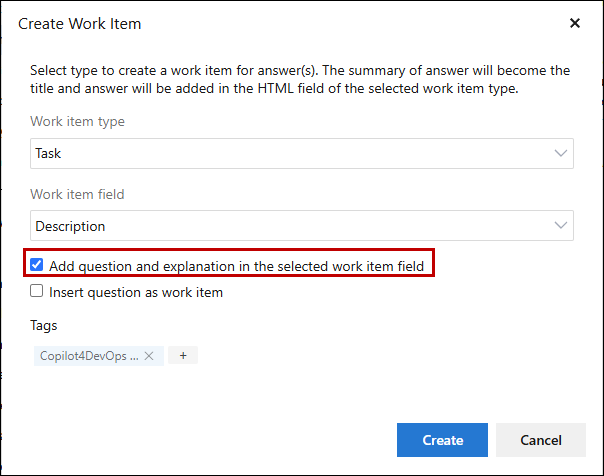
d. There is a checkbox labeled "Insert question as work item" in the pop-up. When selected, this checkbox disables the previously selected option, and the chosen question and its explanation will be added as a separate work item.
e. Add tags using the "Tag" option.
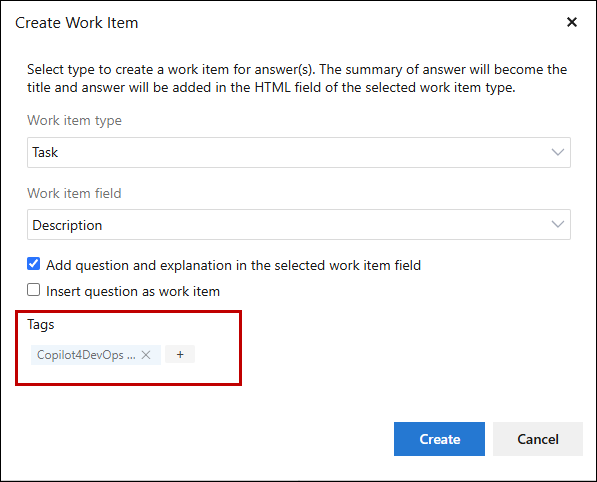
f. Click the "Create" button to create the work item and close the pop-up.
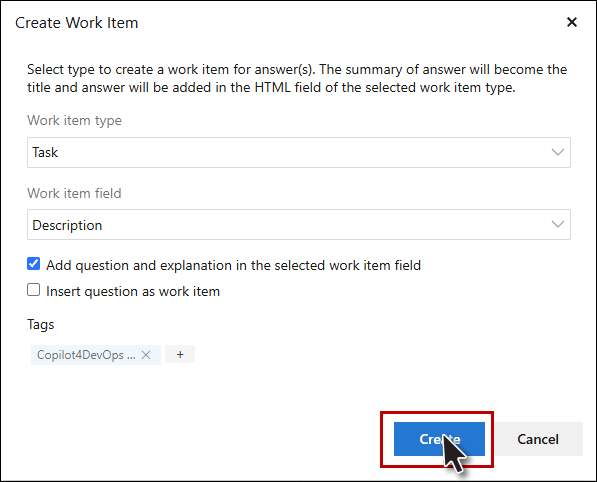
g. The work item ID will be added before the Title in the left panel. Clicking on the ID will open the work item in ADO editor.
.png)
.png)
.png)
h. When a user hovers over a published work item row from the left panel, a Copilot4DevOps icon becomes visible. Clicking on this icon reveals a dropdown menu listing all other available Copilot4DevOps functions. The user can select any function from the dropdown, which will navigate them to the chosen function and allow them to perform their desired task.
i. Click on the ‘Cancel’ button to close the Q&A Assistant pop-up window.