Generating a Diagram
Step 1: Open the Diagram Interface
1. Navigate to the Copilot4DevOps main page or open Copilot4DevOps from Queries or Backlogs.
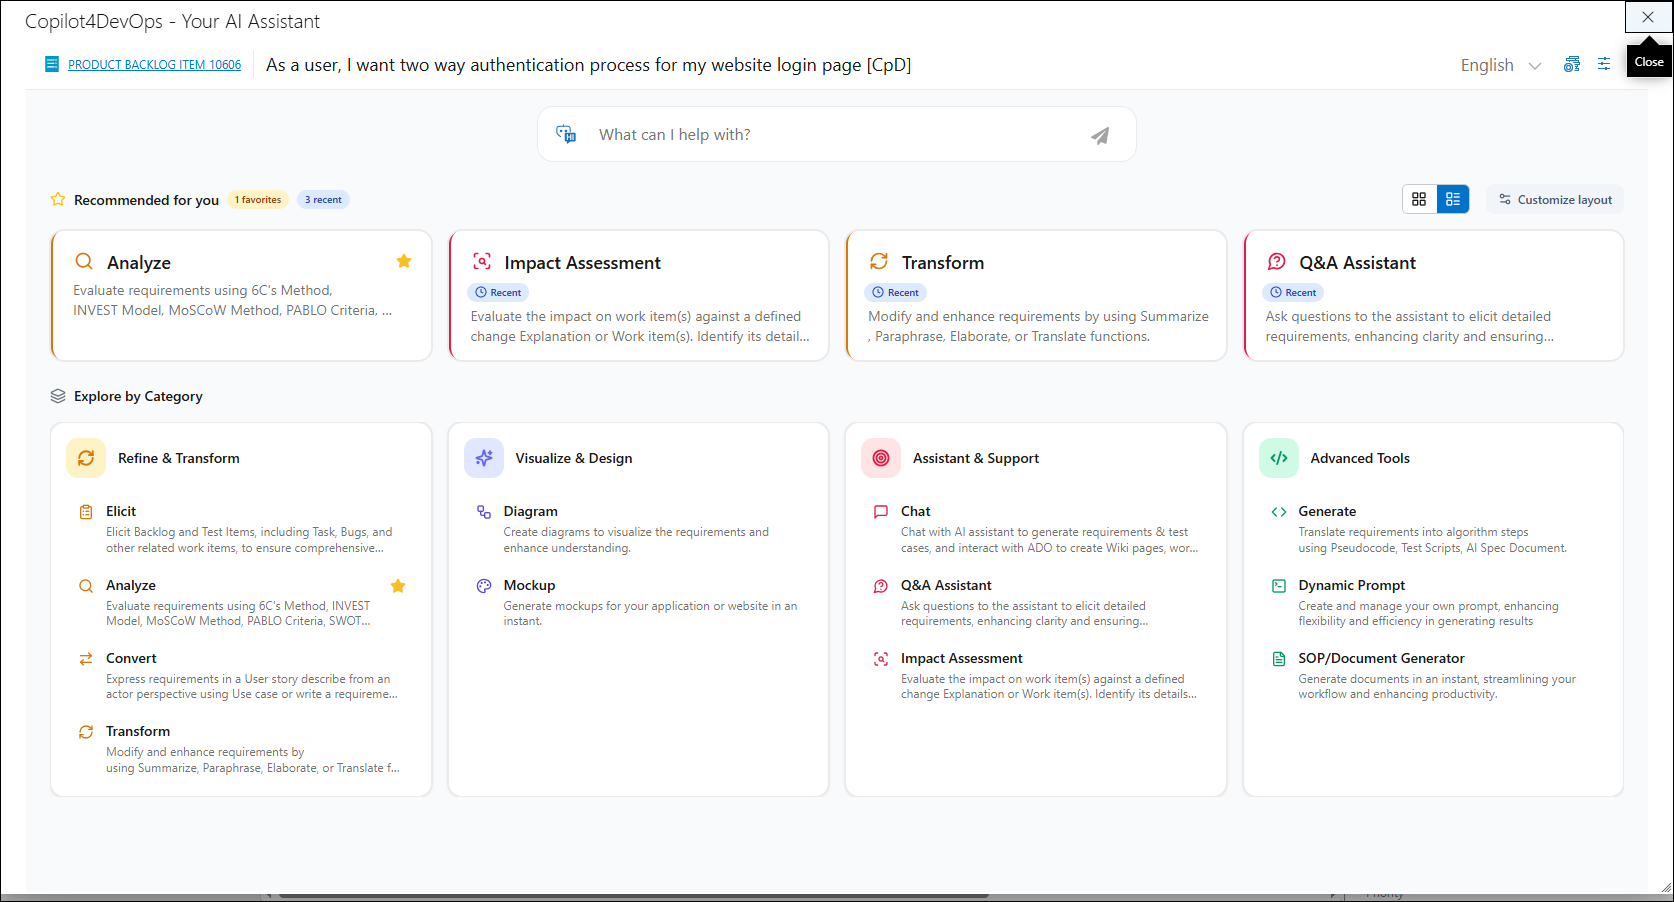
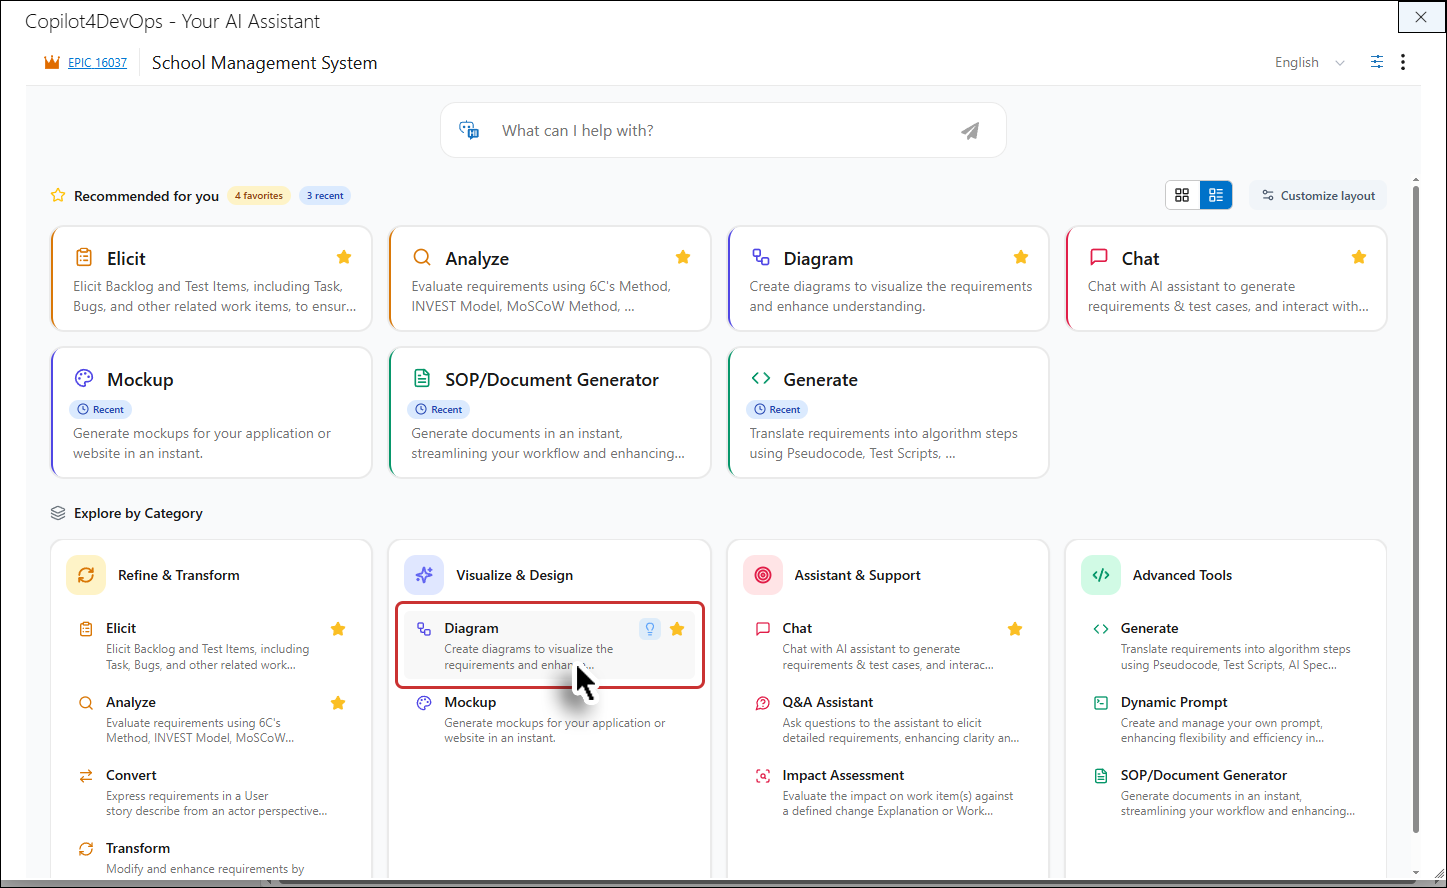
2. Click on the Diagram tile to access the Diagram interface.
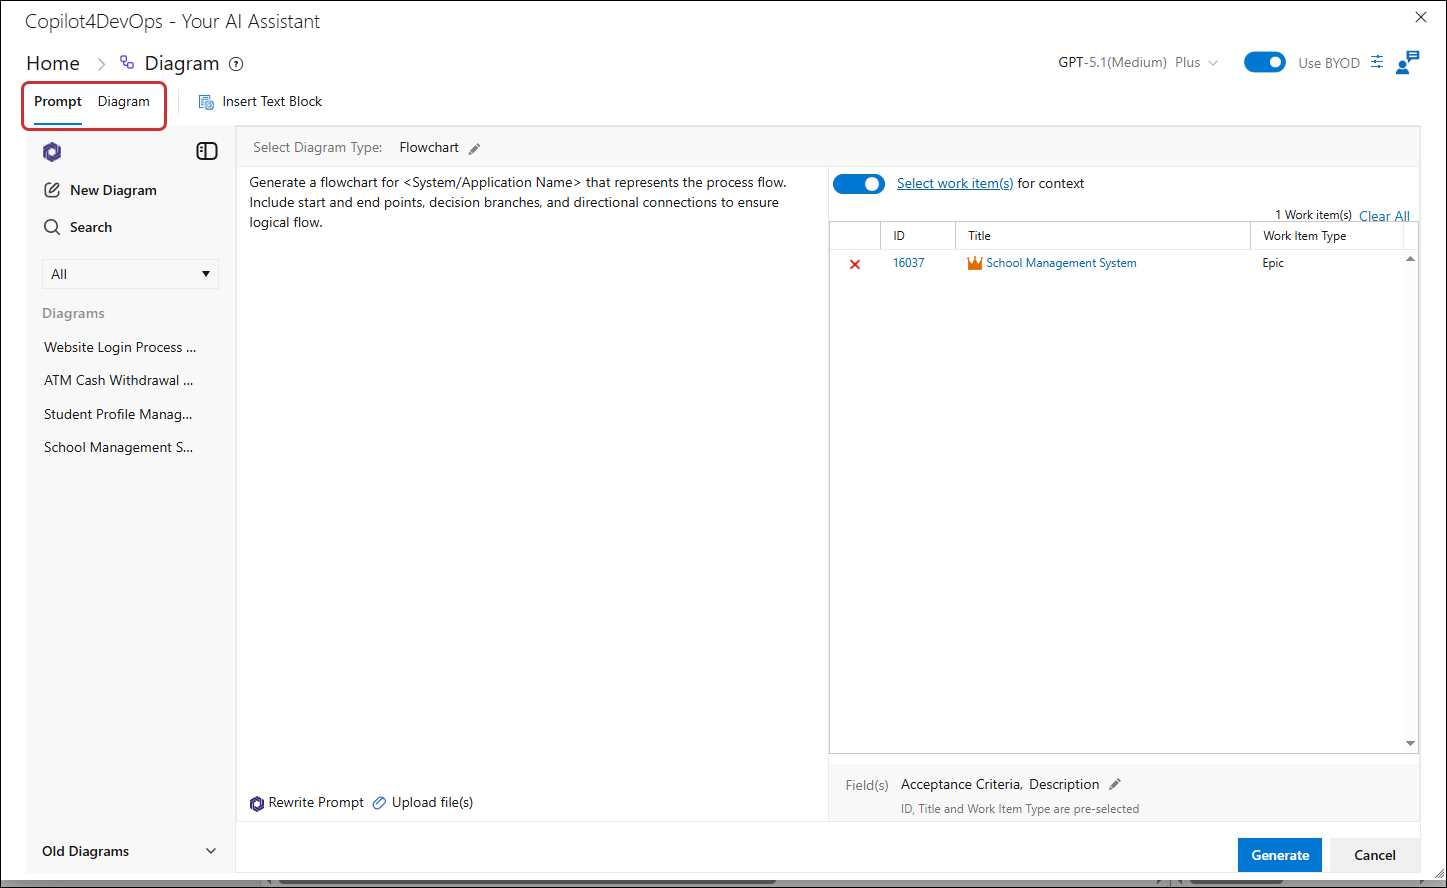
Step 2: Access the "Prompt" Tab
Upon opening the Diagram interface, you will see two tabs: 'Prompt' and 'Diagram'. By default, the interface opens to the Prompt tab.
Step 3: Select a Diagram Type
1. In the Prompt tab, click on Select Diagram Type.
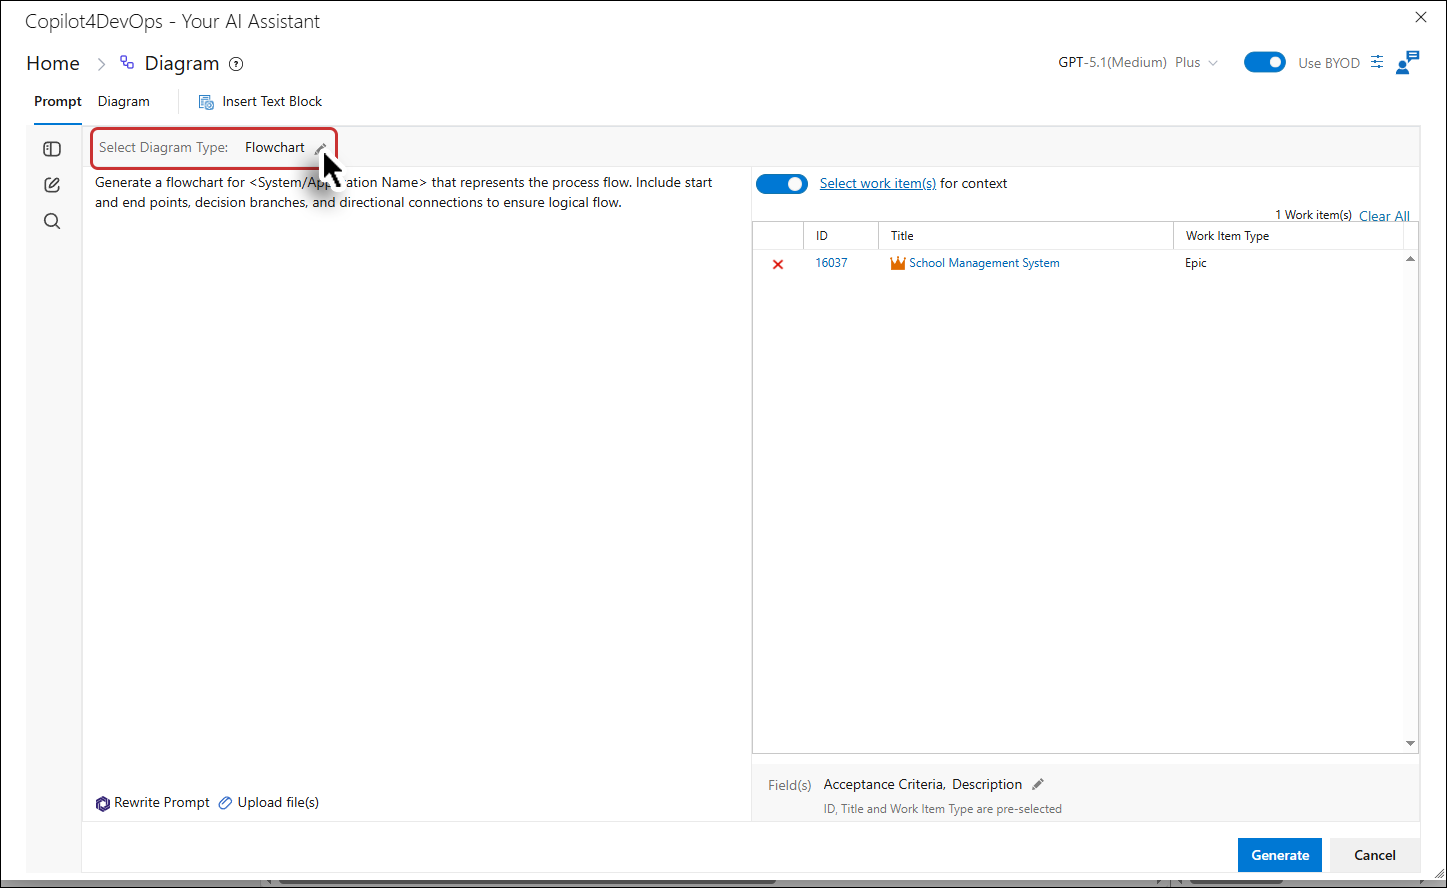
It will open a new window.
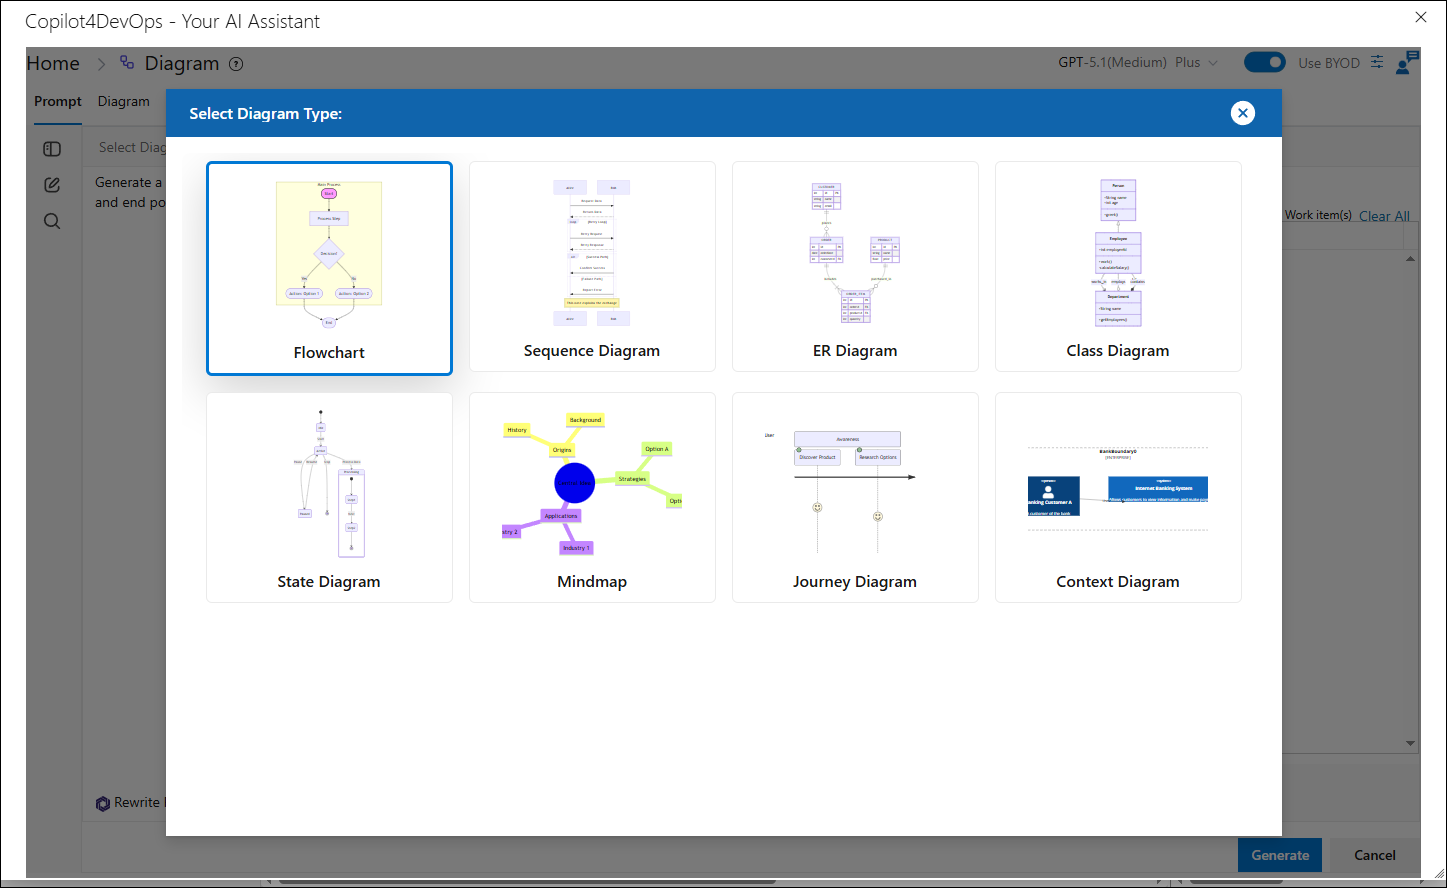
2. Choose a diagram type from the window.
Note: By default, the selection is set to flowchart, which generates diagrams based on the provided prompt or selected Work Item (WI) context or both.
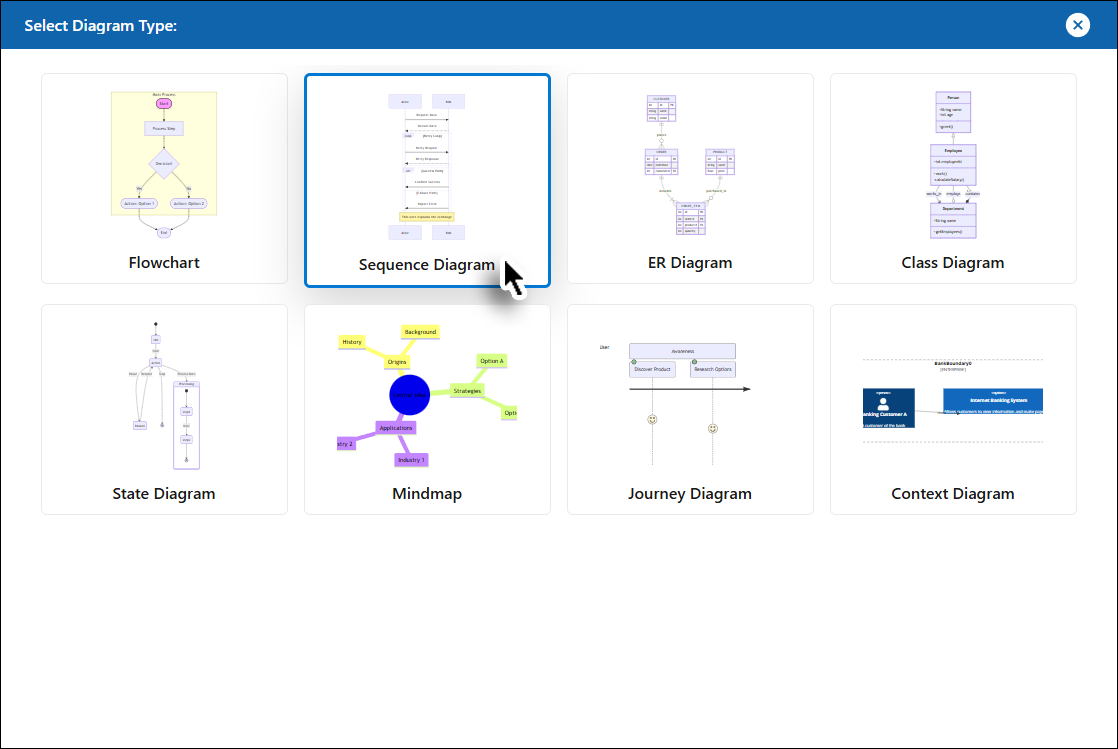
The following Diagram Types are available for the user to generate a diagram.
• Flowchart
• Sequence Diagram
• Entity Relationship Diagram
• Class Diagram
• State Diagram
• Mindmap
• Journey Diagram
• Context Diagram
Step 4: Provide Context for the Diagram
You can generate a diagram by either entering a prompt, selecting a Work Item (WI) for context, or both:
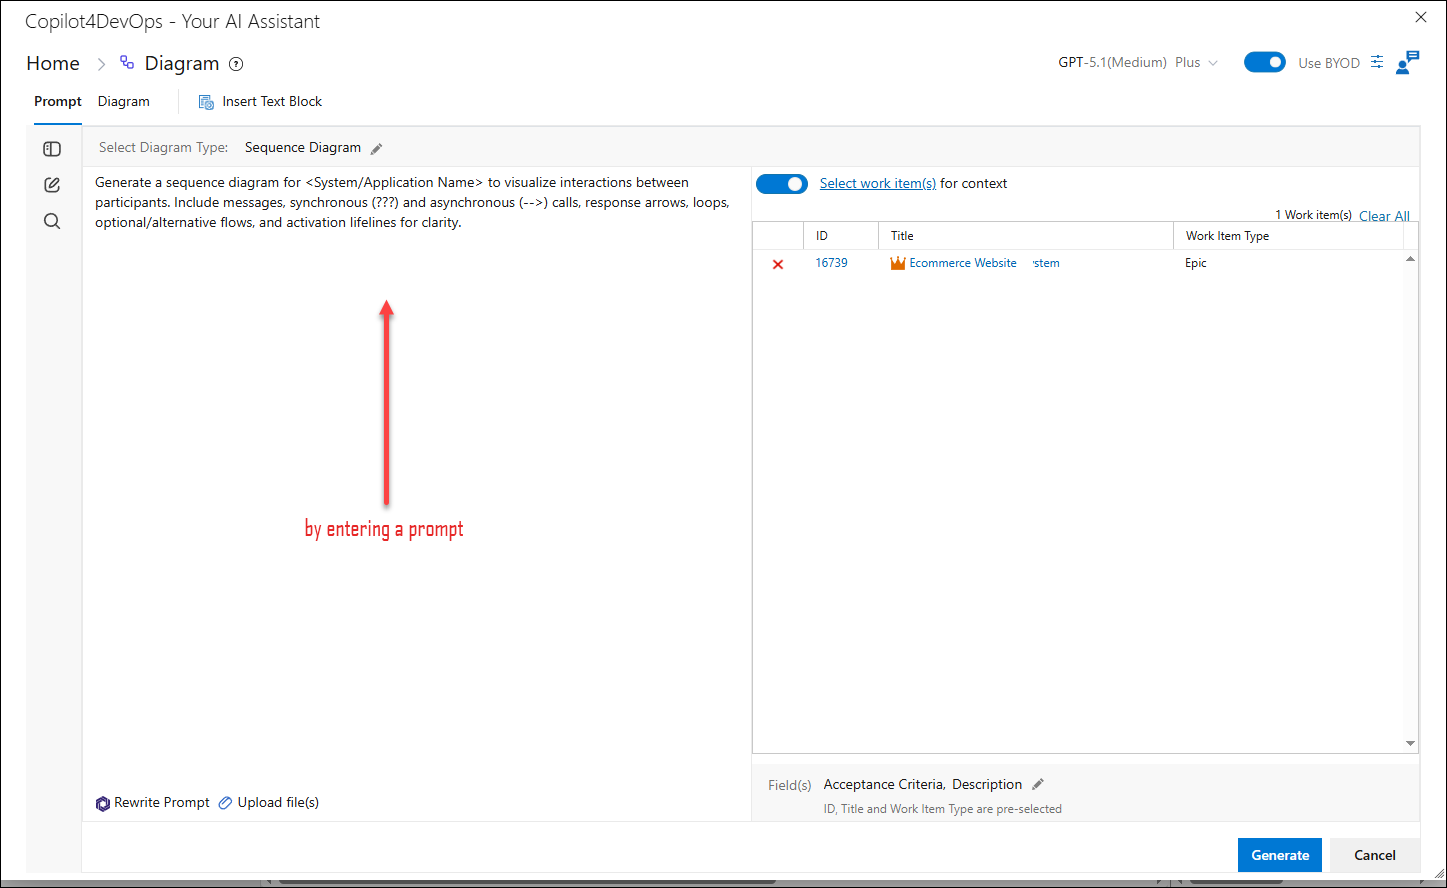
Option 1: Enter a Prompt
1. In the left panel of the Prompt tab, type a description or instructions for the diagram.
Example: "Create a flowchart for a CI/CD pipeline."
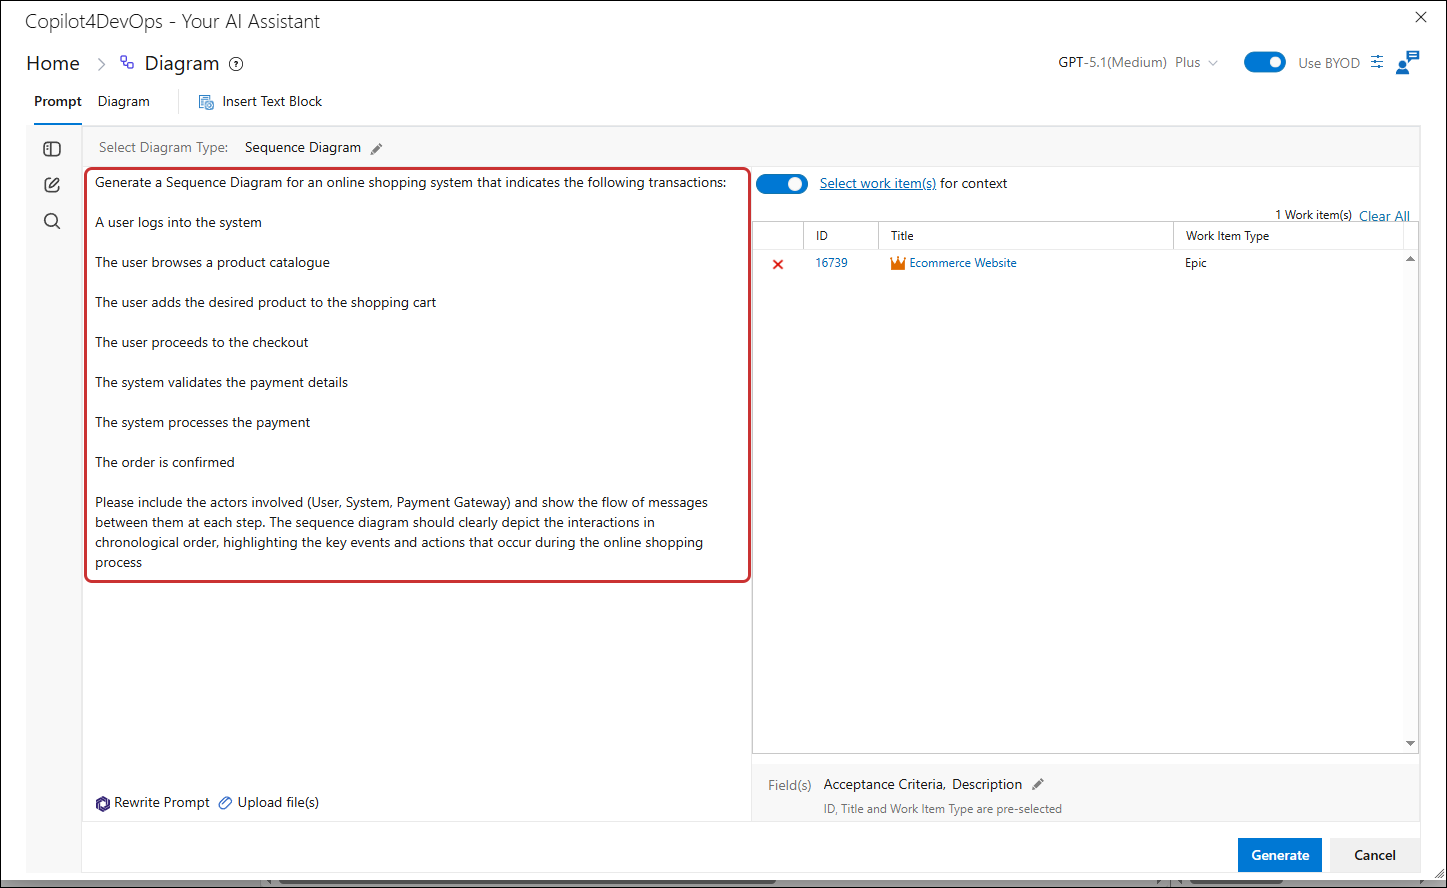
A Default prompt for each diagram type will be shown.
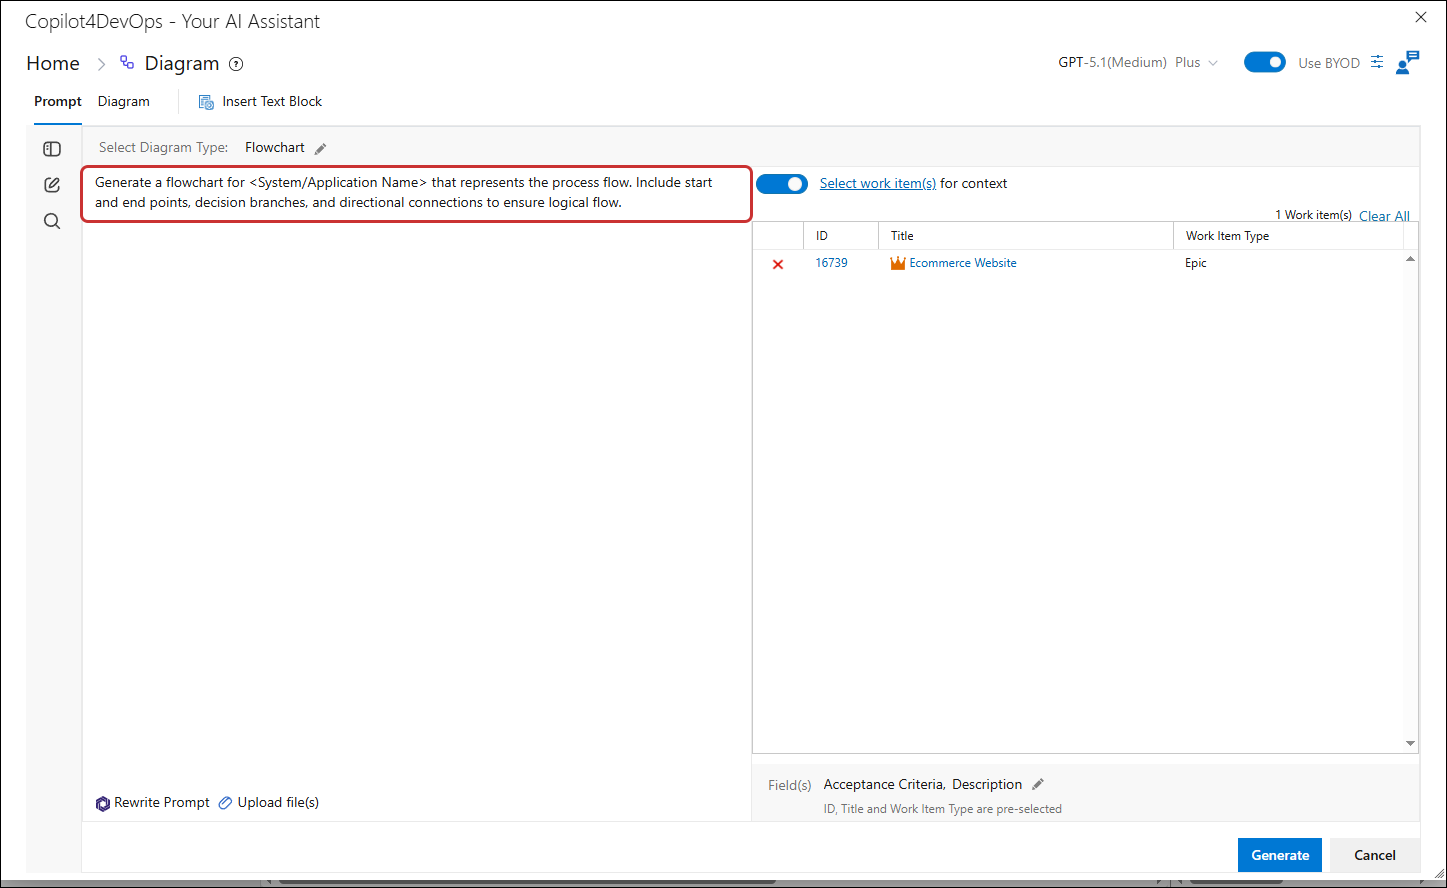
• Users can rewrite their prompt using the Rewrite Prompt option in the Diagram function with a single click, producing structured, complete, and accurate prompt—using the AI model selected from the "AI Model Auto Selection and Ranking" section for “Rewrite Prompt” under the General tab in Admin panel.
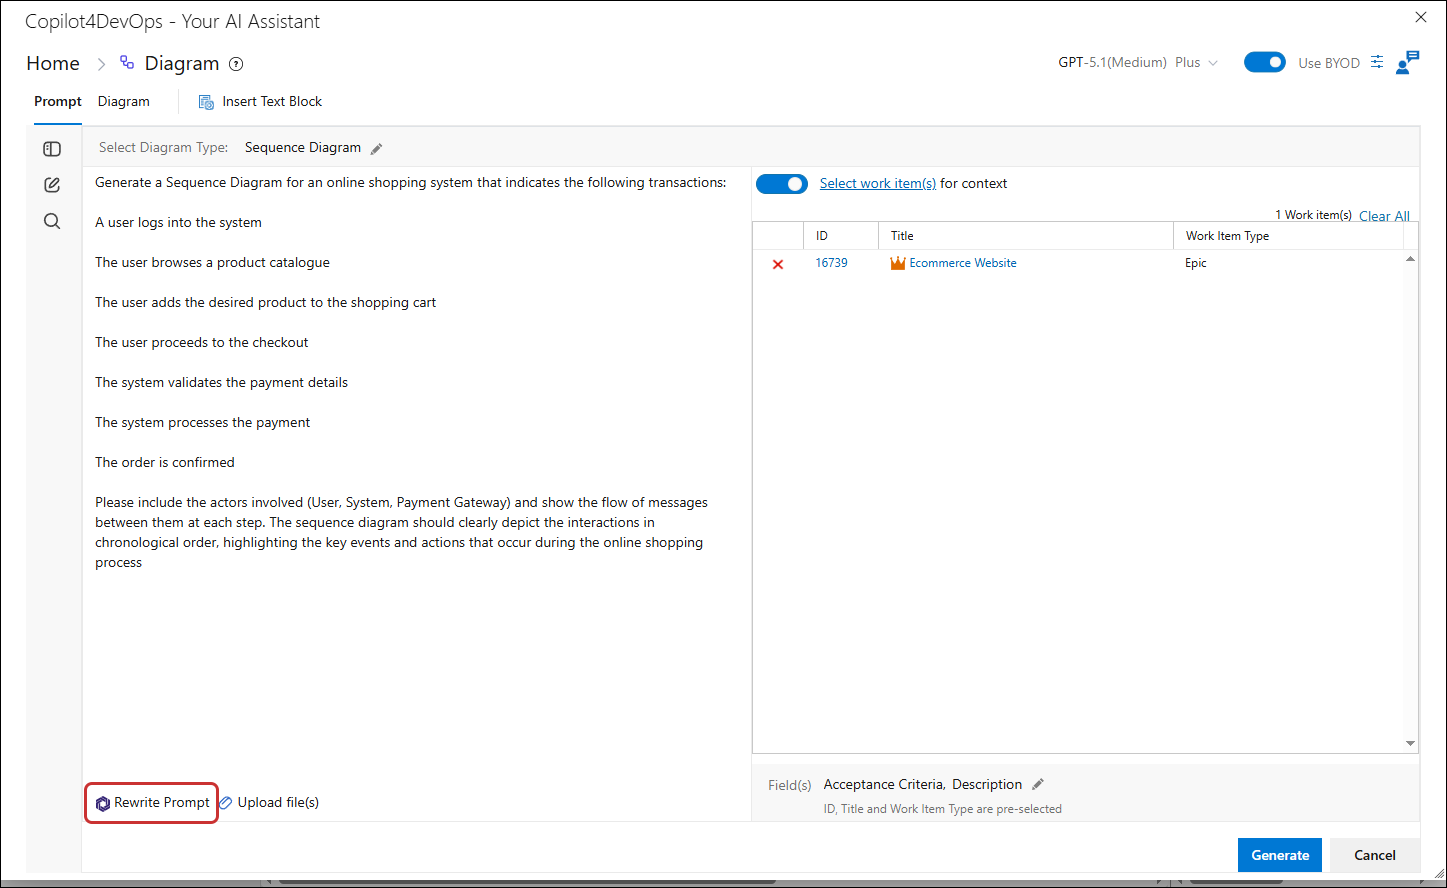
Upload File(s)
The "Upload File(s)" feature has been introduced and is now seamlessly integrated into the Diagram. This capability allows users to attach relevant files that serve as contextual reference material to generate more accurate and tailored diagram outputs.
Steps to Upload a File
1. Click on the "Upload File(s)" option, found next to the "Rewrite Prompt" button
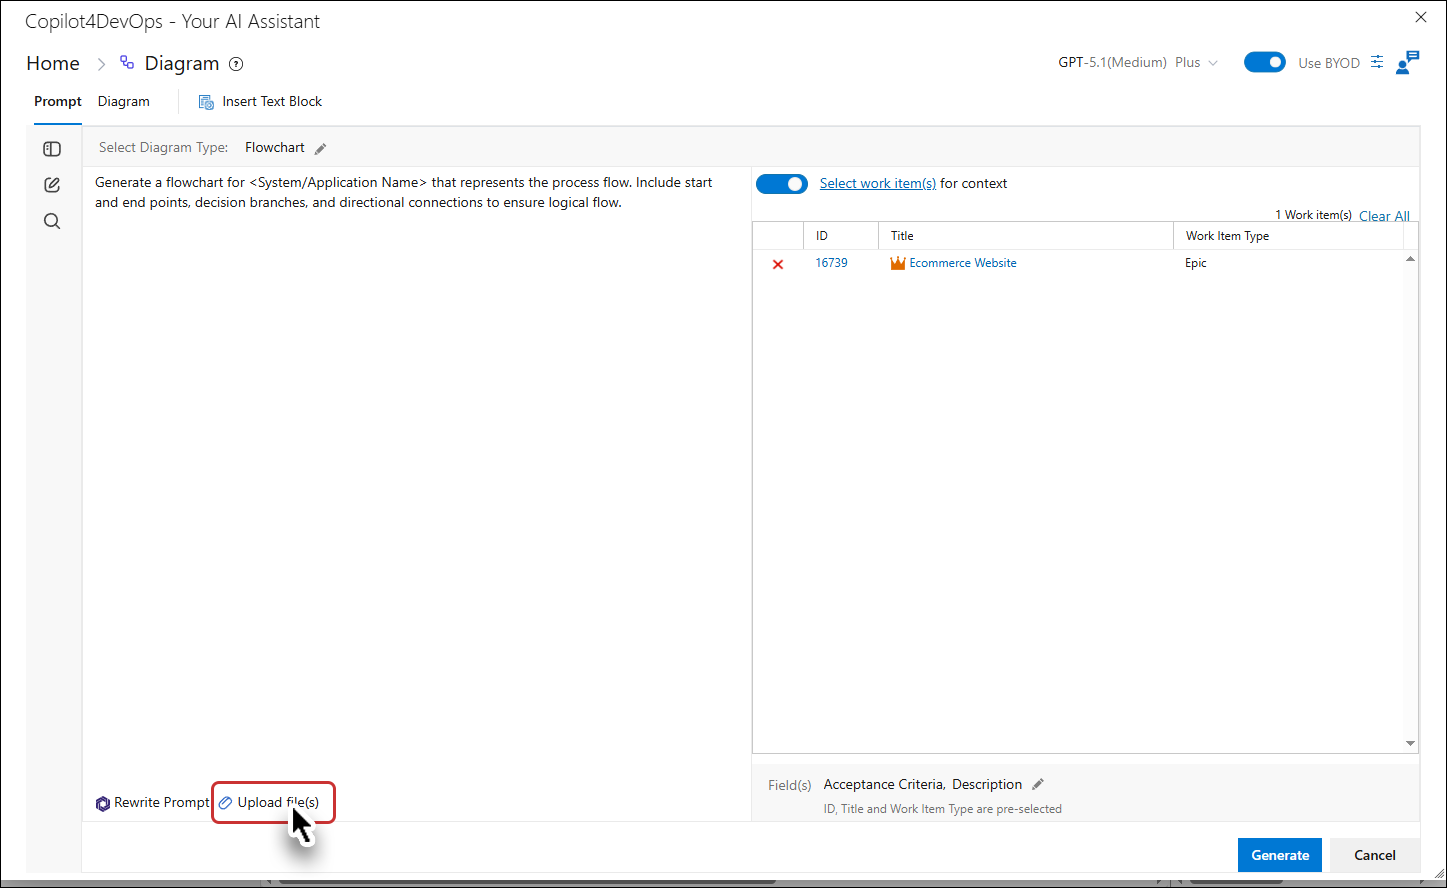
A popup window will appear titled Upload File.
Note: The file/attachment upload process is elaborated in detail here.
All uploaded files will now be visibly listed below the "Rewrite Prompt" and "Upload File(s)" buttons, clearly indicating the files attached to the current session.
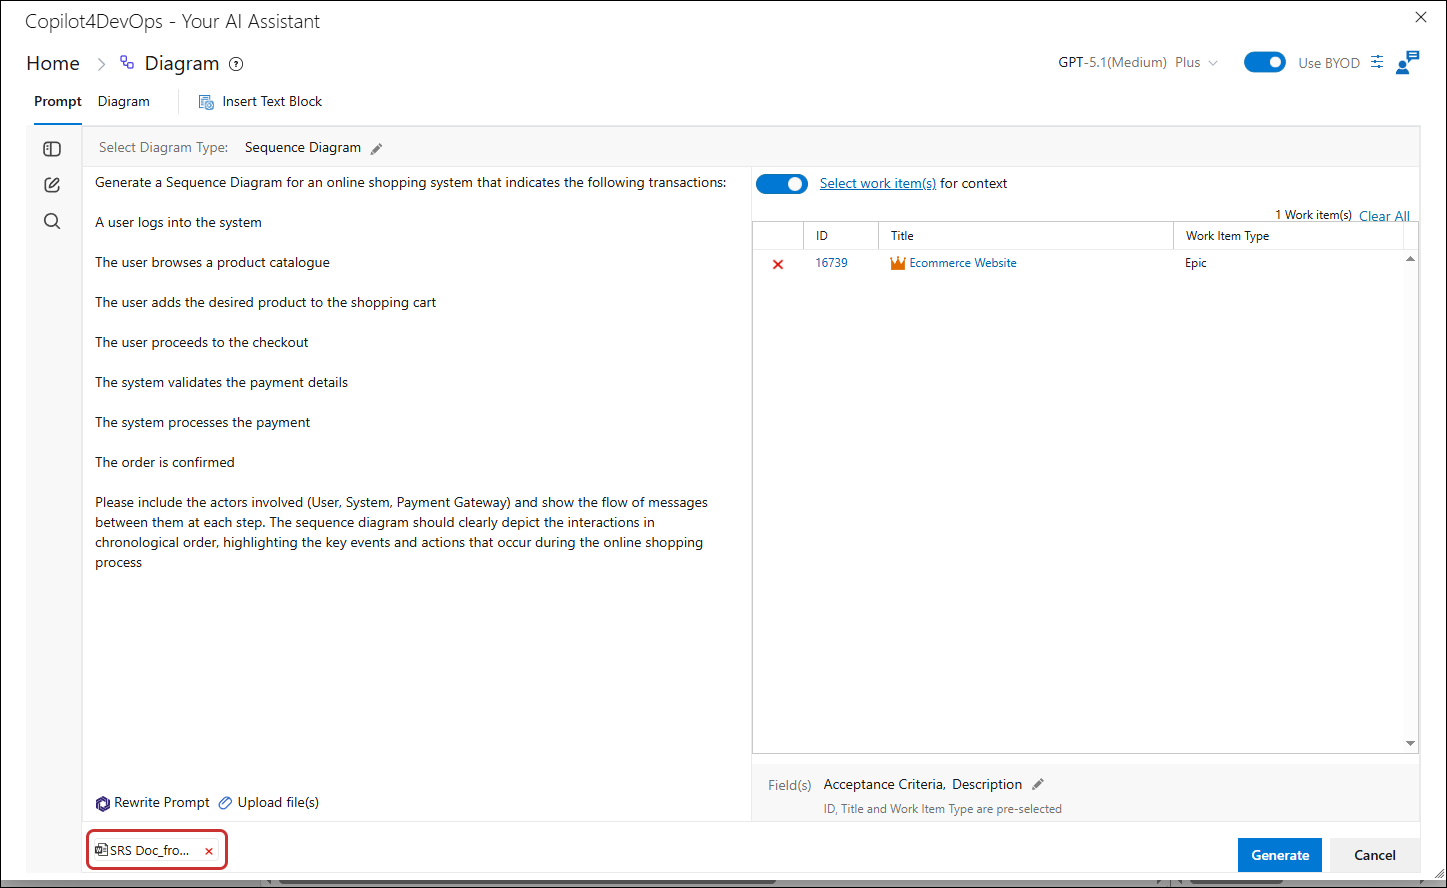
Note: supported file types, ".xls",".xlsx",".csv",".docx",".xml",".json",".pdf",".txt",".png",".jpg",".webp",".gif",".CSS",".HTML","JS".
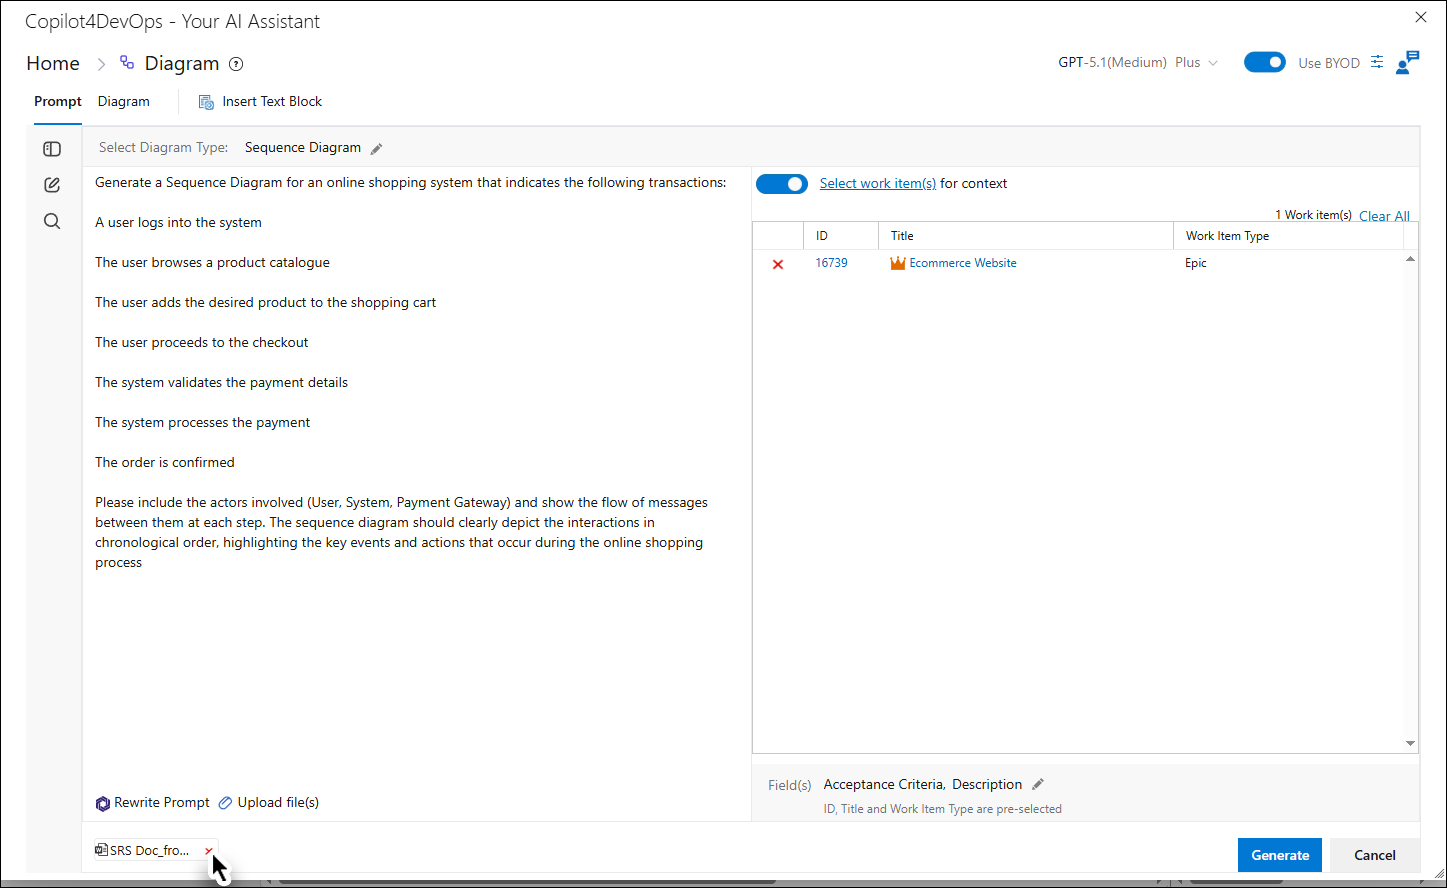
If a file was uploaded by mistake, it can be removed by clicking the "x" (cross) icon next to the file name.
Option 2: Select a Work Item (WI)
By Default, the work item from which the Copilot4DevOps feature has been invoked will be shown pre-selected.
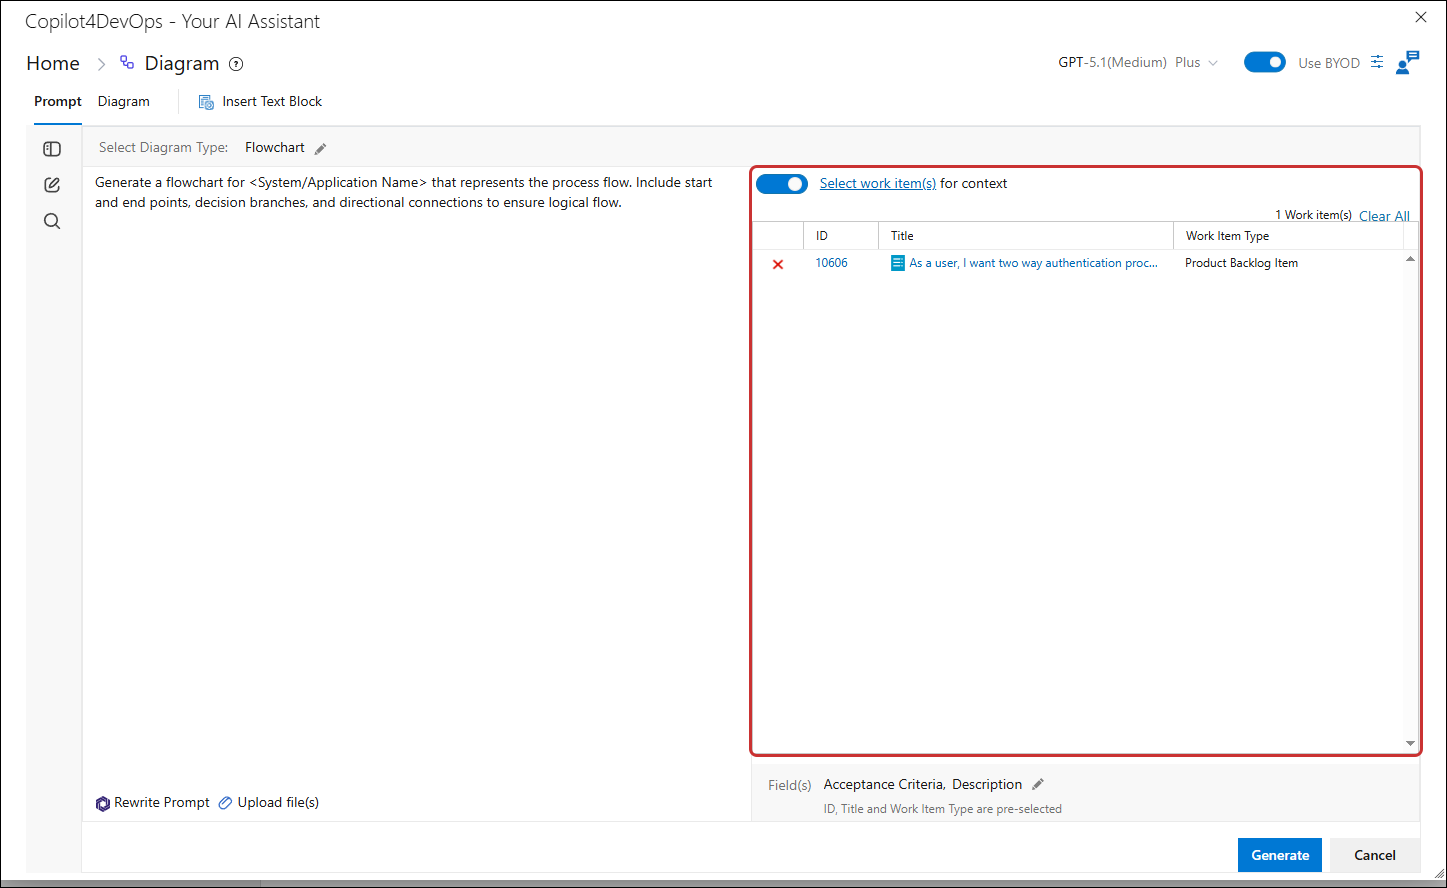
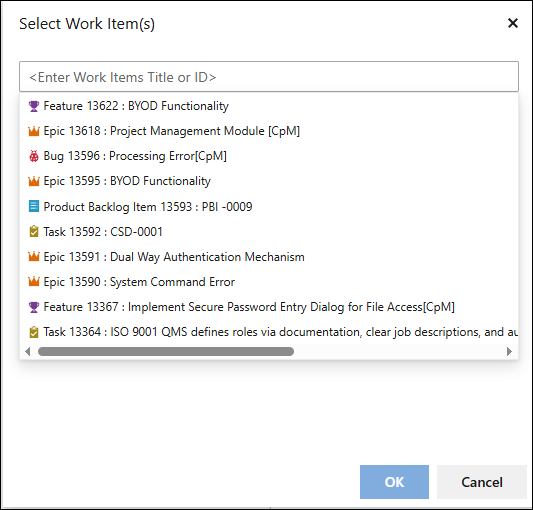
1. From the right panel, search for and select a Work Item by ID or title.
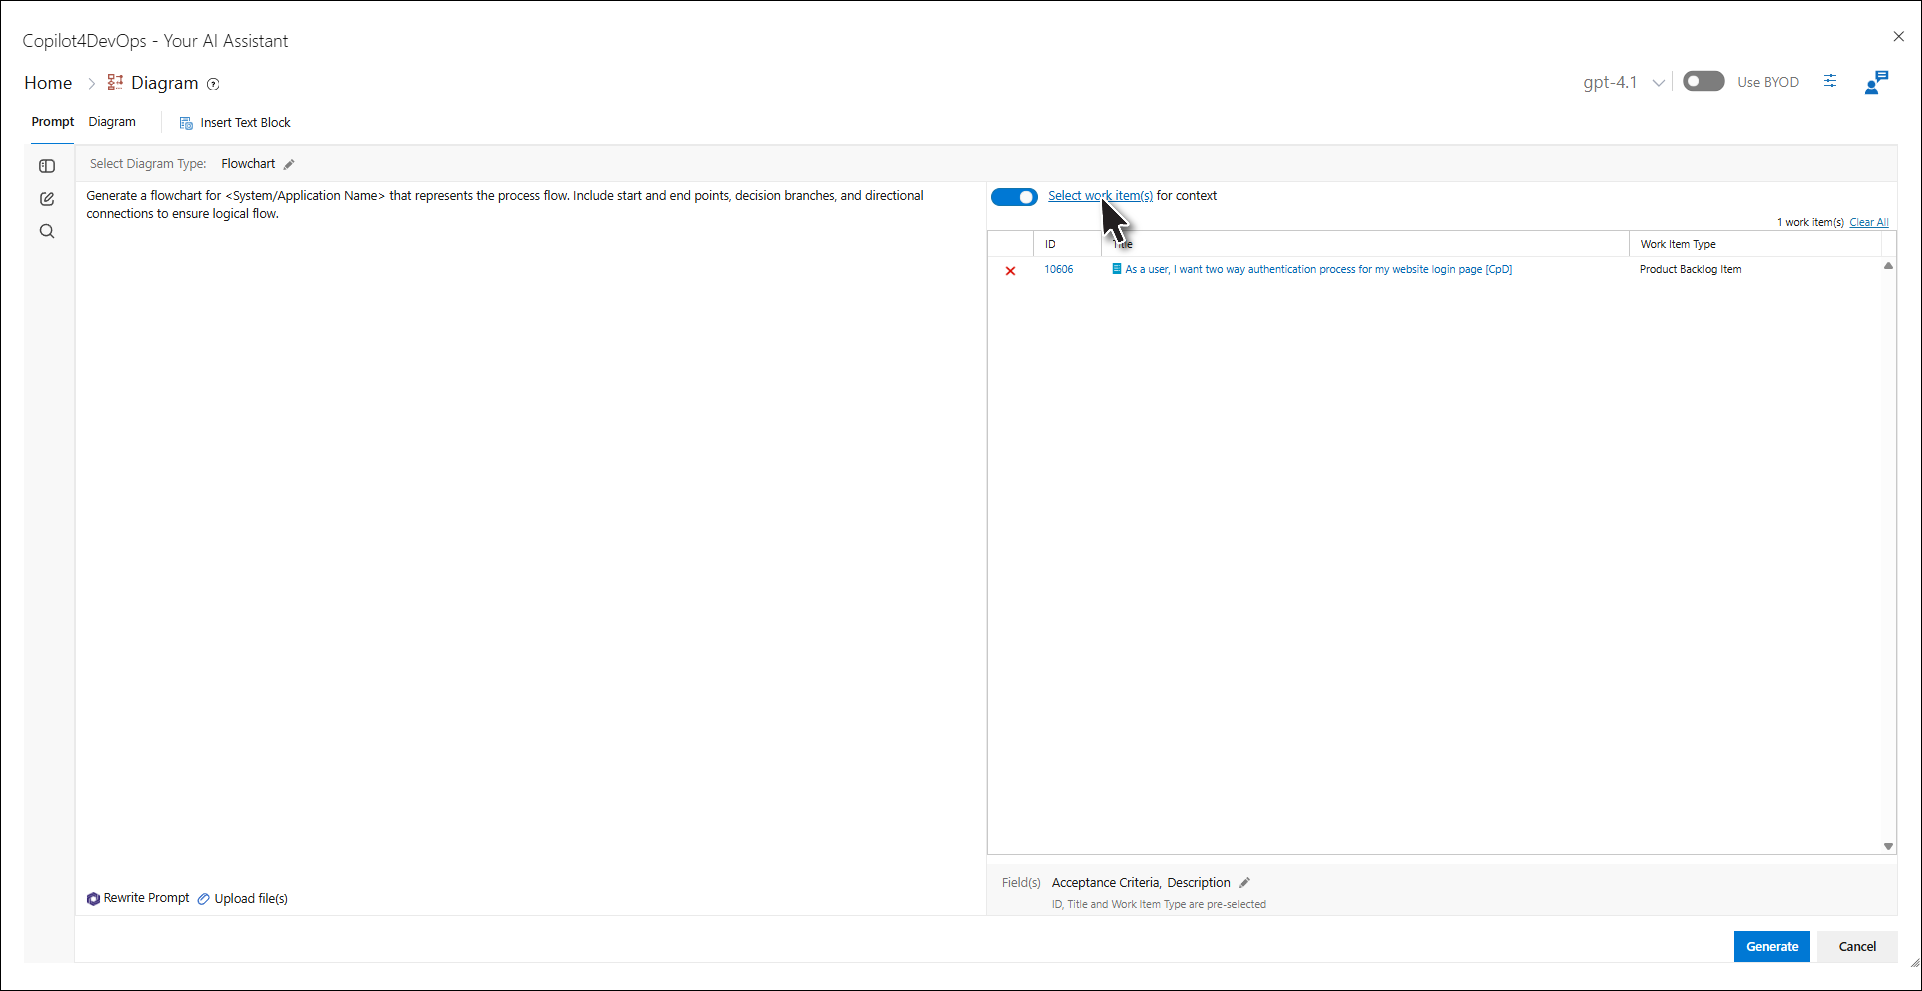
2. Select one or multiple work items for context and click on the "OK" button.
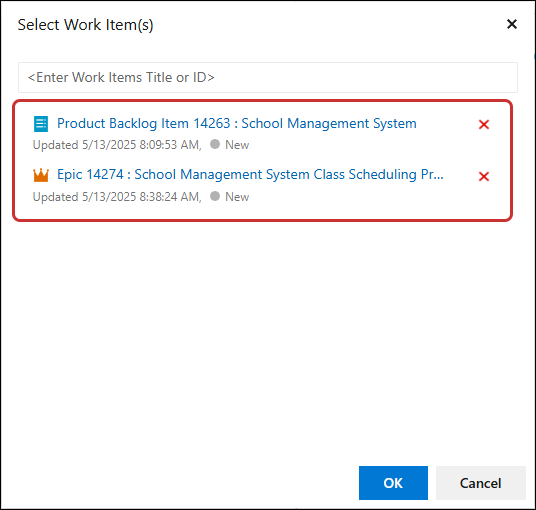
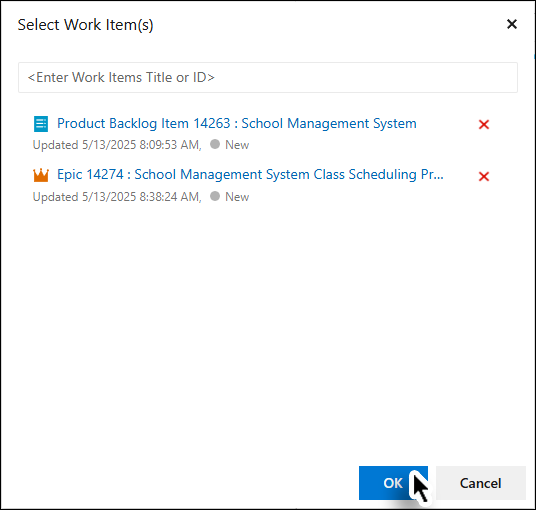
The work item(s) have been added for context.
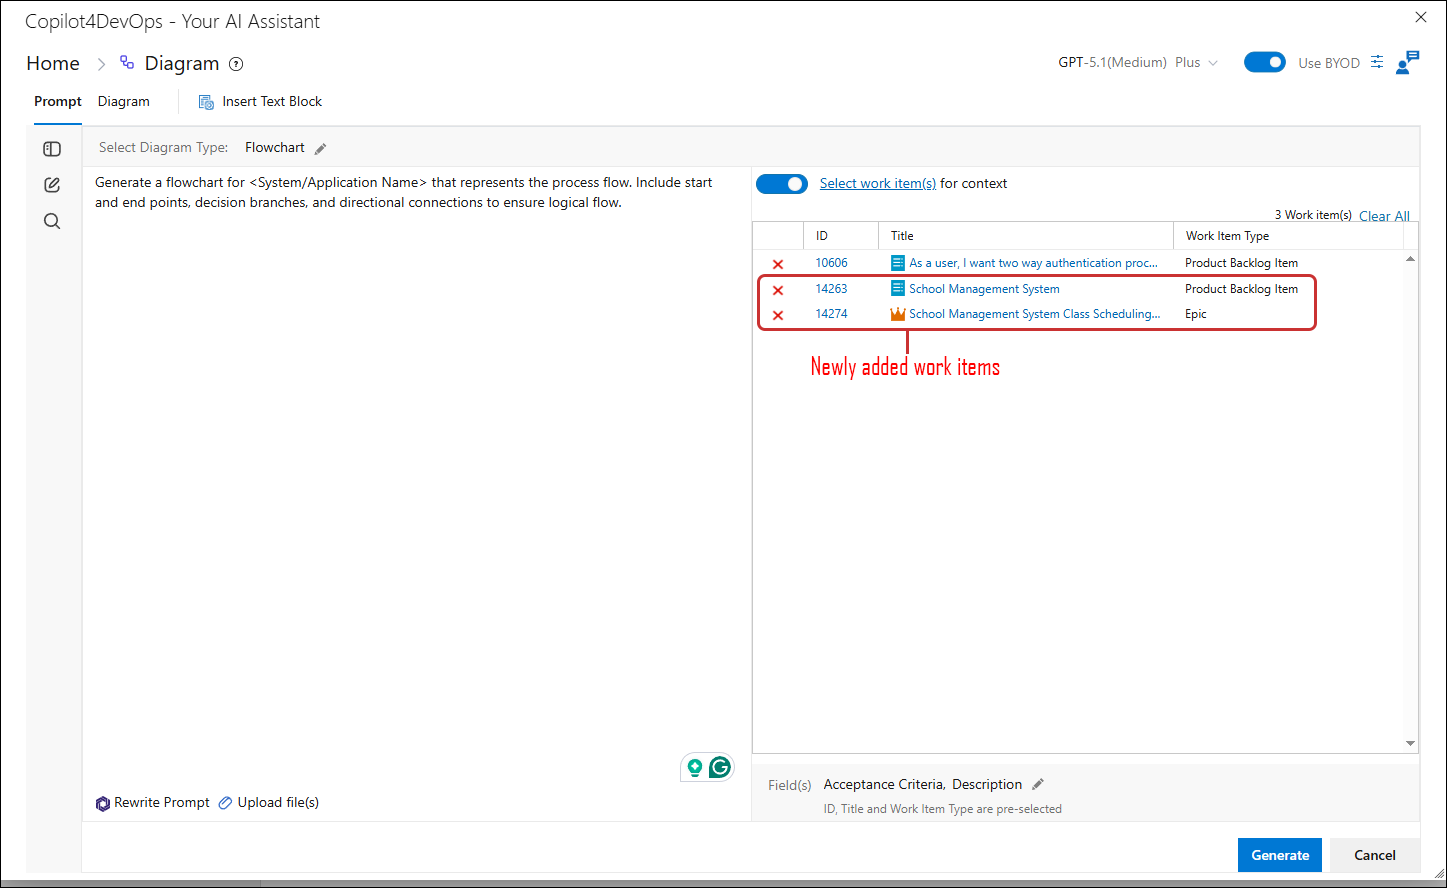
3. Once selected, you can specify fields from the Work Item to include in the diagram.
Note: The Fields in the bottom of the right panel will selected by default in accordance to the work item type. However, ID, Title, and Work Item Type are pre-selected fields which cannot be removed.
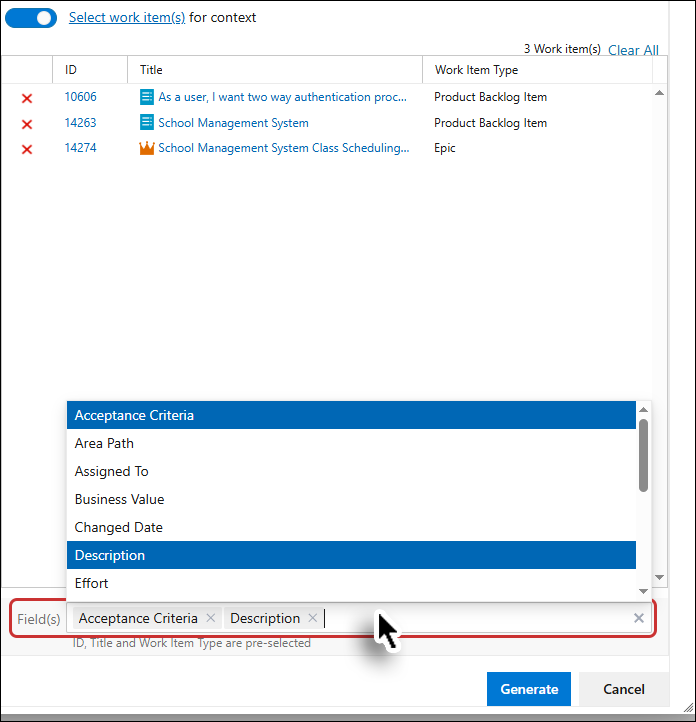
Note: Images embedded within the work item's HTML fields (such as Description, Acceptance Criteria, Repro Steps, and Comments) are detected and processed during AI operations. Image references are preserved throughout the operation.
Step 5: Generate the Diagram
1. Ensure that either a prompt is entered, a Work Item is selected, or both.
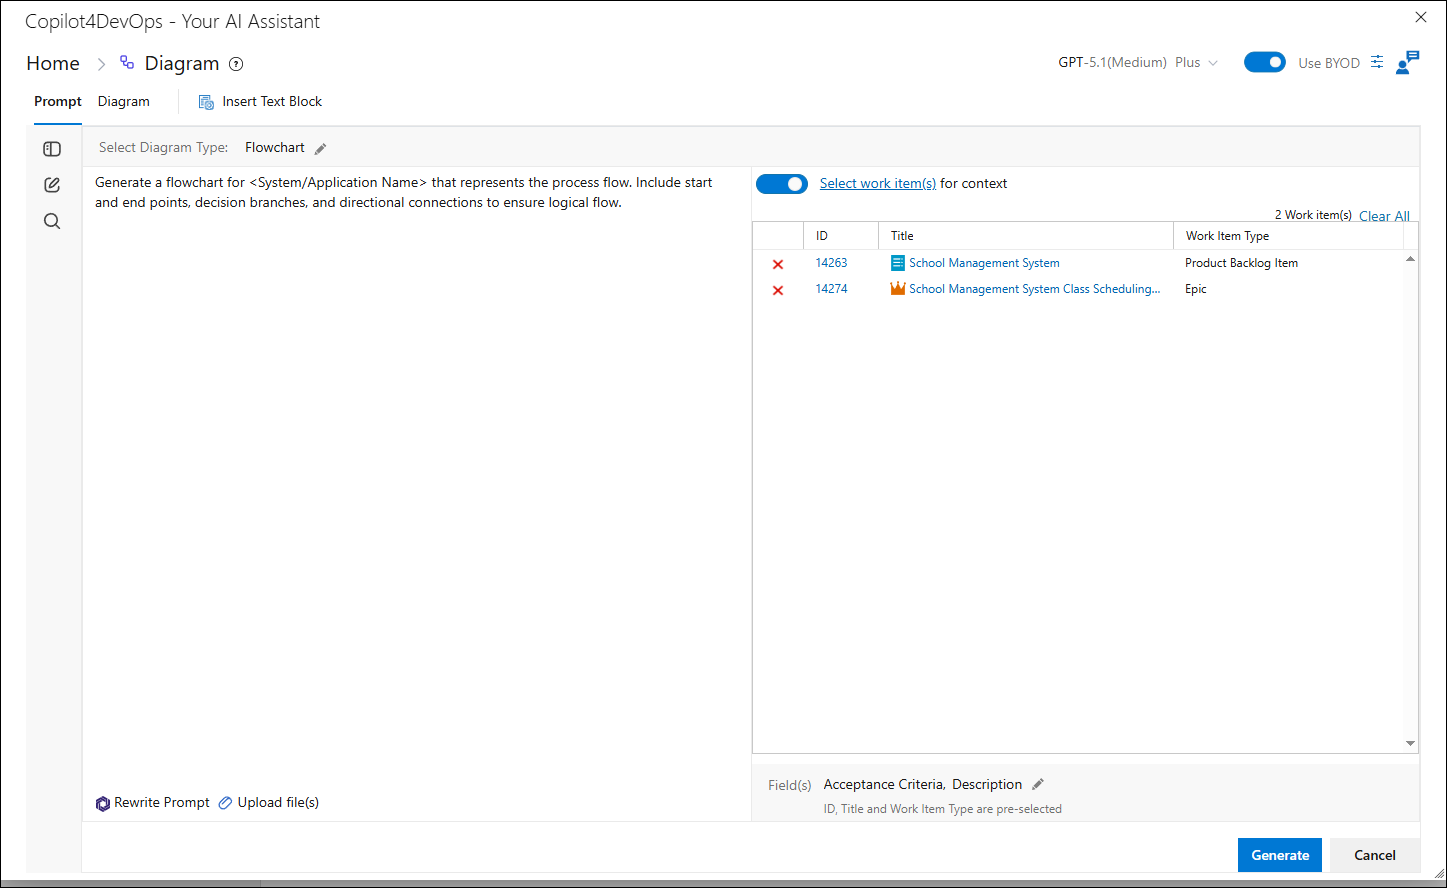
Note: Diagram generation is disabled if no prompt is provided and no Work Item is selected.
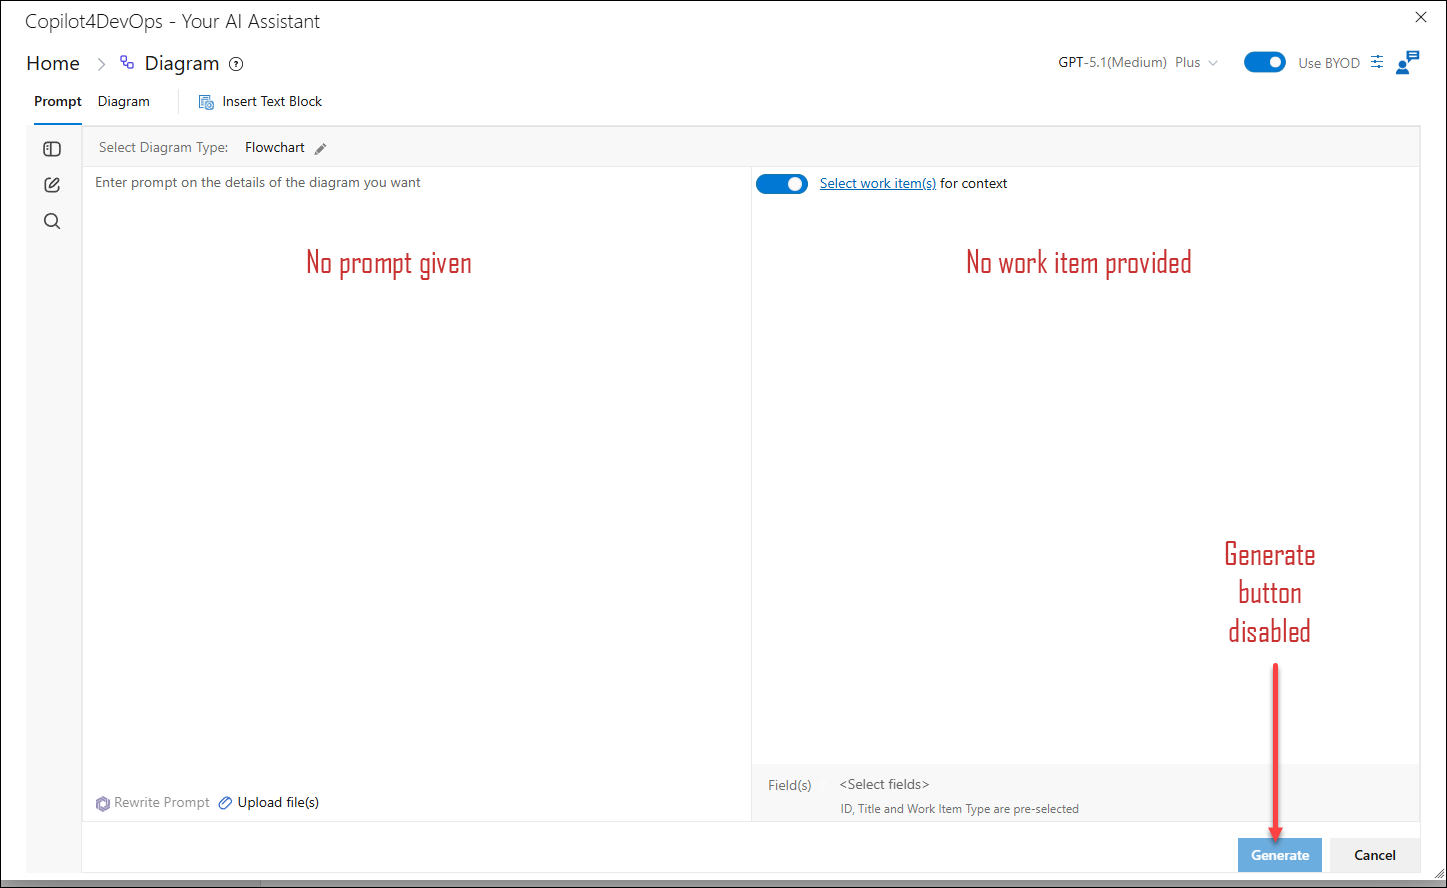
2. Click the Generate button.
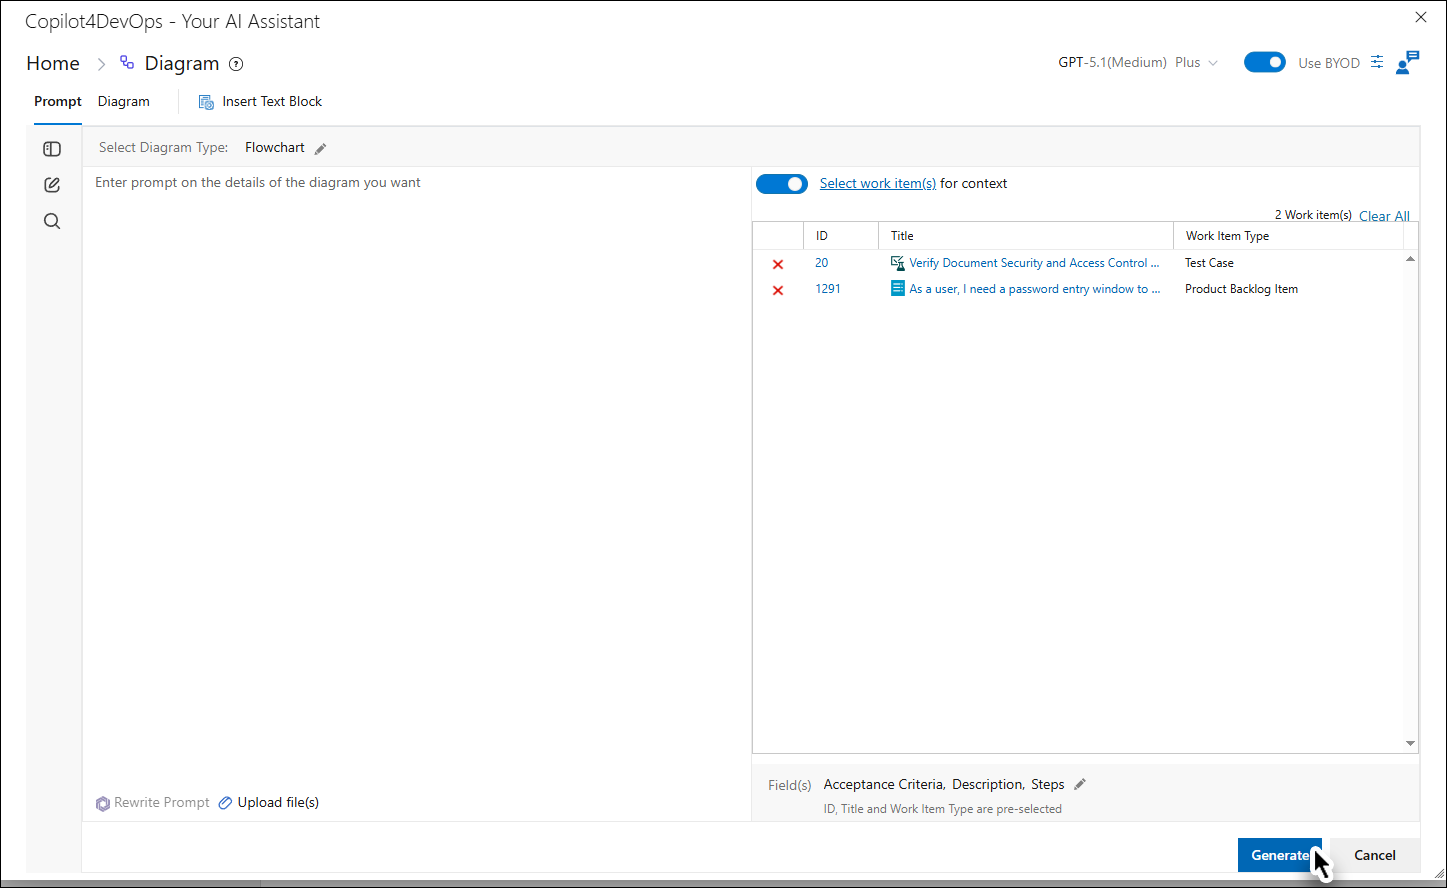
Note: Ranked AI model is configured in the Admin Panel for the Diagram, and this will be used for generating the diagram.
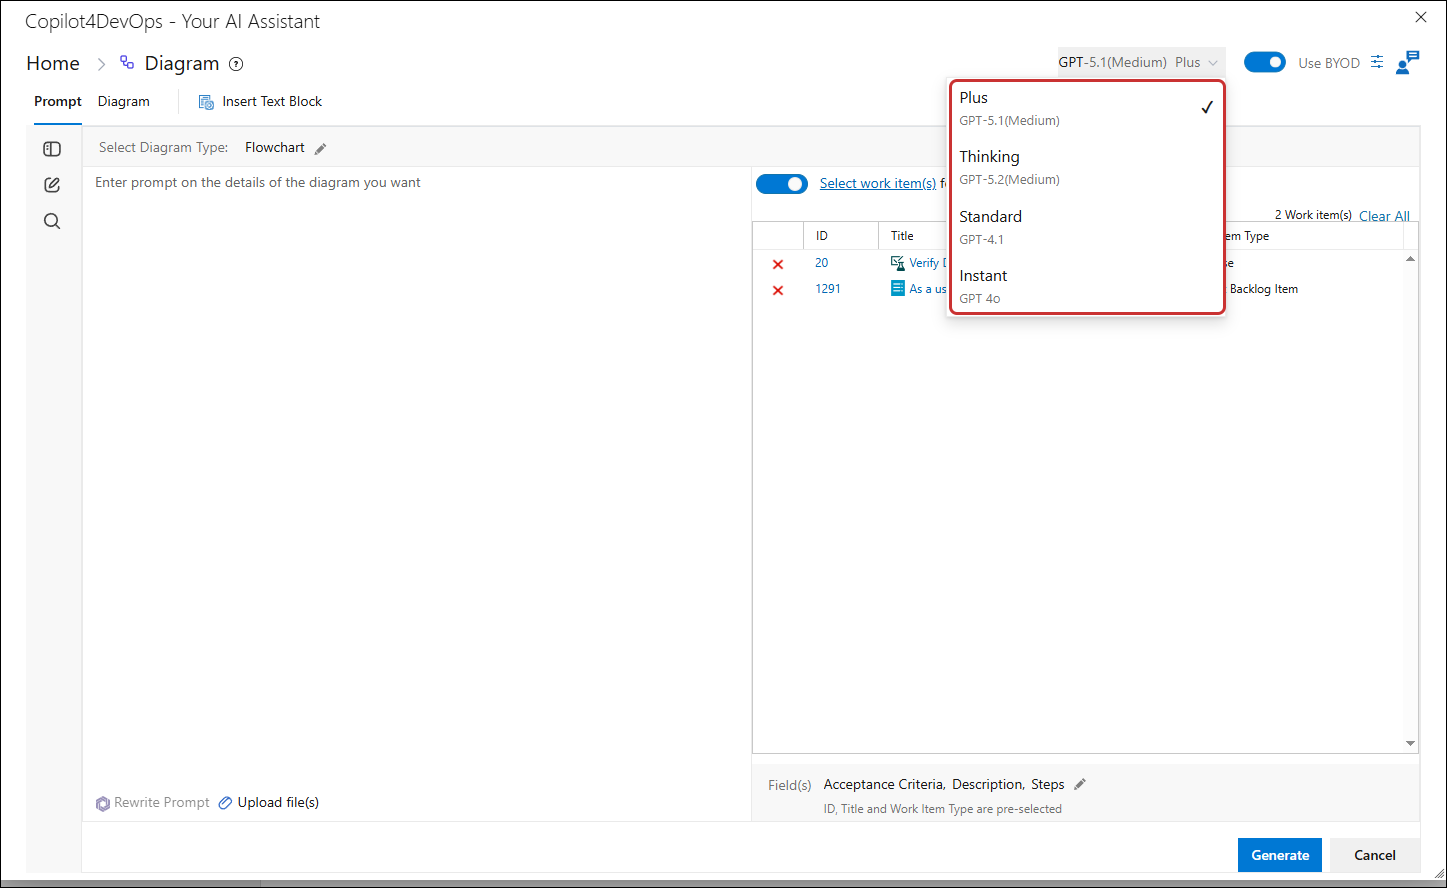
Step 6: View the Diagram
After generation, the interface will automatically switch to the Diagram tab.
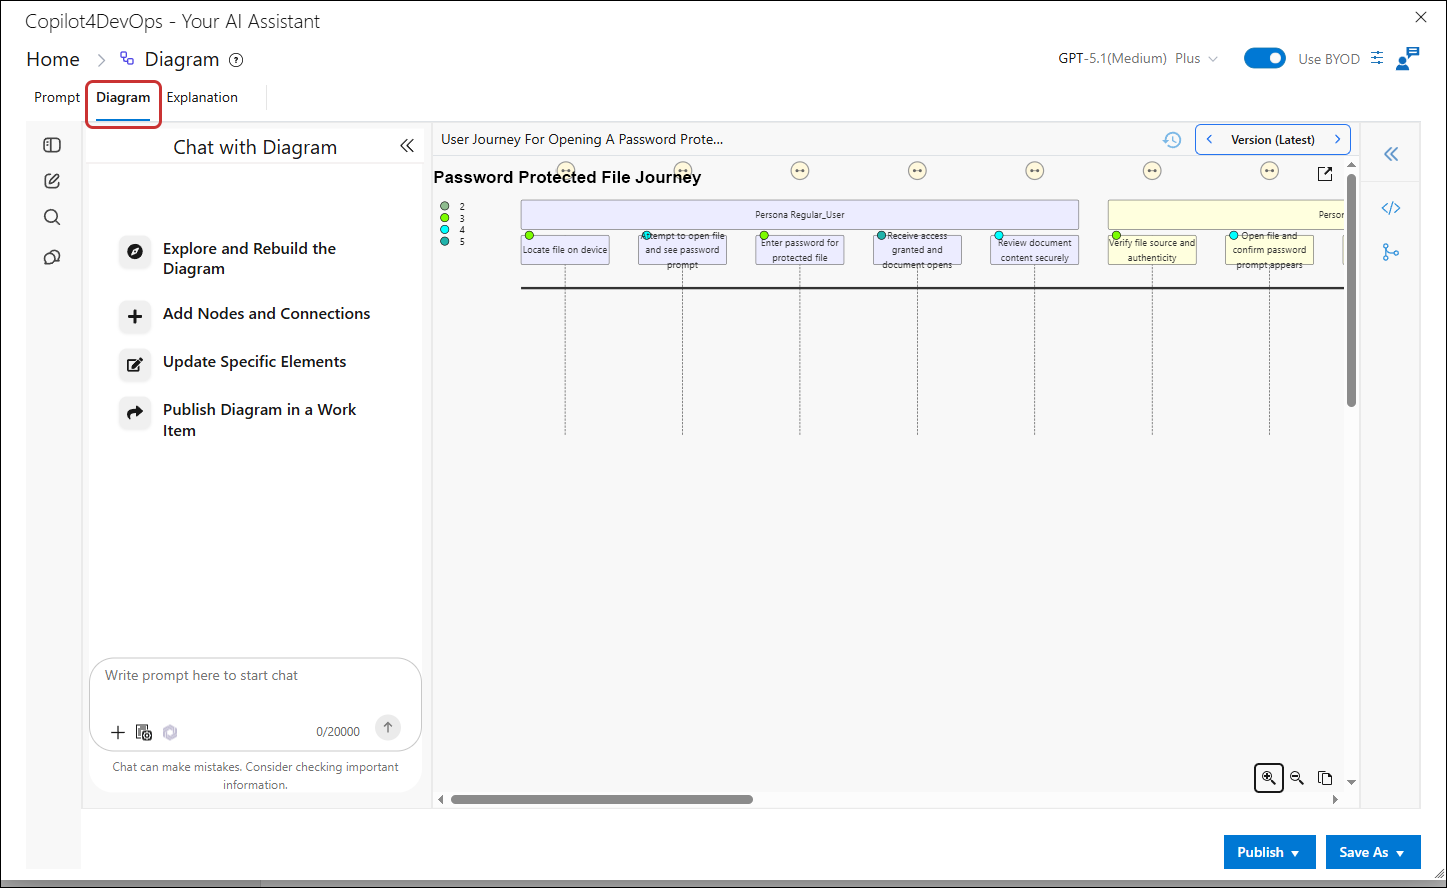
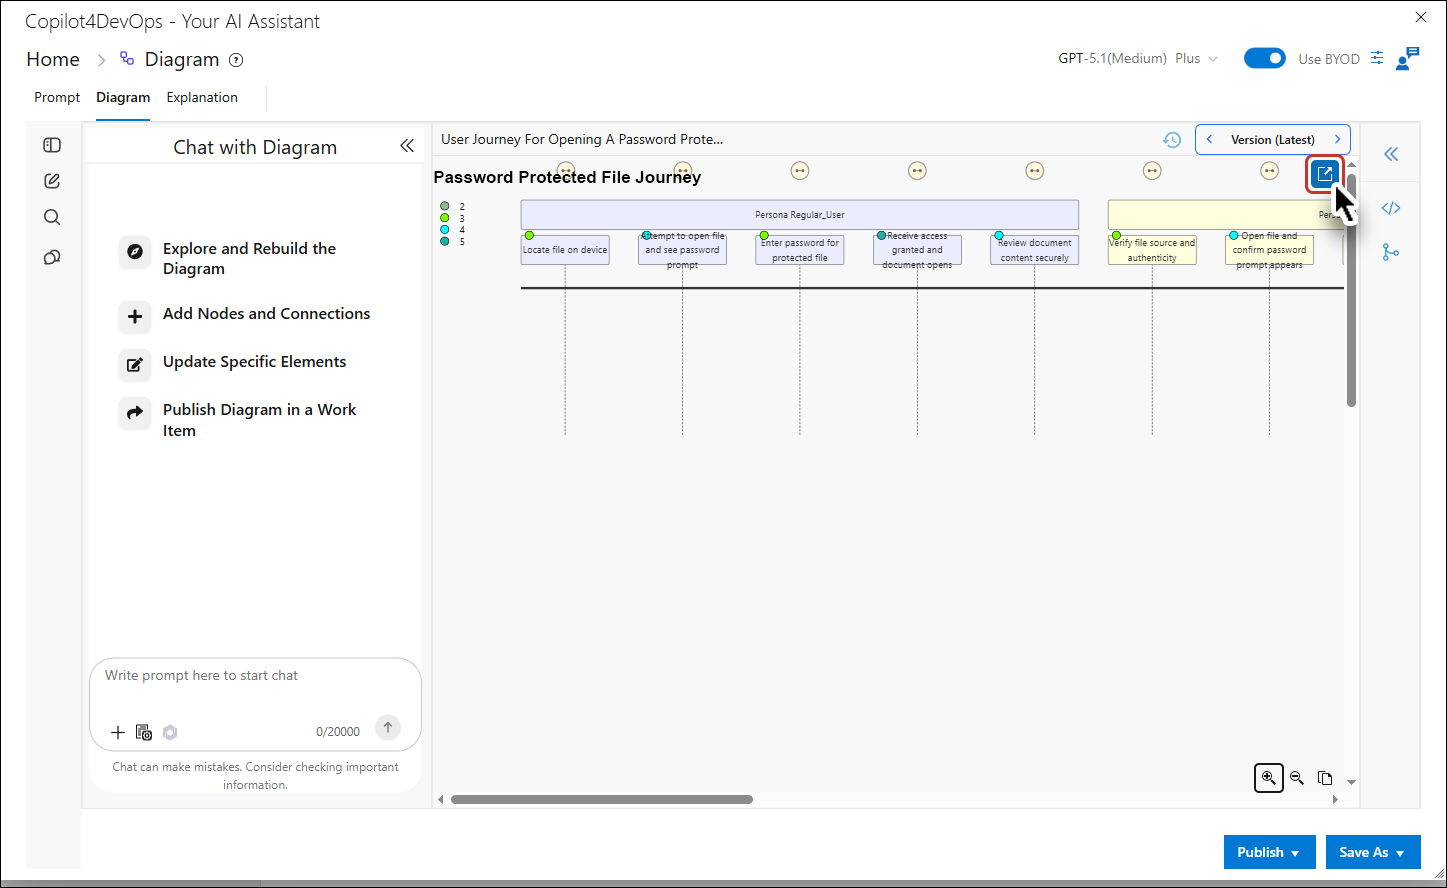
1. Click on the highlighted button, to open the right panel.
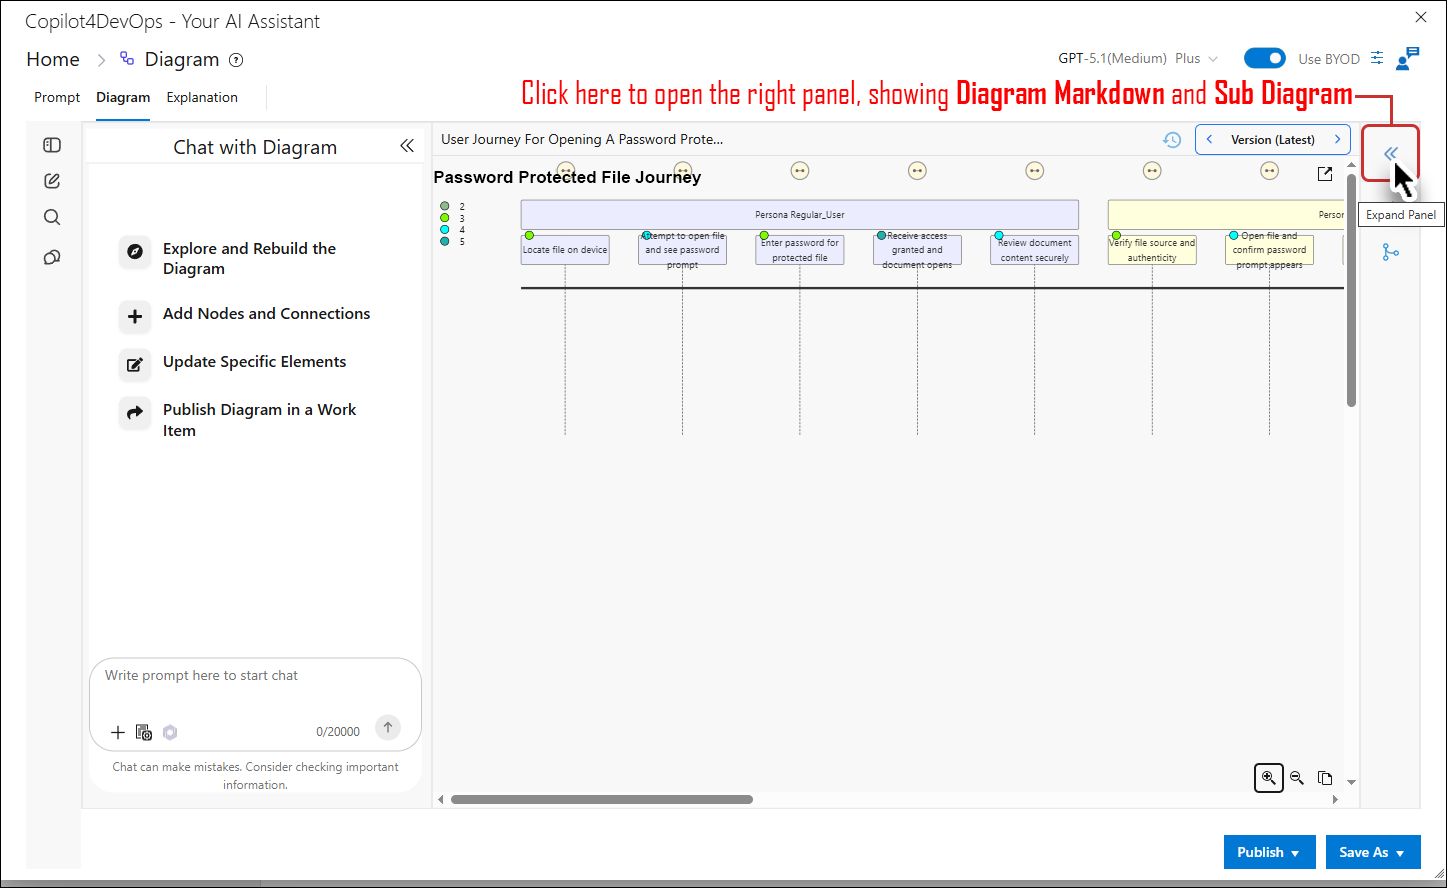
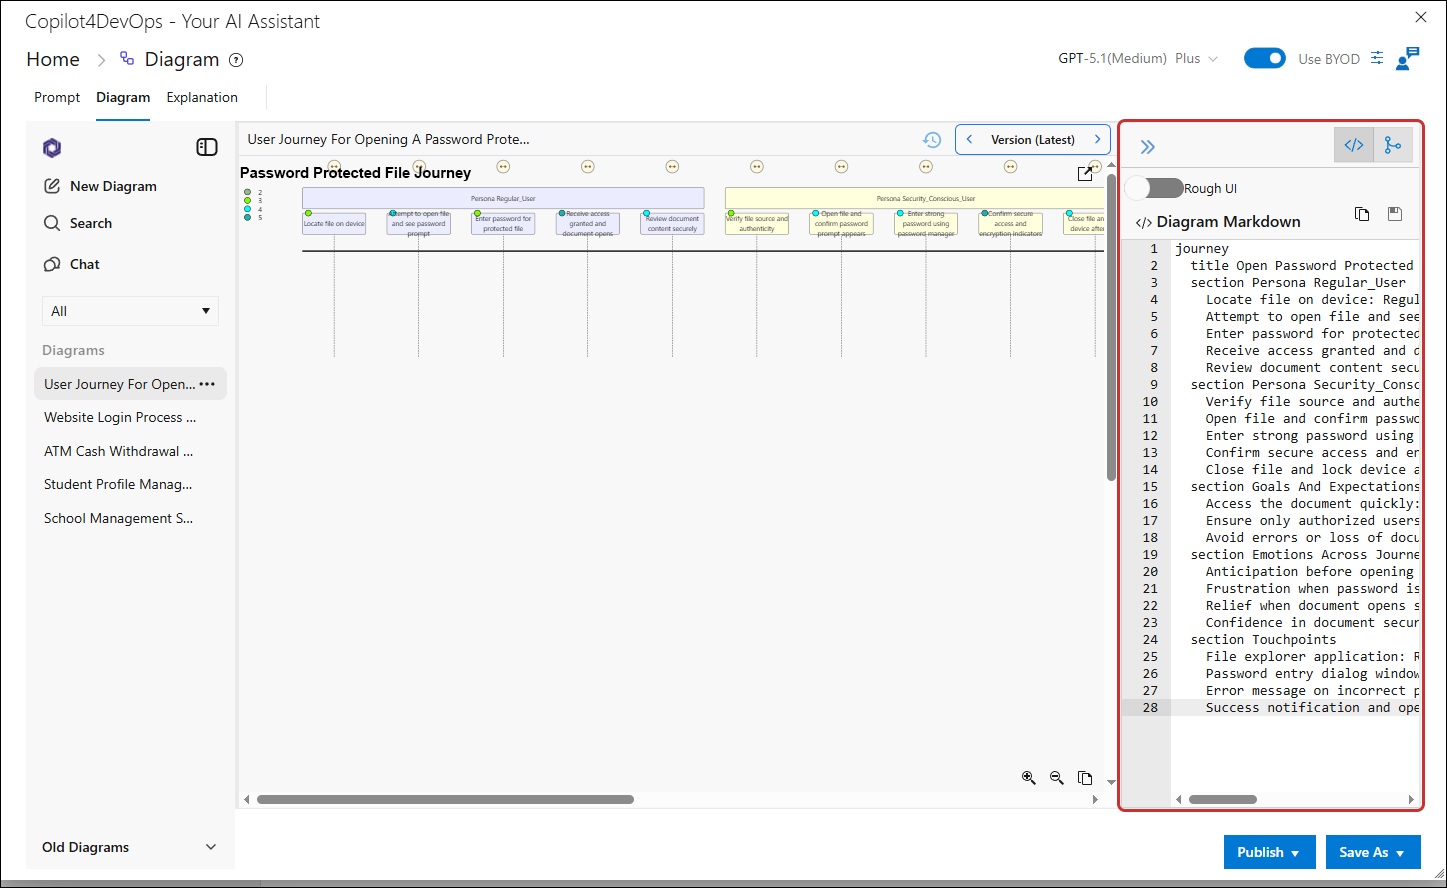
2. Interact with the diagram using the available options:
• Zoom In/Out: Adjust the diagram's view.
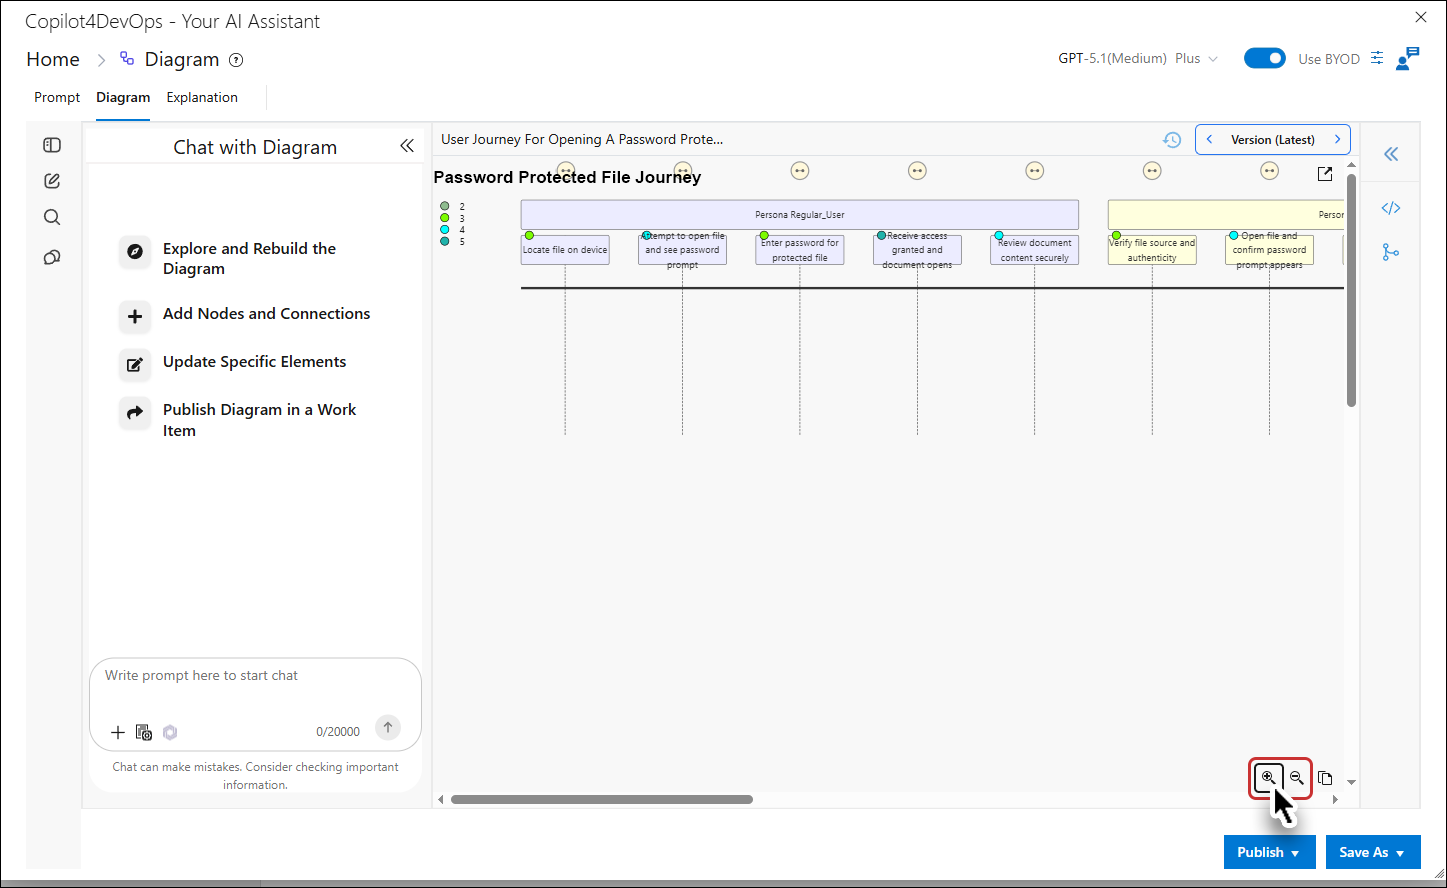
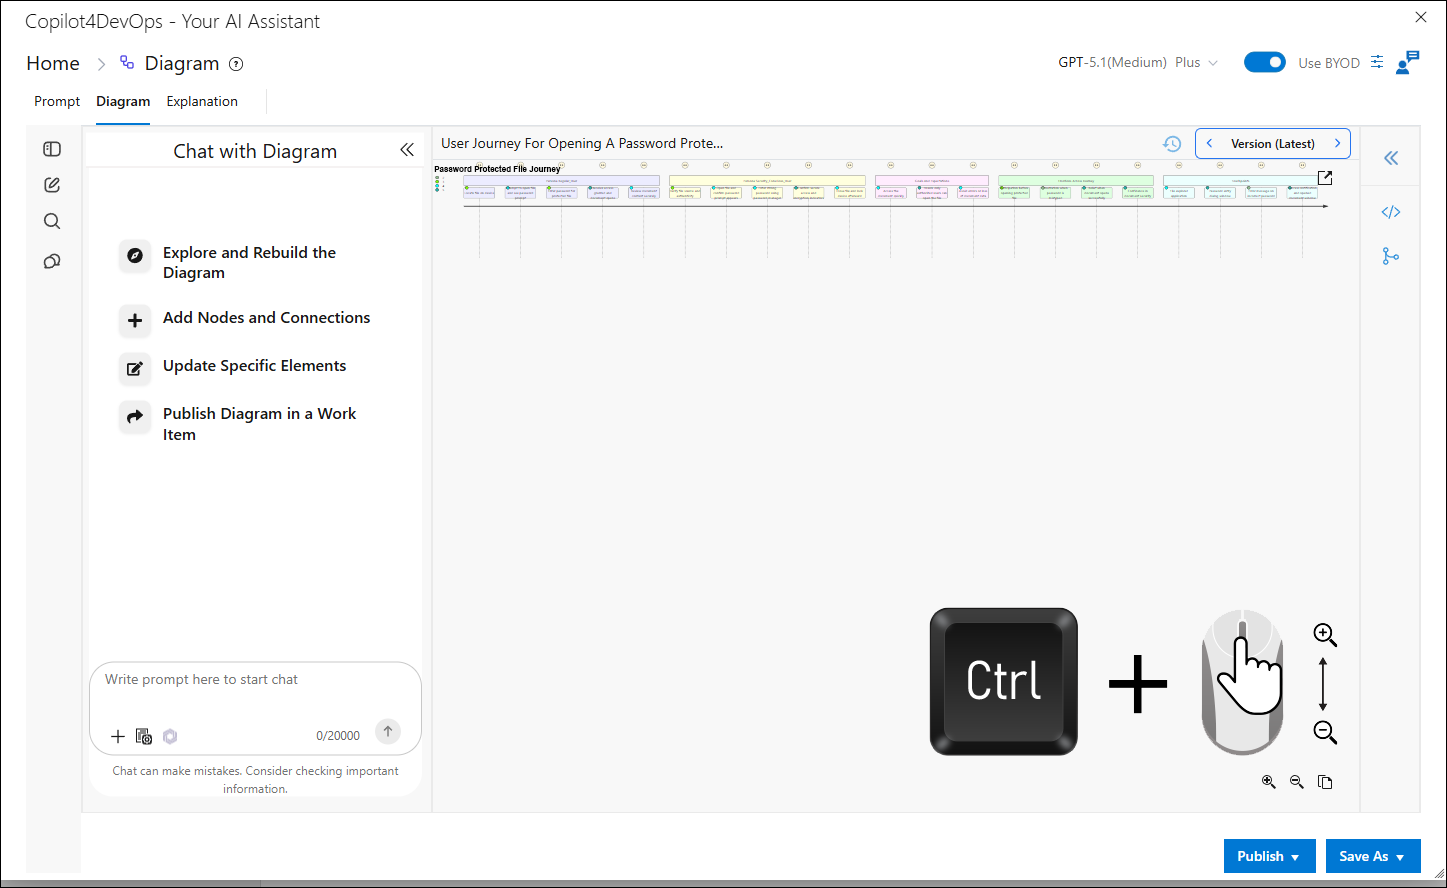
To navigate diagrams more easily, you can now use mouse-based controls. Hold Ctrl and scroll the mouse wheel over the diagram to zoom in or out.
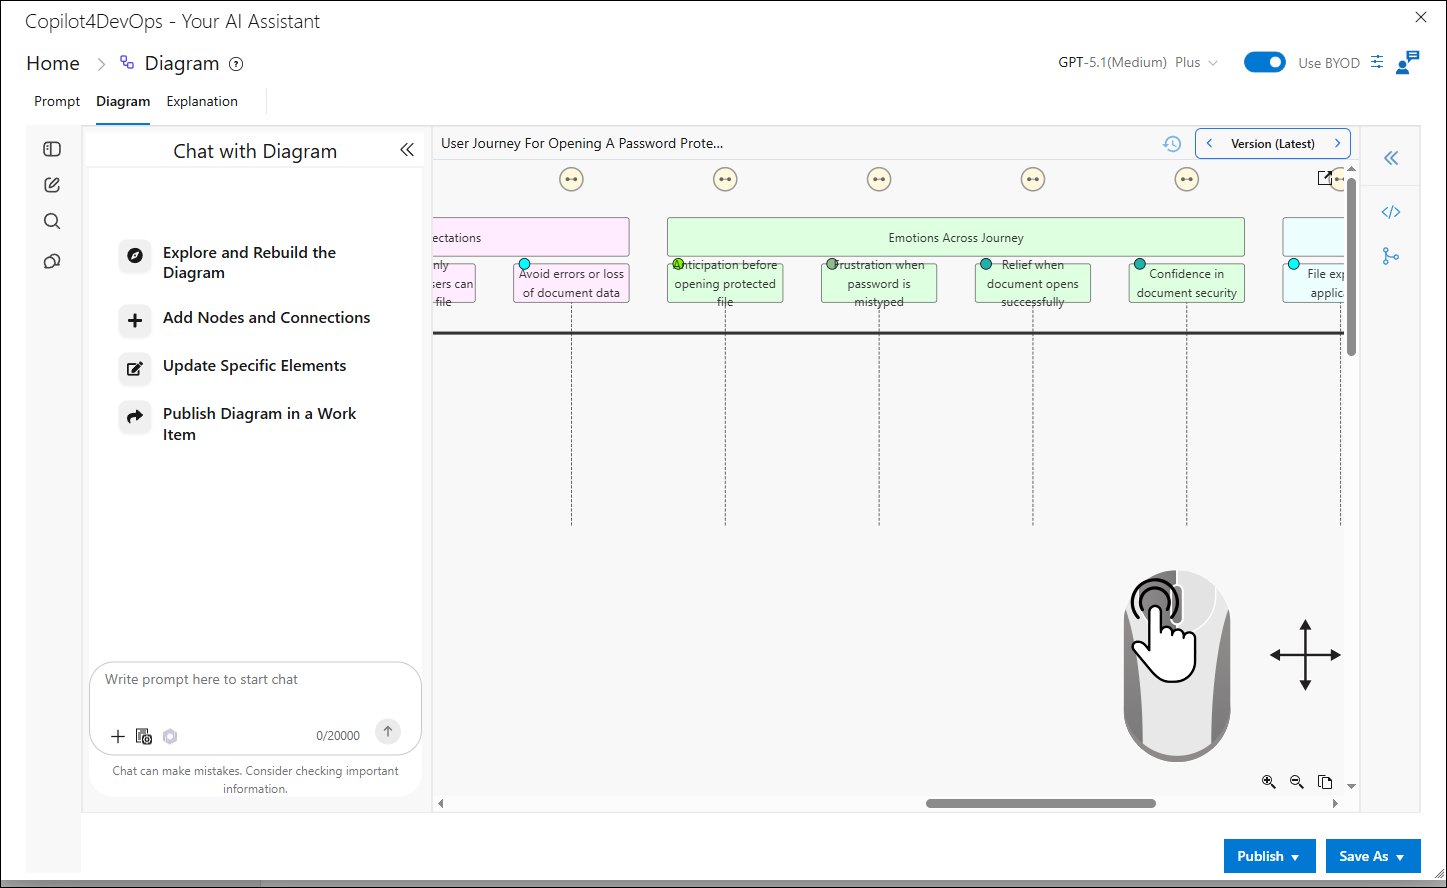
To move around the diagram, click and hold on the canvas, then drag to pan the view, helping you move smoothly without affecting diagram elements.
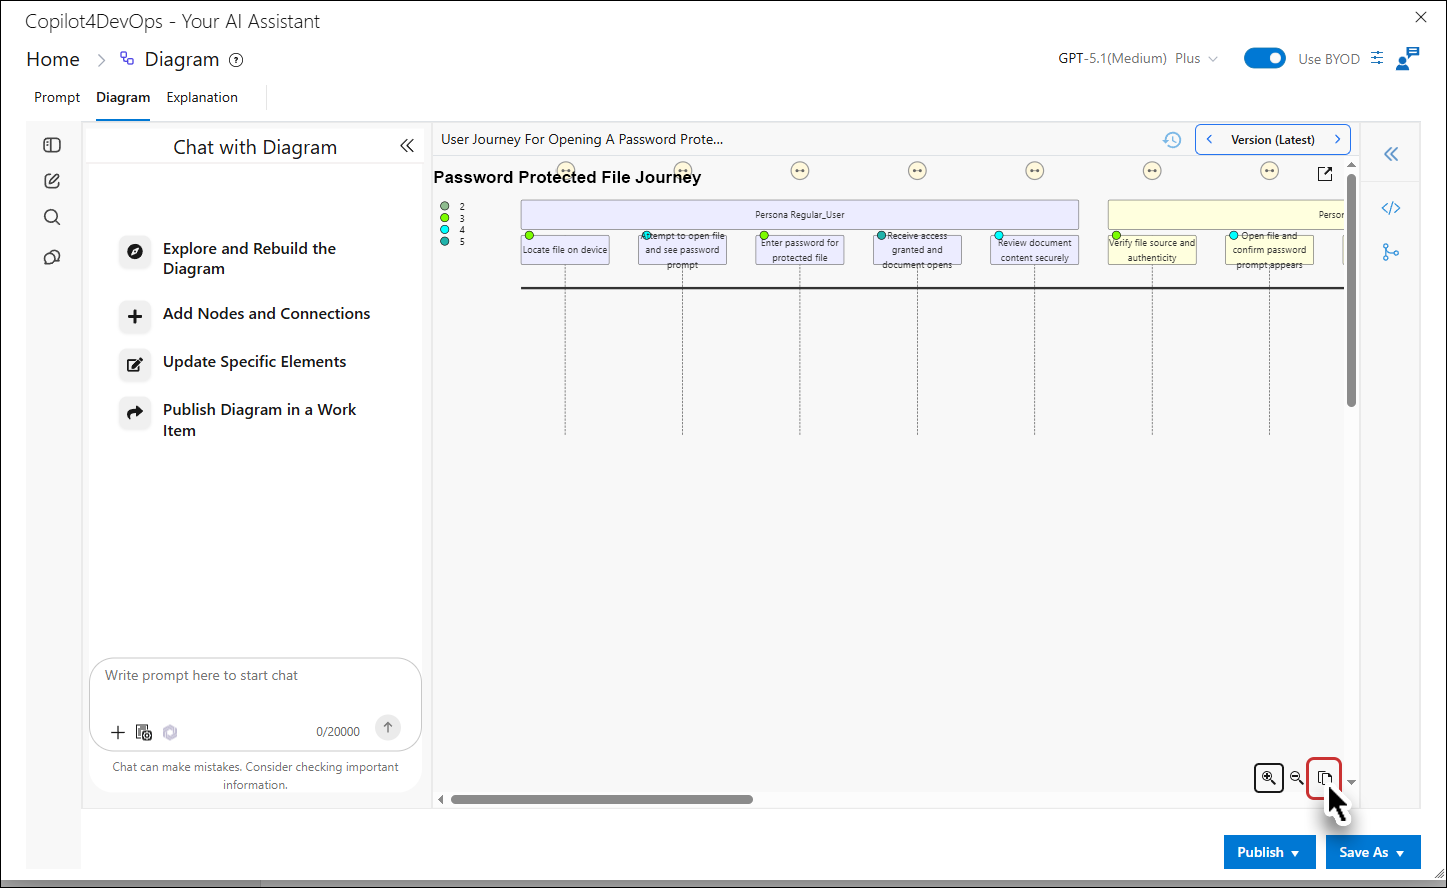
• Copy Diagram: Copy the diagram to the clipboard.
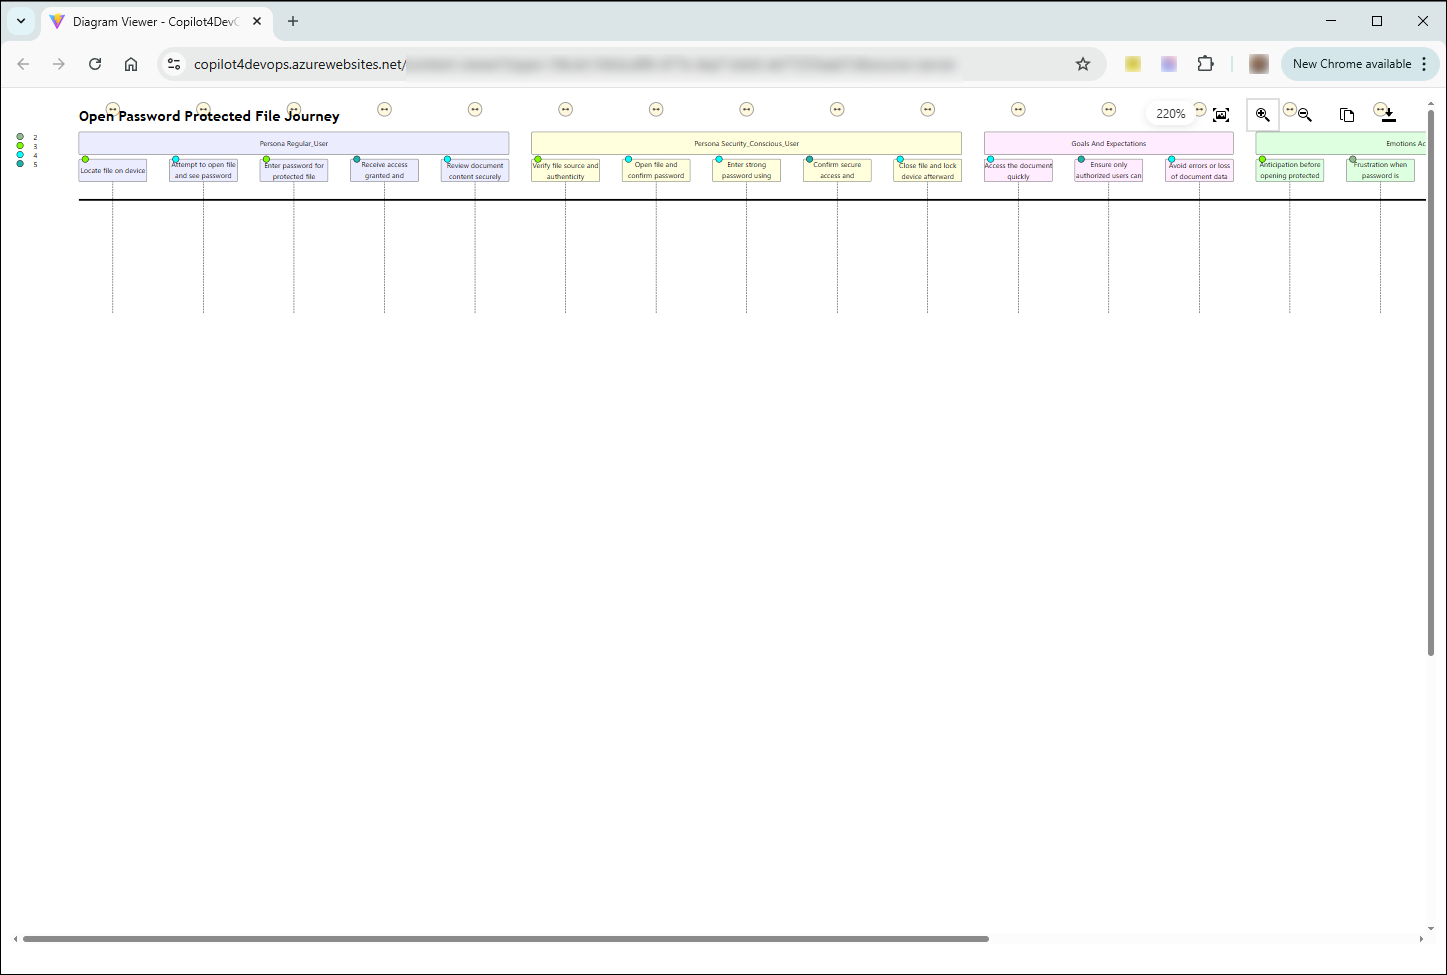
• Open in a New Window: Open the diagram in a larger view.
Step 7: Save and Publish the Diagram
Saving the Diagram
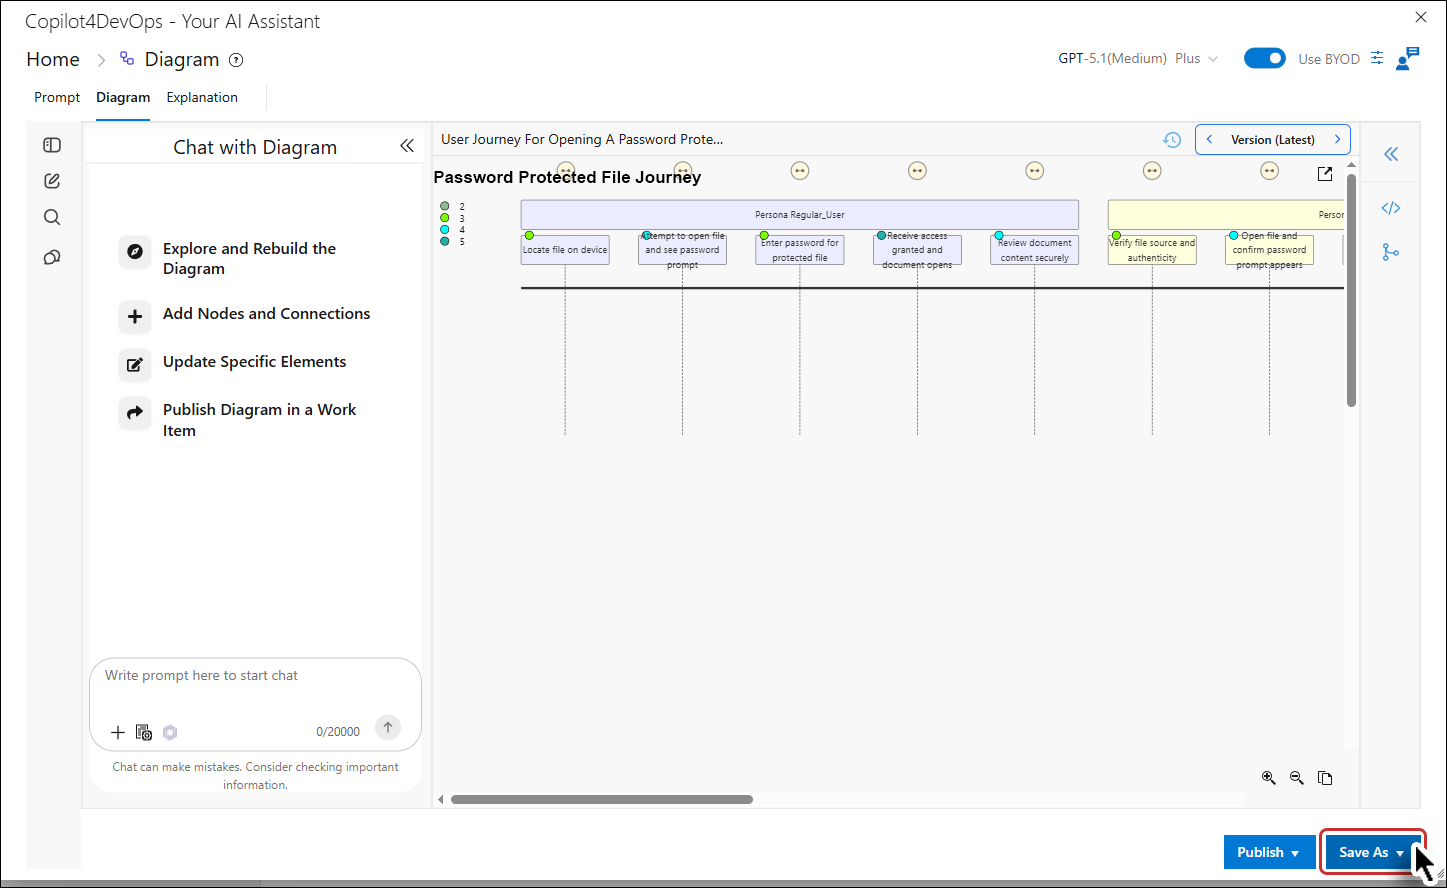
1. After generating or modifying a diagram, click on the Save As option in the interface.
2. Choose the desired format for saving the diagram:
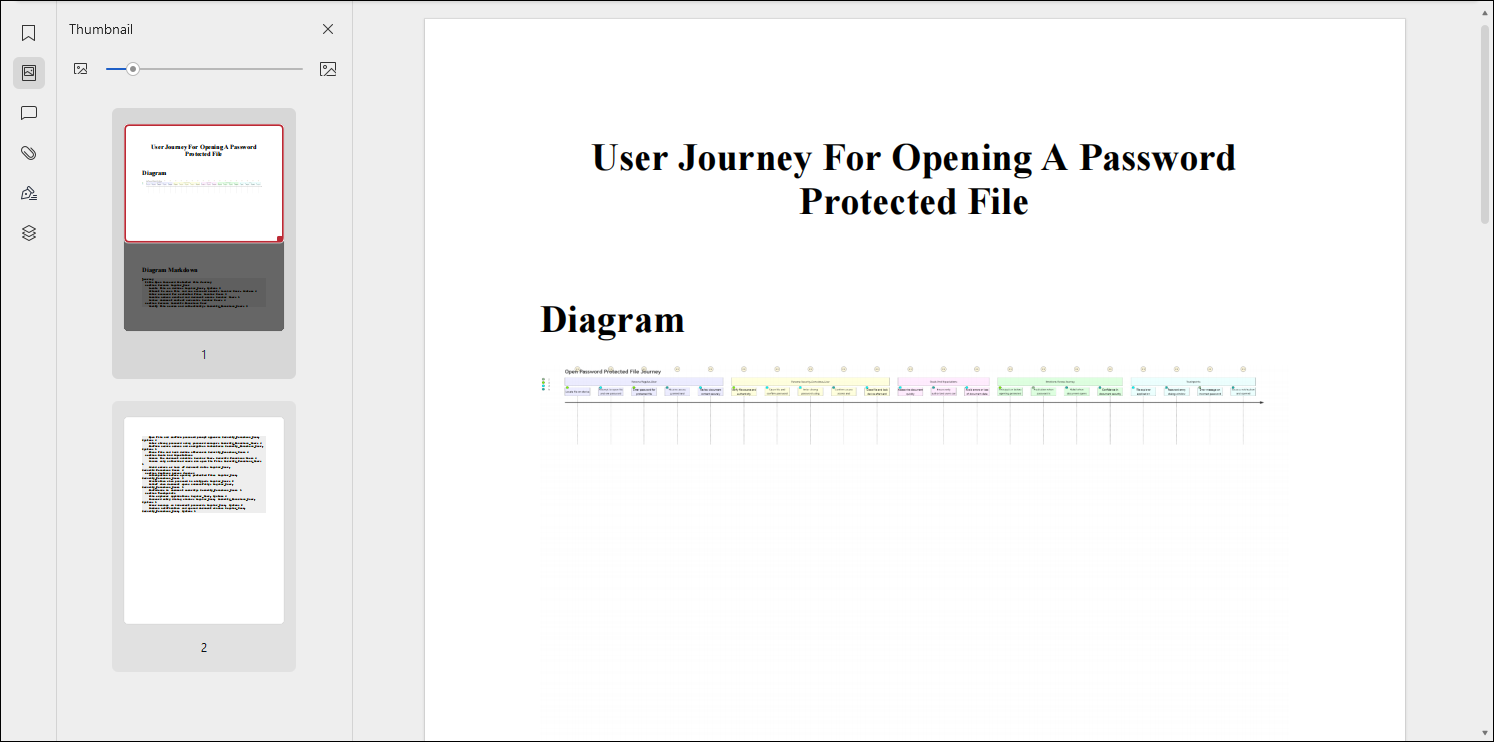
• Word File (.docx): Includes the Diagram, Explanation, and Diagram Markdown.
• PDF File (.pdf): Includes the Diagram, Explanation, and Diagram Markdown.
• Image File (.svg): Saves the Diagram as a standalone image.
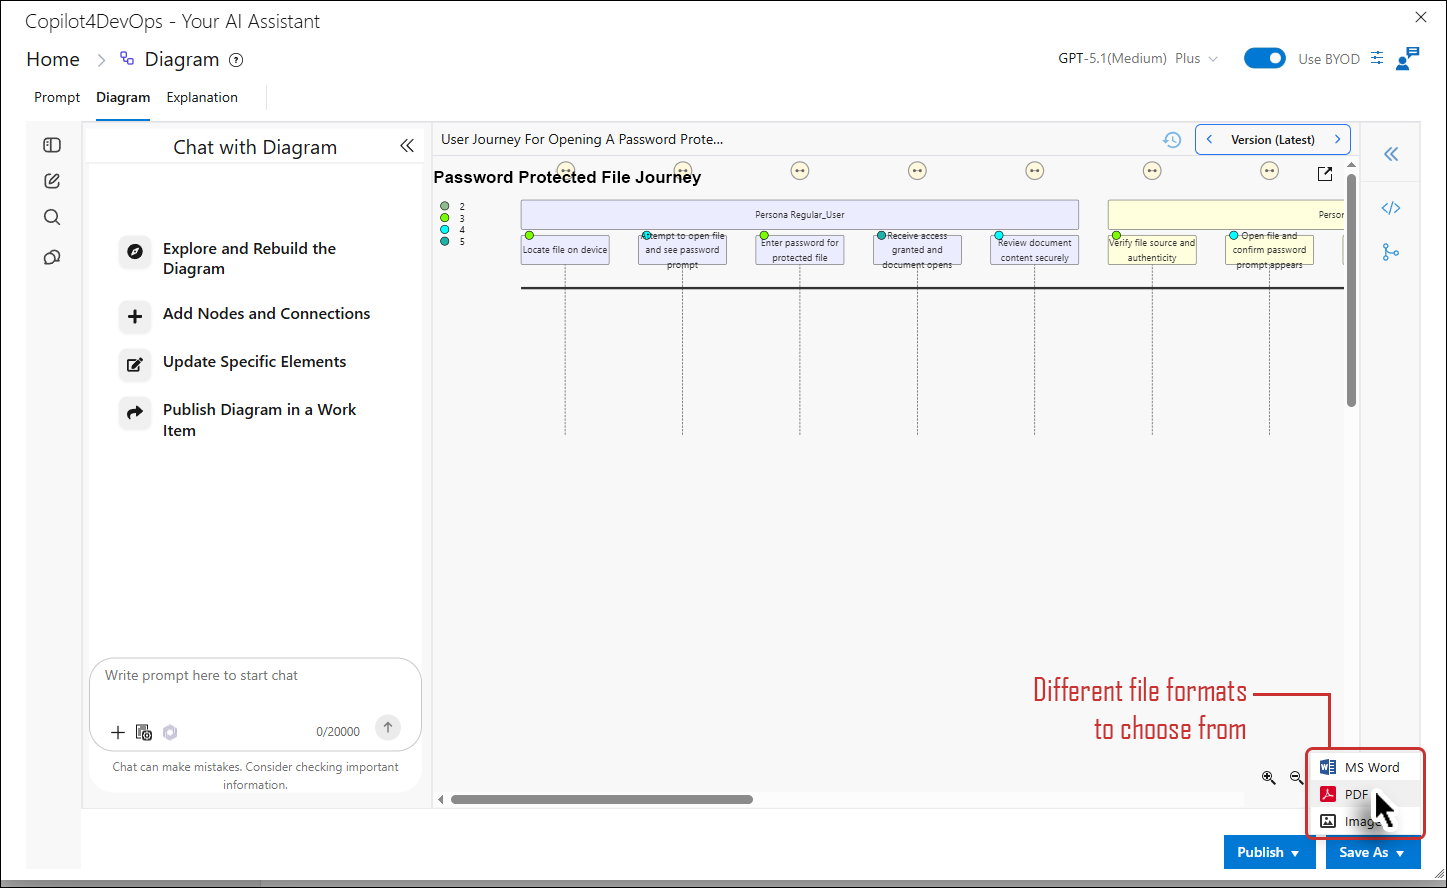
Once the format has been selected the file is downloaded.
3. Click on the downloaded file.
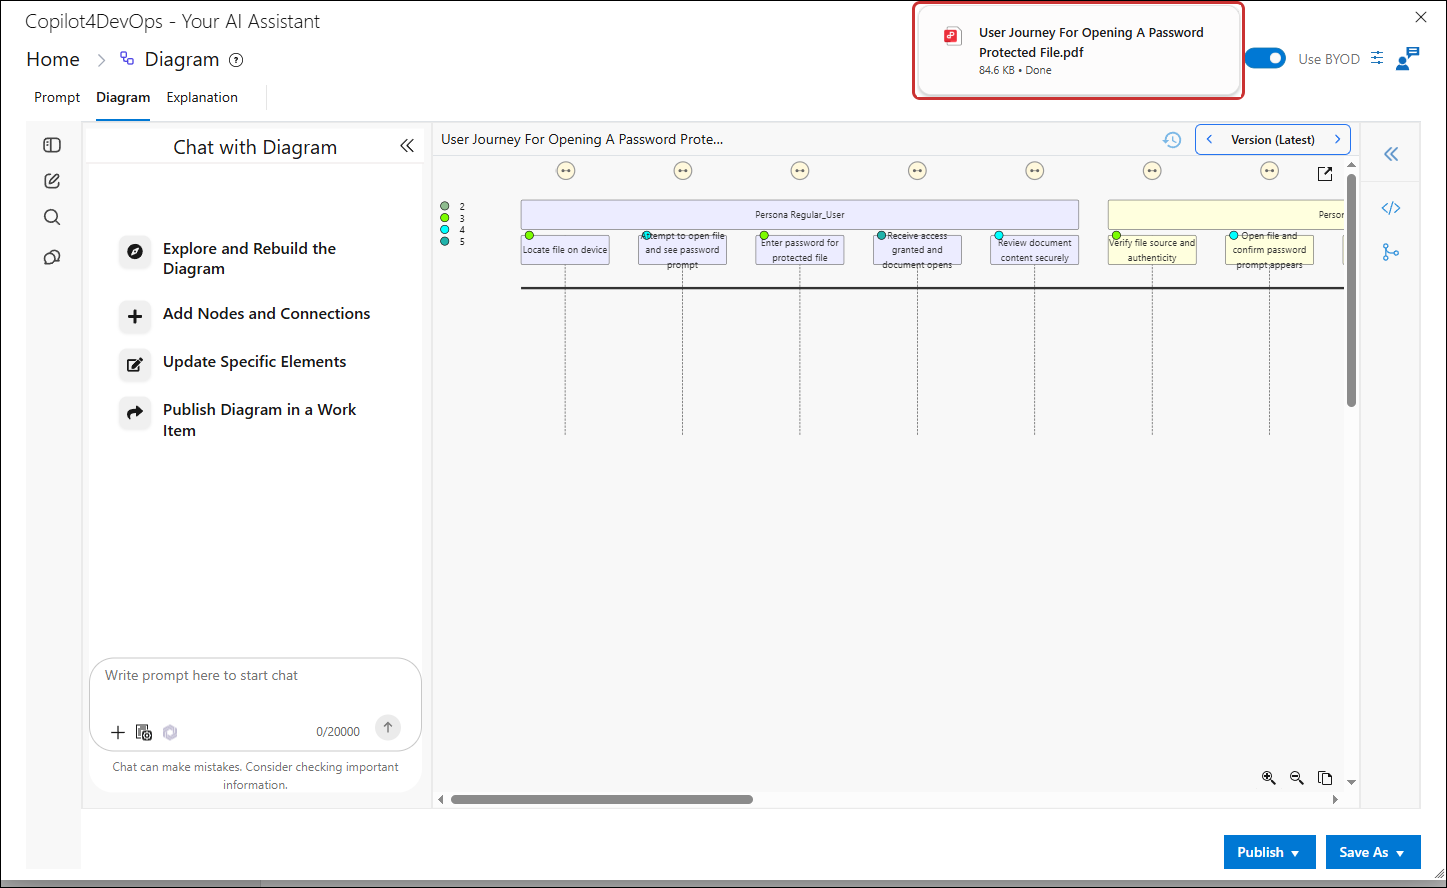
Users can view the downloaded file.
Publishing the Diagram
The user can publish diagrams to Work Items (WIs) either by updating an existing WI or creating a new one:
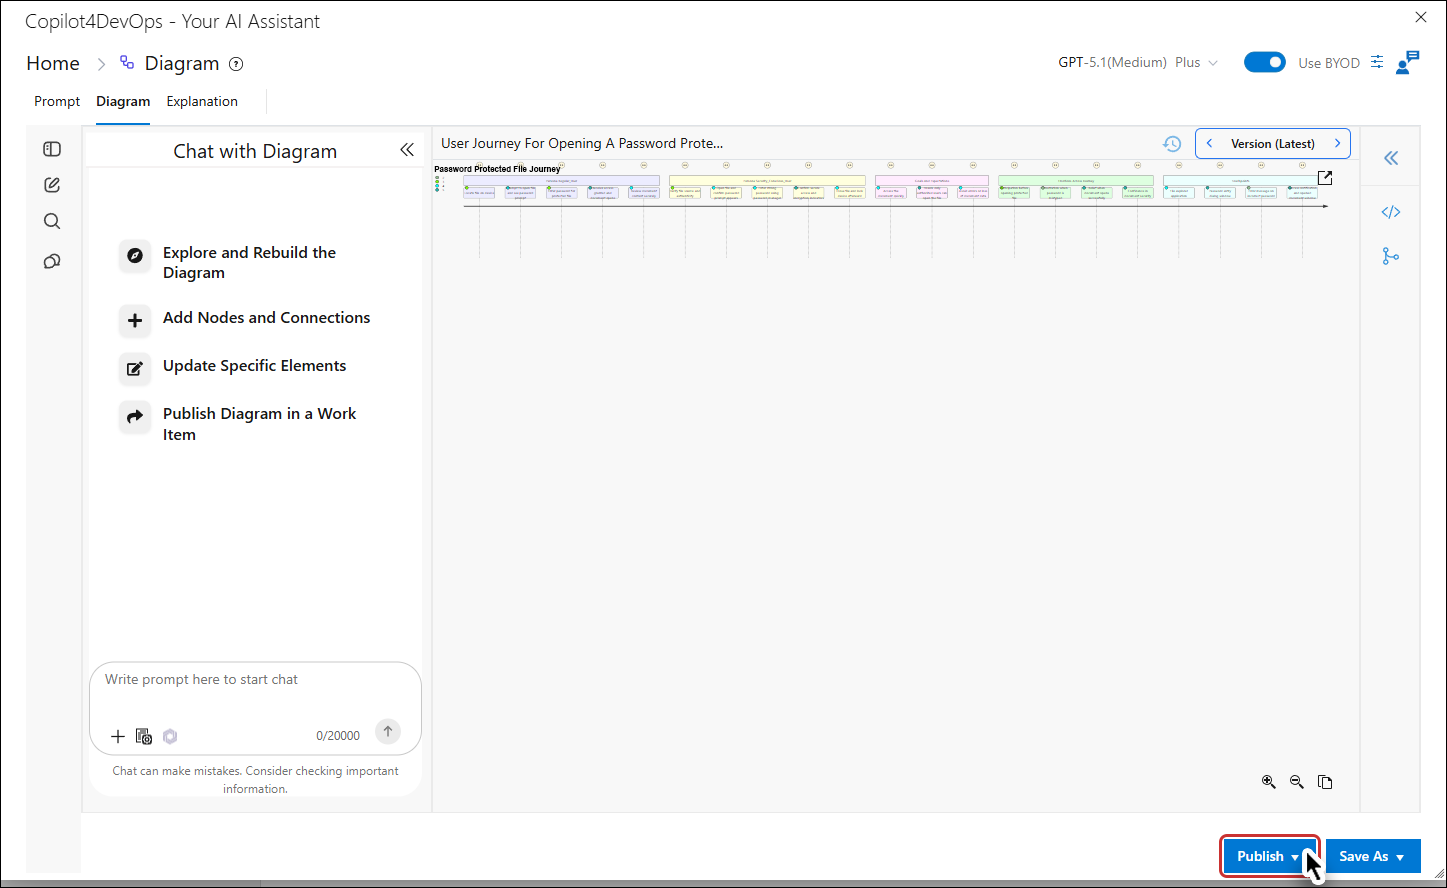
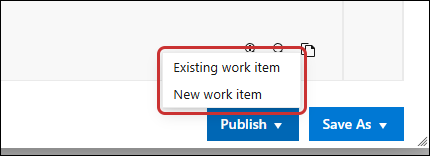
Option 1: Publish to an Existing Work Item
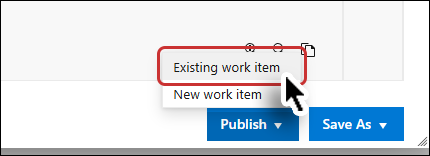
1. Choose the option to publish the diagram to Existing Work Item.
Note: If the diagram was generated using only a prompt and not a work item, the 'Existing Work Item' option will be disabled.
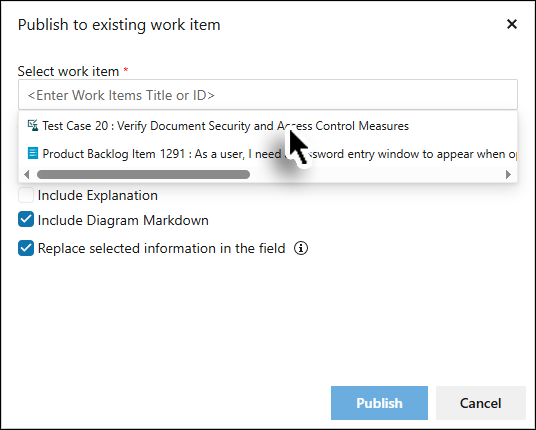
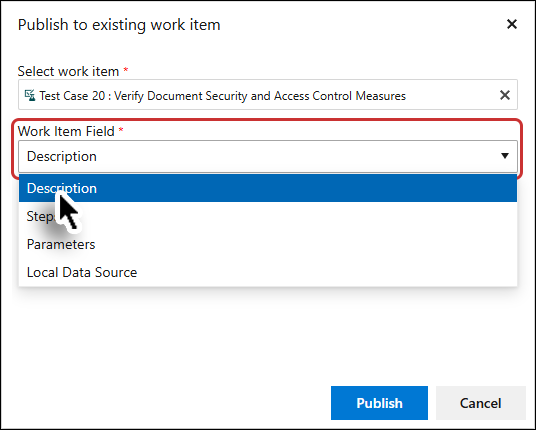
2. Select an existing WI from the provided list and choose the work item field. Only those work items will be shown in this dropdown that have been selected for the context. If no work item has been selected for the context of the diagram user won't be able to publish the diagram to Existing Work Item and the option will be shown disabled.
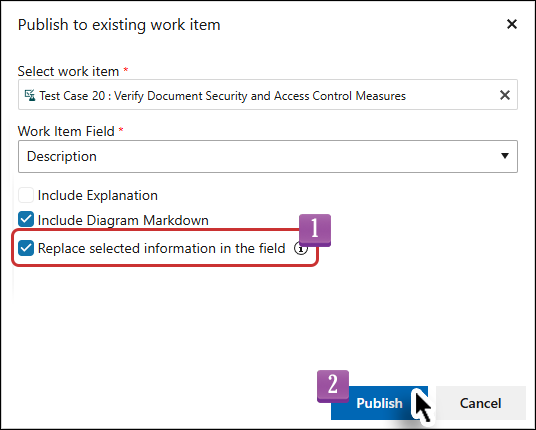
3. Decide whether to include the explanation and diagram Markdown in the Work Item (WI).
Note: If the 'Include Explanation' checkbox is not enabled, it indicates that the diagram's explanation has not been generated yet. Should the user click the checkbox, the explanation will be generated in real time. If the explanation has already been generated, the checkbox will be selected by default.
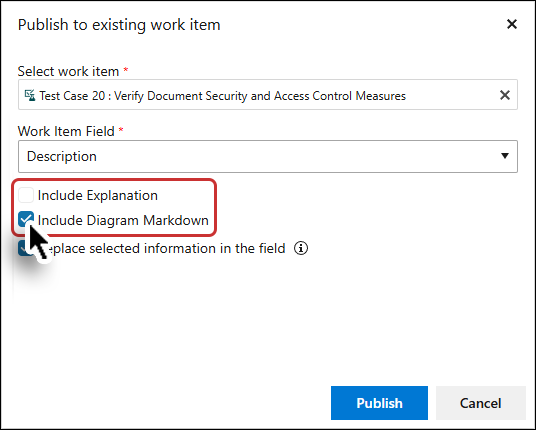
4. Select if you want to replace the selected information in the field and then click on the Publish button.
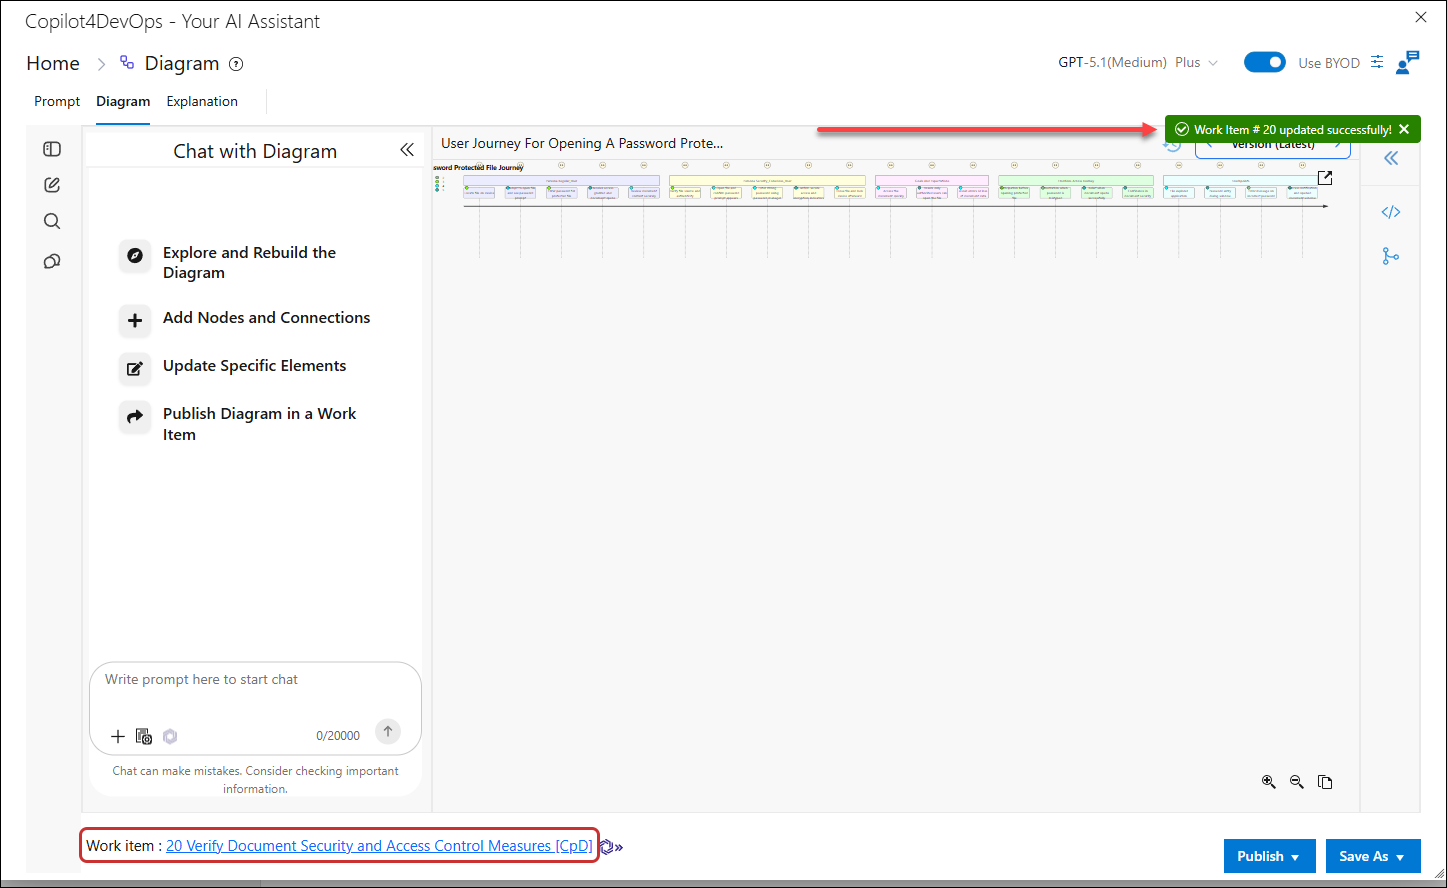
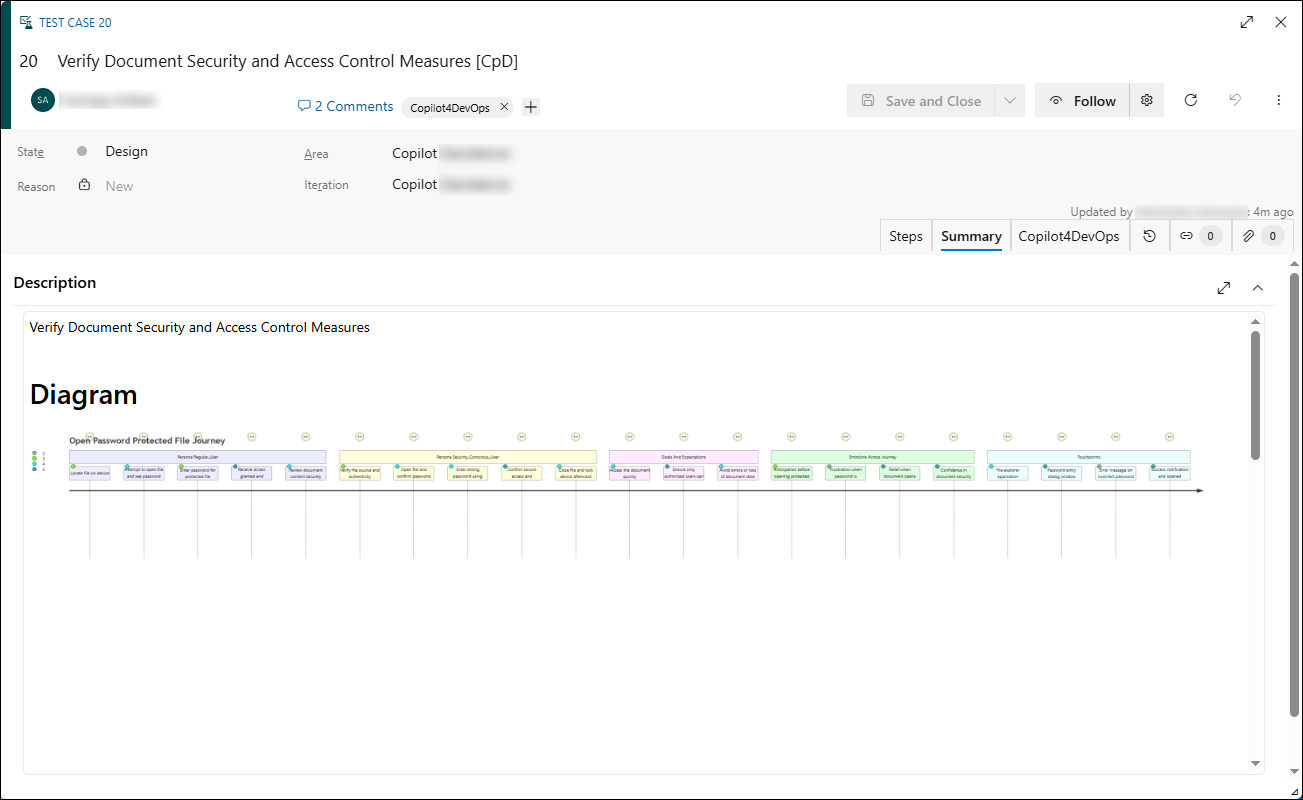
The existing work item has been updated successfully.
Option 2: Publish to a New Work Item
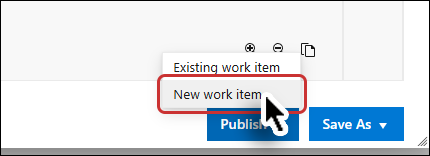
1. Choose the option to create a New Work Item during publishing.
2. A default title for the new WI will be auto-generated. You can edit the title before completing the publishing process.
Note: The title will include a CpD postfix (e.g., "New Workflow Diagram [CpD]").
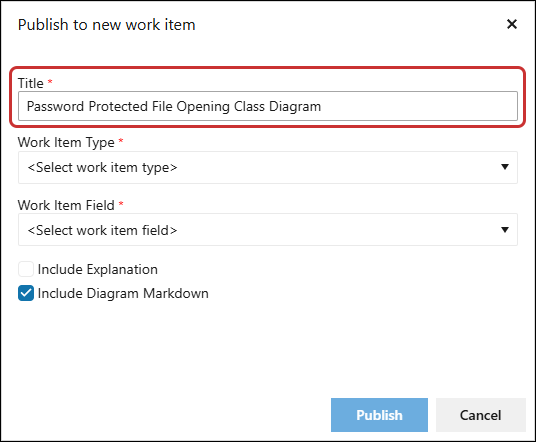
3. Select the Work item type.
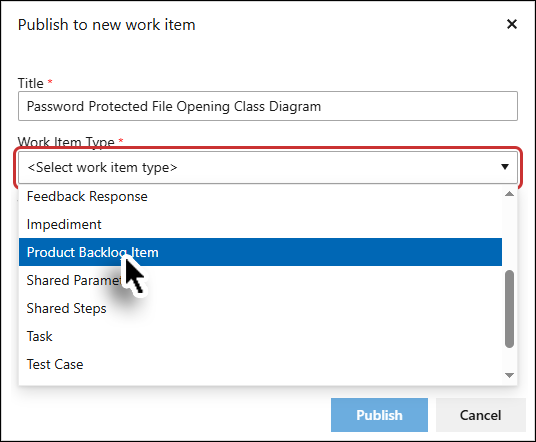
4. Select the Work item field.
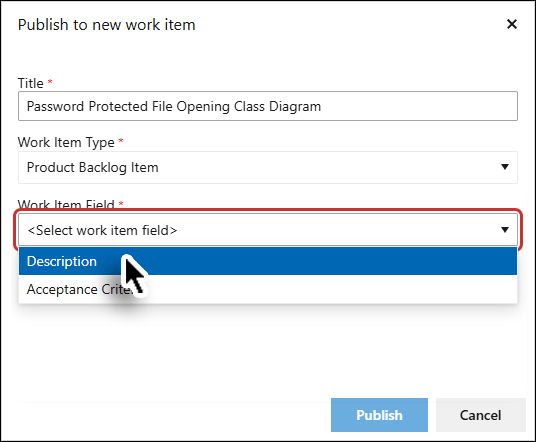
5. Decide whether to include the explanation and diagram Markdown in the new WI.
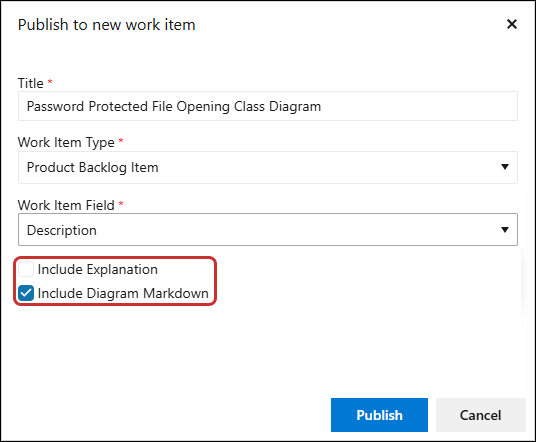
6. Click on the "Publish" button.
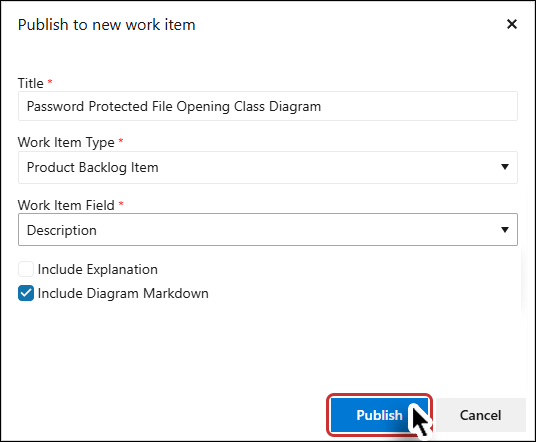
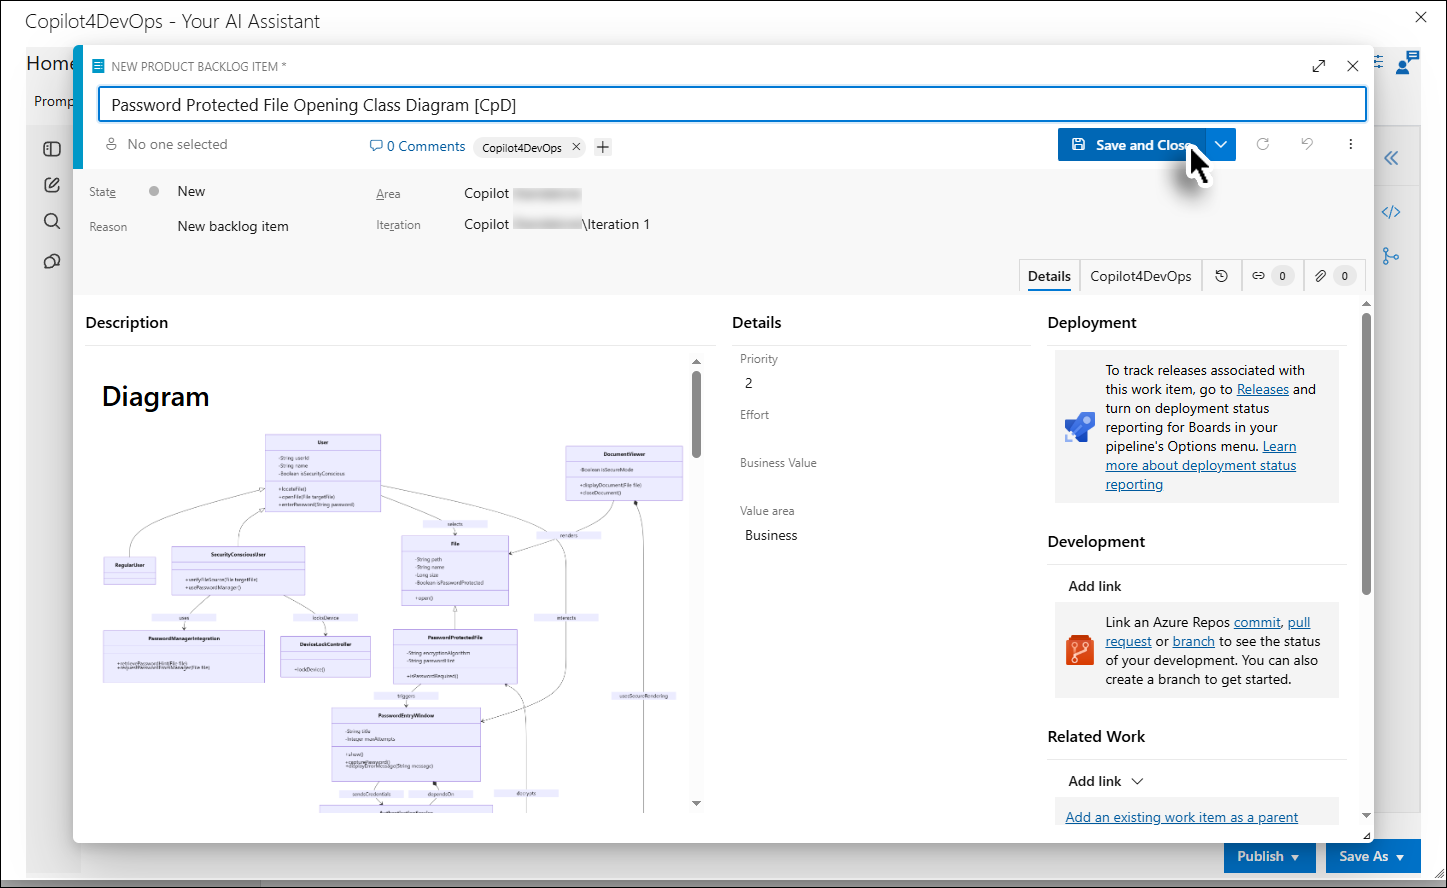
The new work item with diagram has been published successfully.
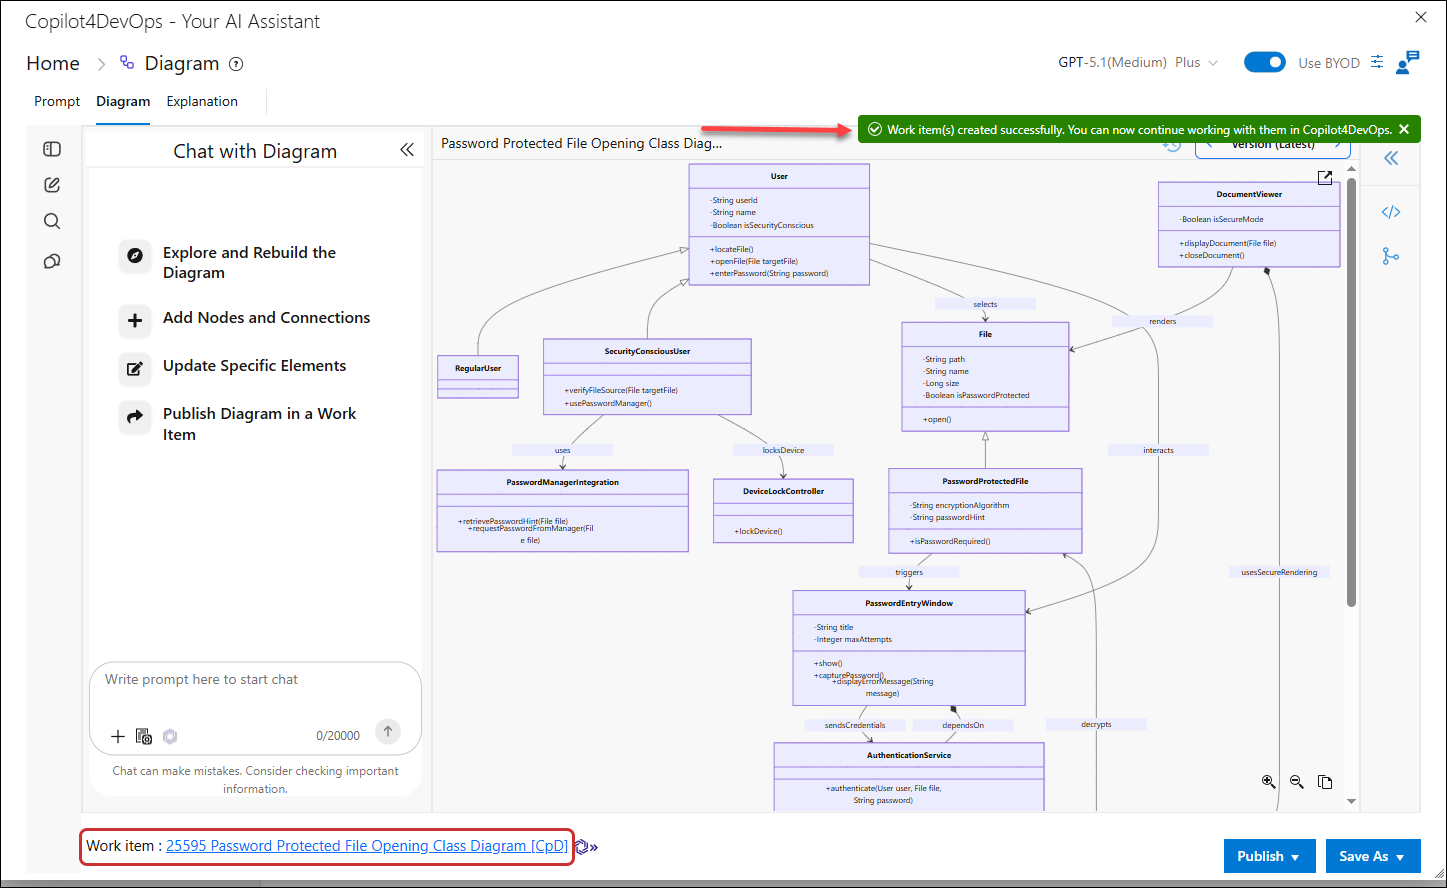
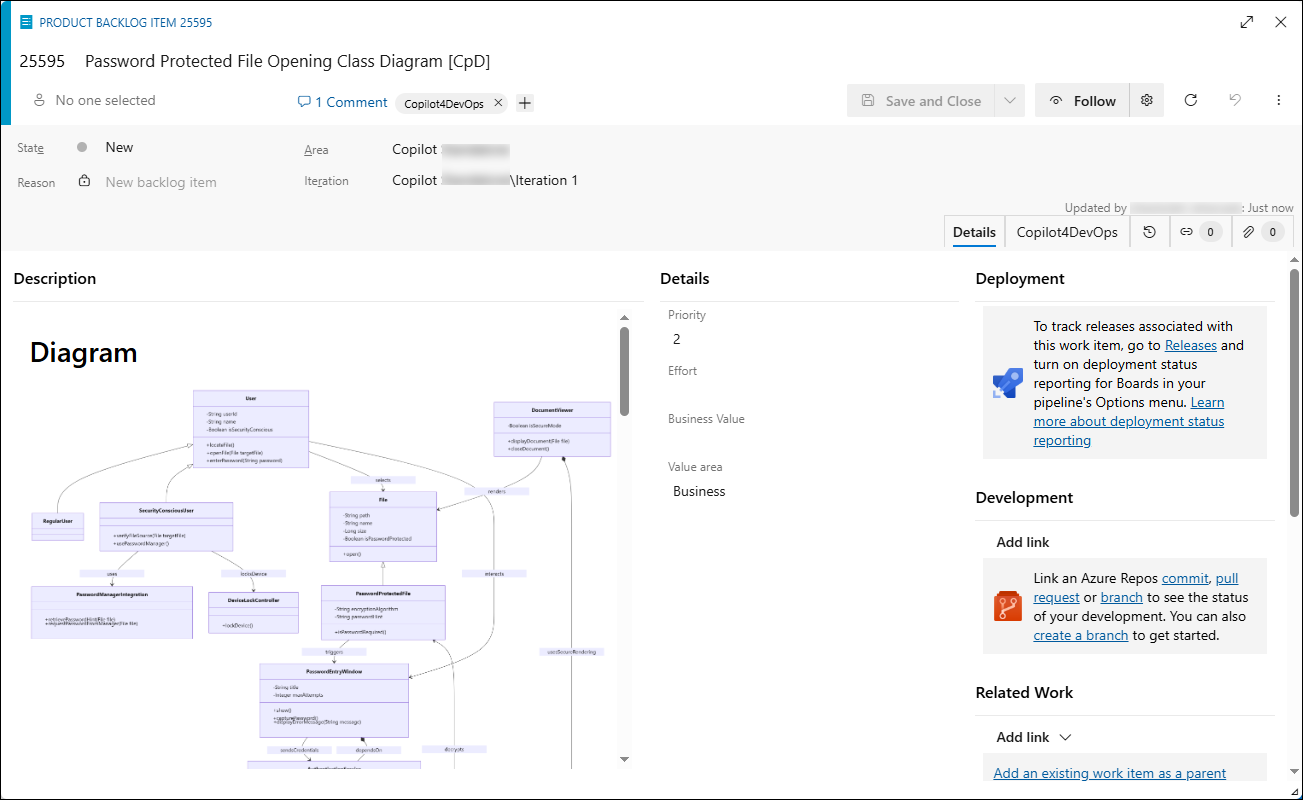
Note: When a work item is created from Copilot4DevOps, it automatically inherits both the Area Path and the Iteration Path of the parent (anchor) work item, keeping child items aligned with their parent's area and sprint and reducing manual effort during planning.
-
Before the work item is created, the system validates whether the current user has permission to create or edit work items in the inherited Area Path.
-
If the user has access, the work item is created successfully with the inherited Area Path and Iteration Path.
-
If the user does not have access to the inherited Area Path, the Work Item window opens so the user can change the Area Path before creating the work item.
Entering Diagram Markdown to Generate a Diagram
1. If you have a Diagram Markdown you can directly go to the Diagram tab and enter the Diagram Markdown directly to generate a diagram.
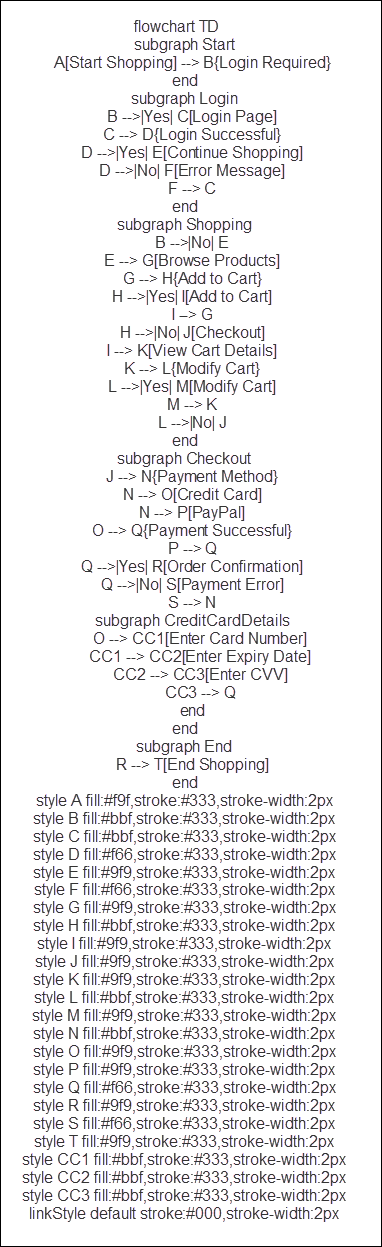
2. Directly go to the Diagram tab.
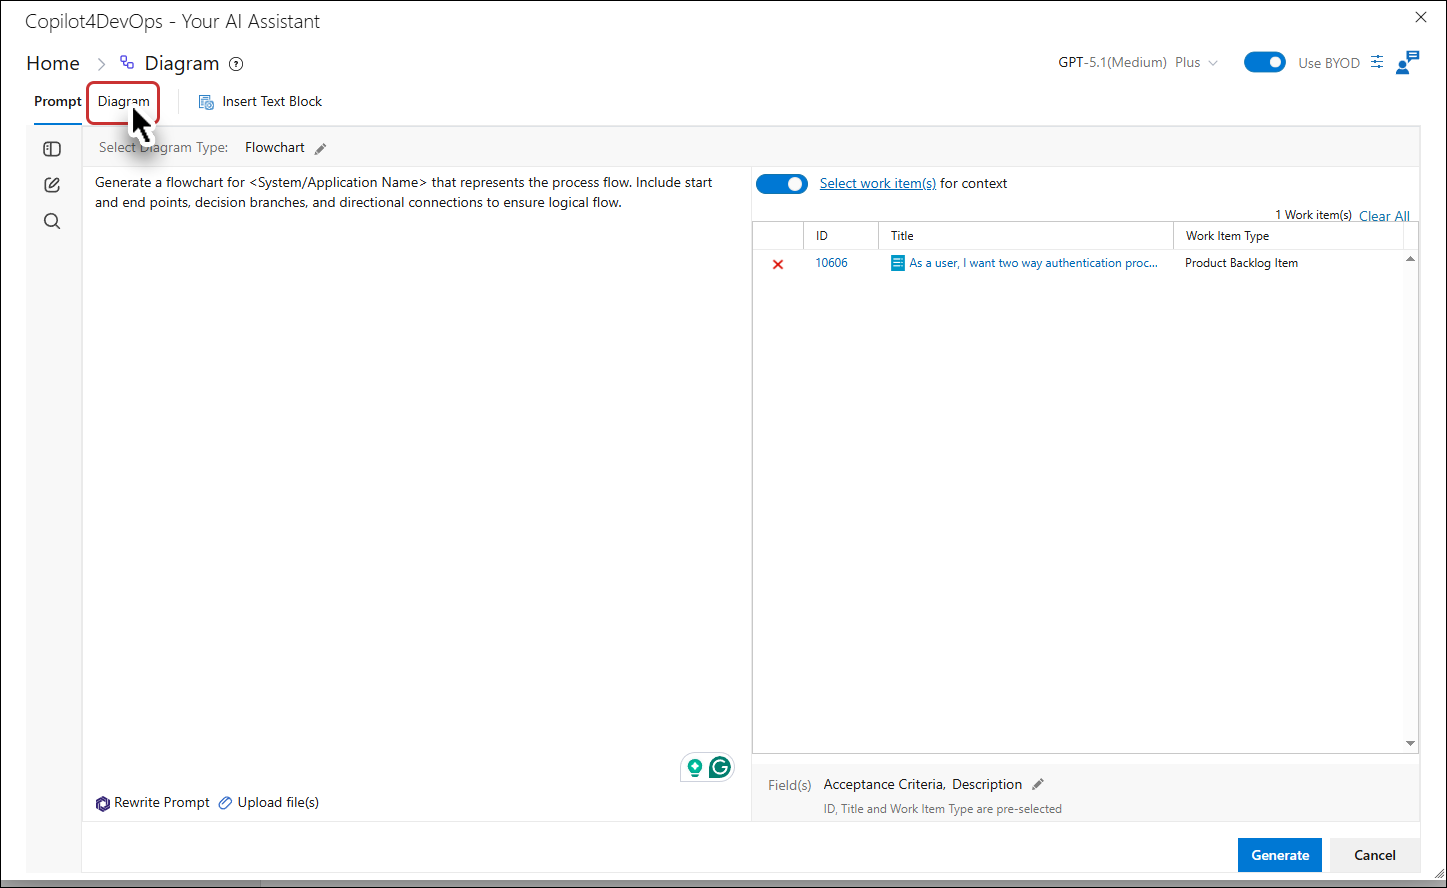
3. Click the Markdown button to open the panel.
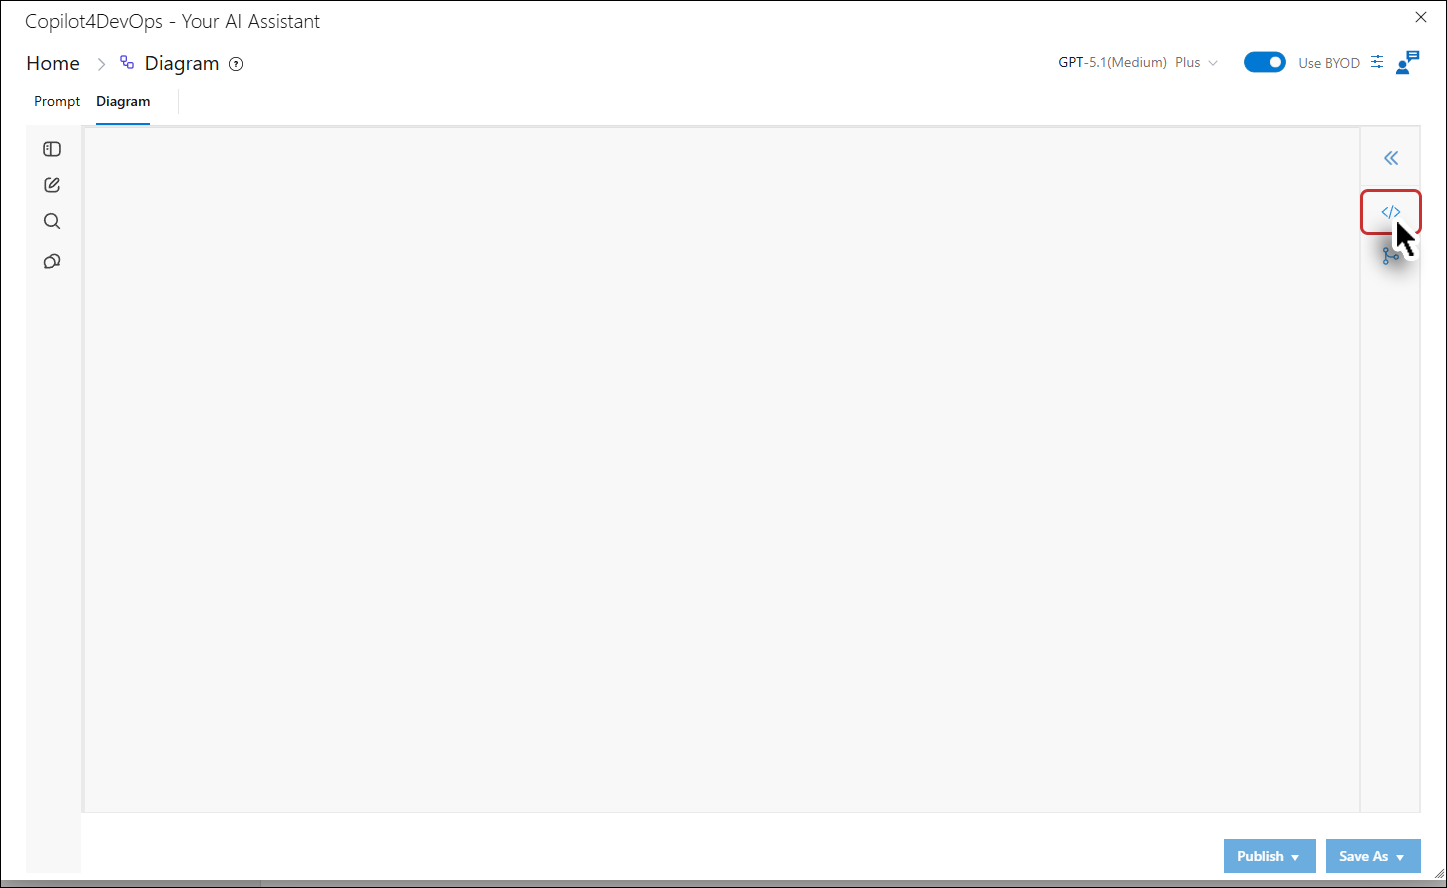
4. Paste / Type the Diagram Markdown.
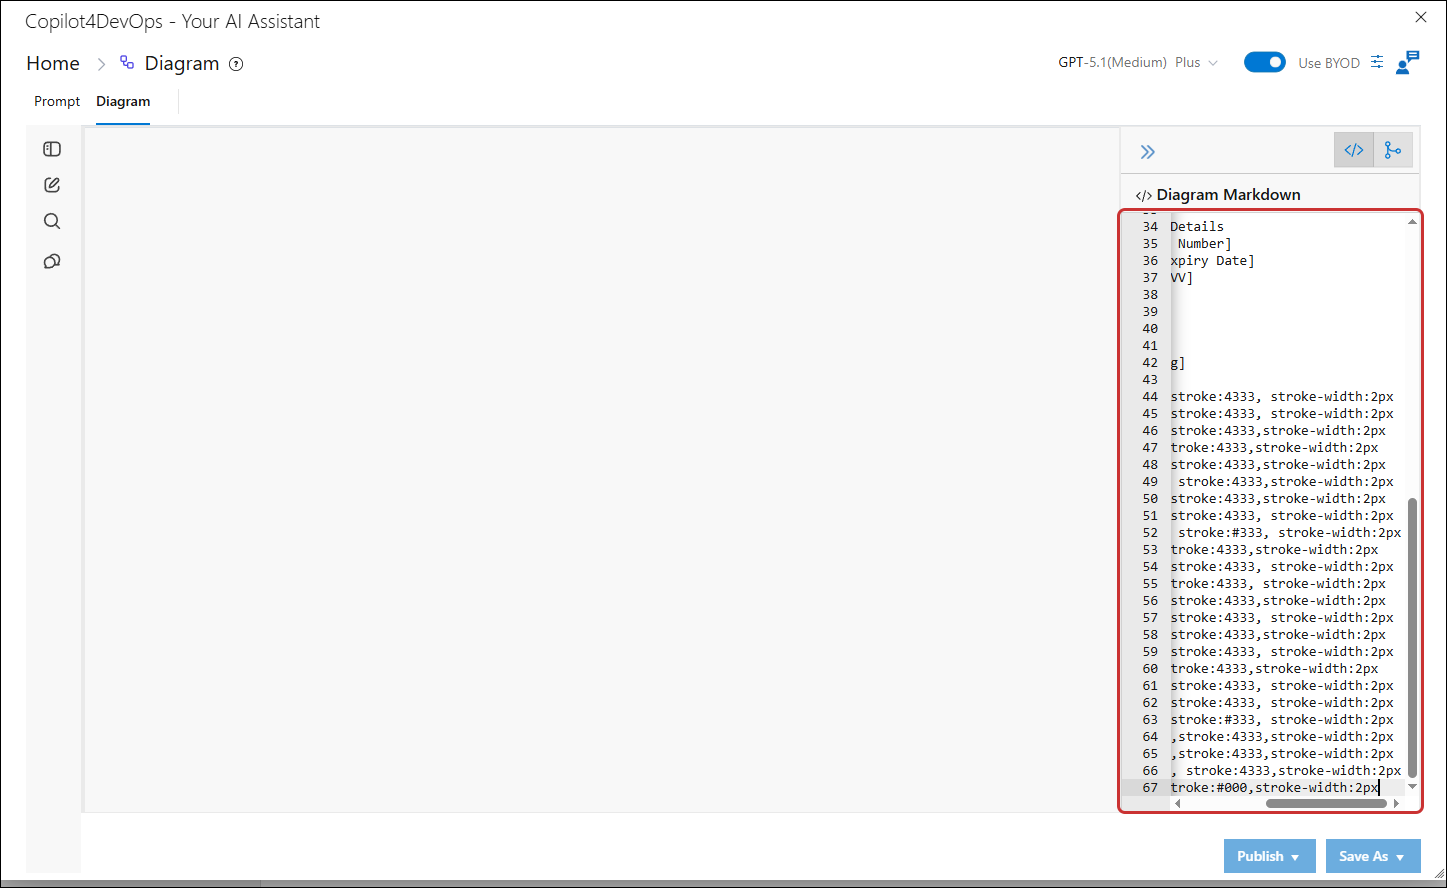
5. The diagram has been generated directly using the Diagram Markdown.
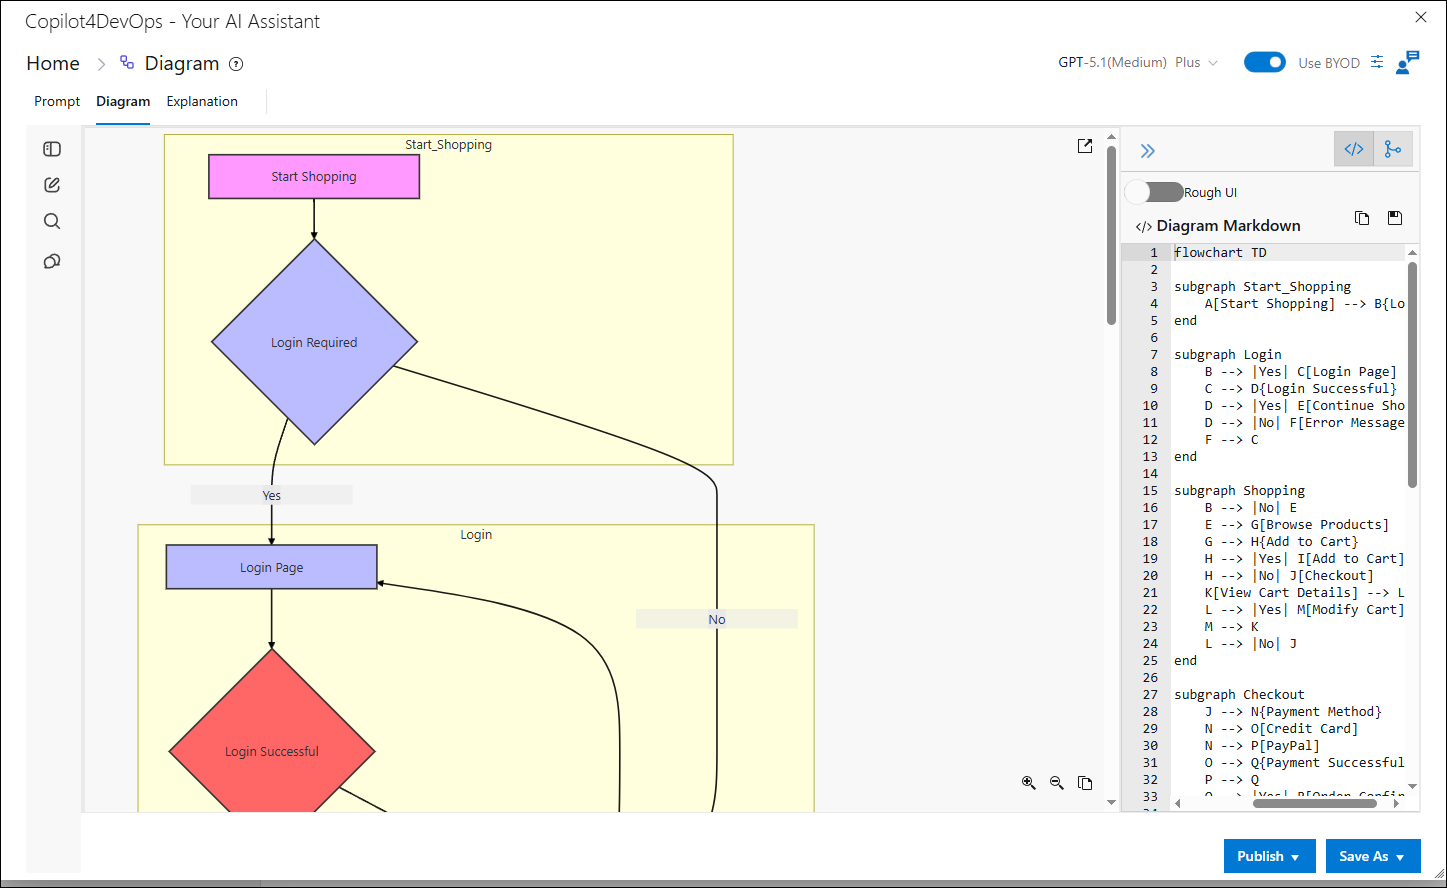
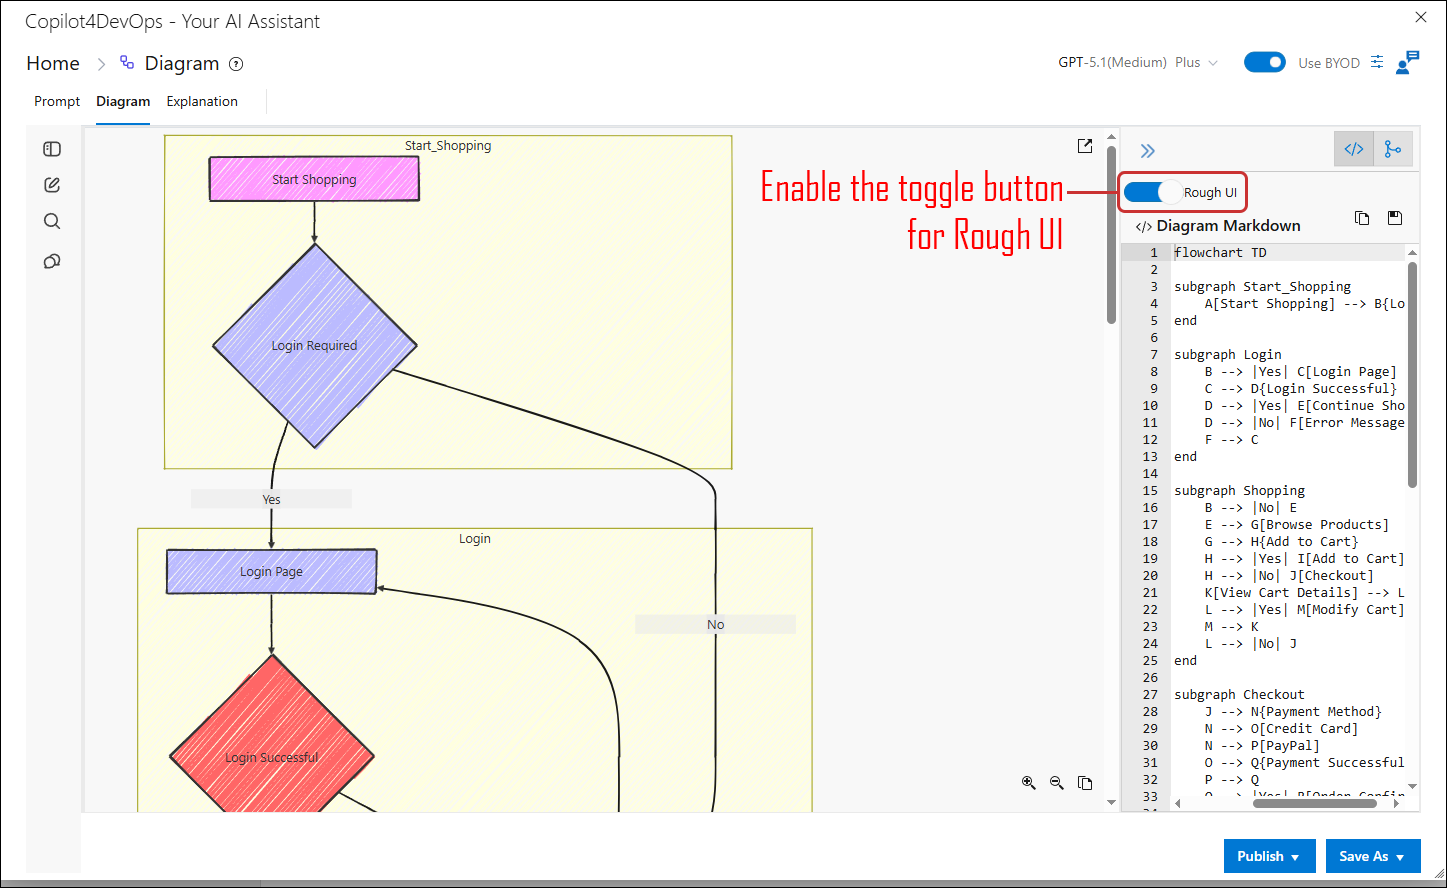
Rough UI Functionality
A Rough UI feature enables users to create diagrams with a deliberately hand-drawn, sketch-like aesthetic. This approach is particularly valuable in the early stages of design or ideation, as it prioritizes concept exploration over detailed styling or refined visuals. By simulating the appearance of rough sketches, the feature fosters rapid prototyping and encourages iterative feedback, allowing users to focus on functionality, structure, and user flow rather than visual precision. This informal yet effective presentation style supports collaboration by making it clear that the design is still in a conceptual phase, inviting constructive input and facilitating innovation.