Saving and Publishing a Diagram
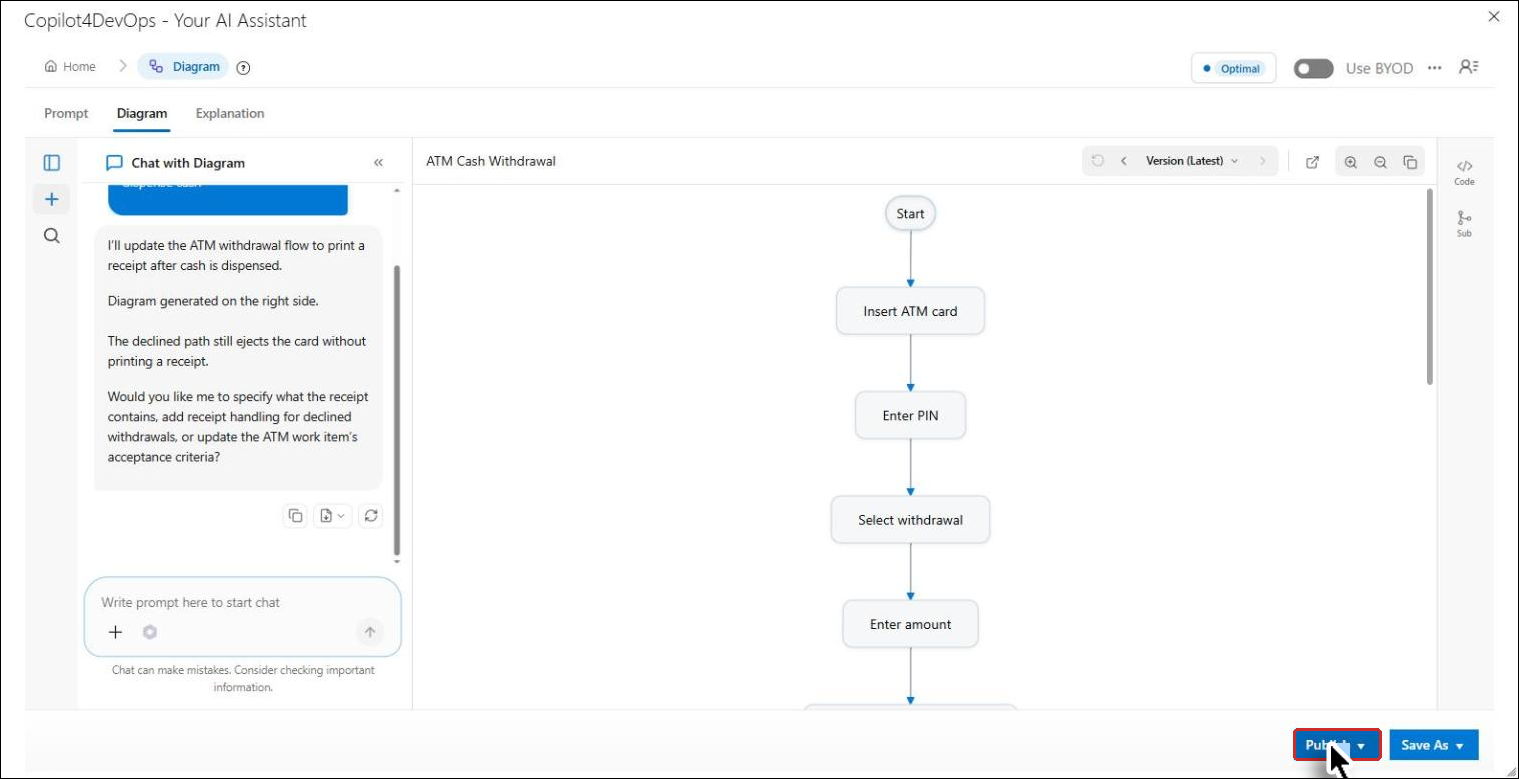
After a diagram has been generated (see Generating a Diagram), you can save it as a file or publish it to a work item from the bottom of the Diagram tab.
Saving the Diagram
1. After generating or modifying a diagram, click on the Save As option in the interface.
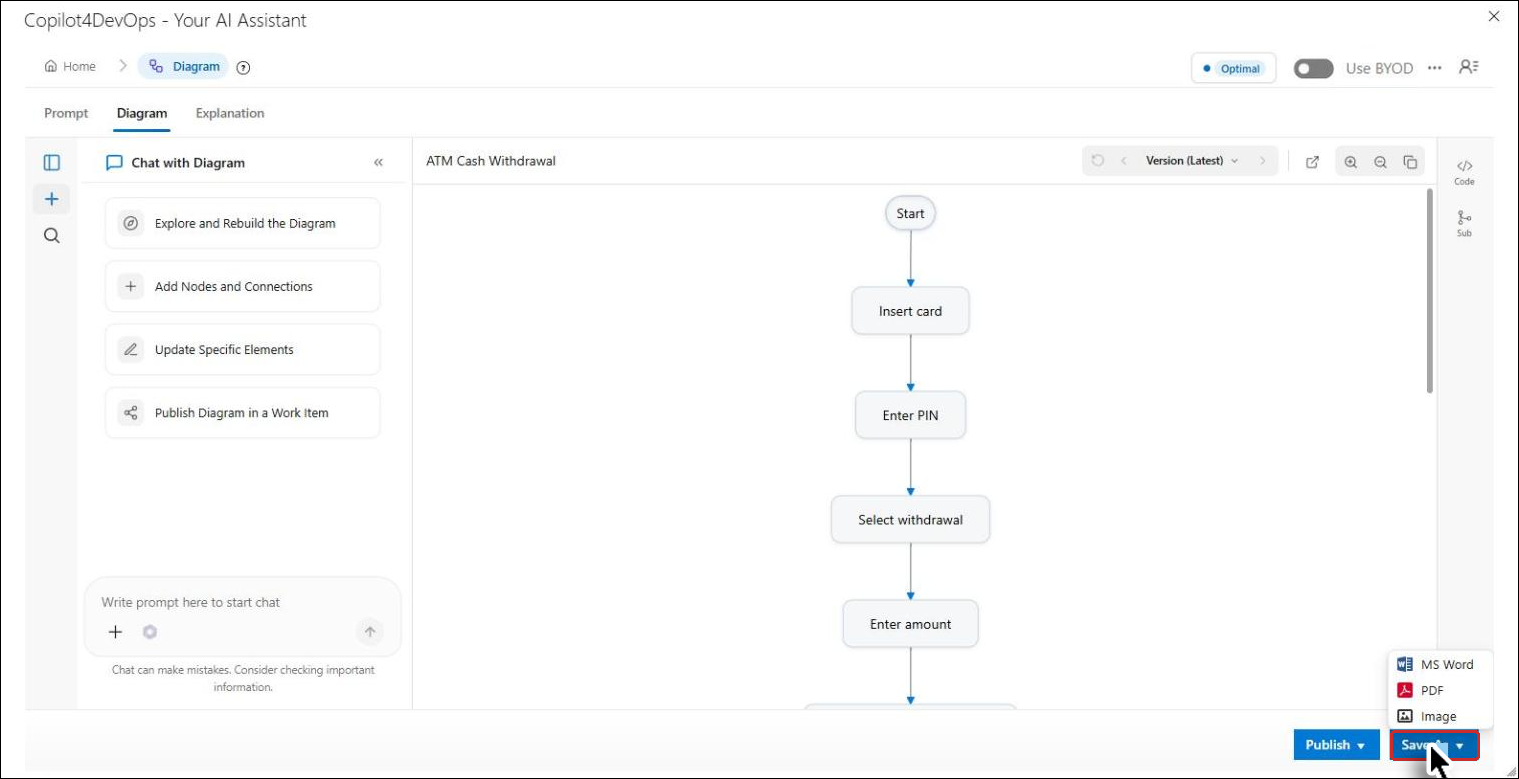
2. Choose the desired format for saving the diagram:
MS Word (.docx): Includes the Diagram, Explanation, and Diagram Markdown.
PDF (.pdf): Includes the Diagram, Explanation, and Diagram Markdown.
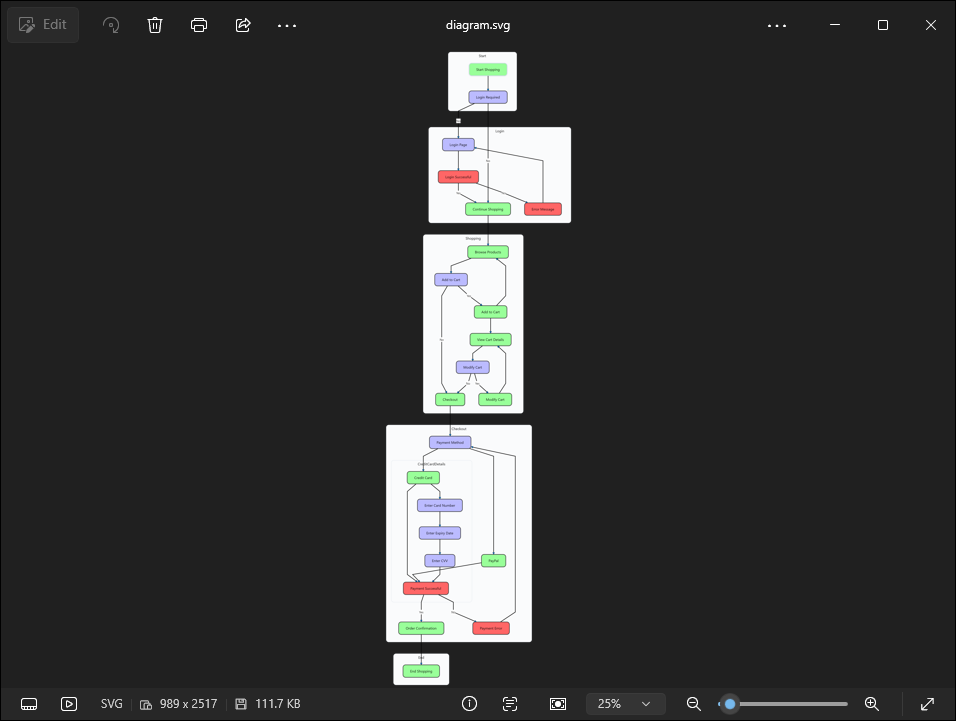
Image (.svg): Saves the Diagram as a standalone image.
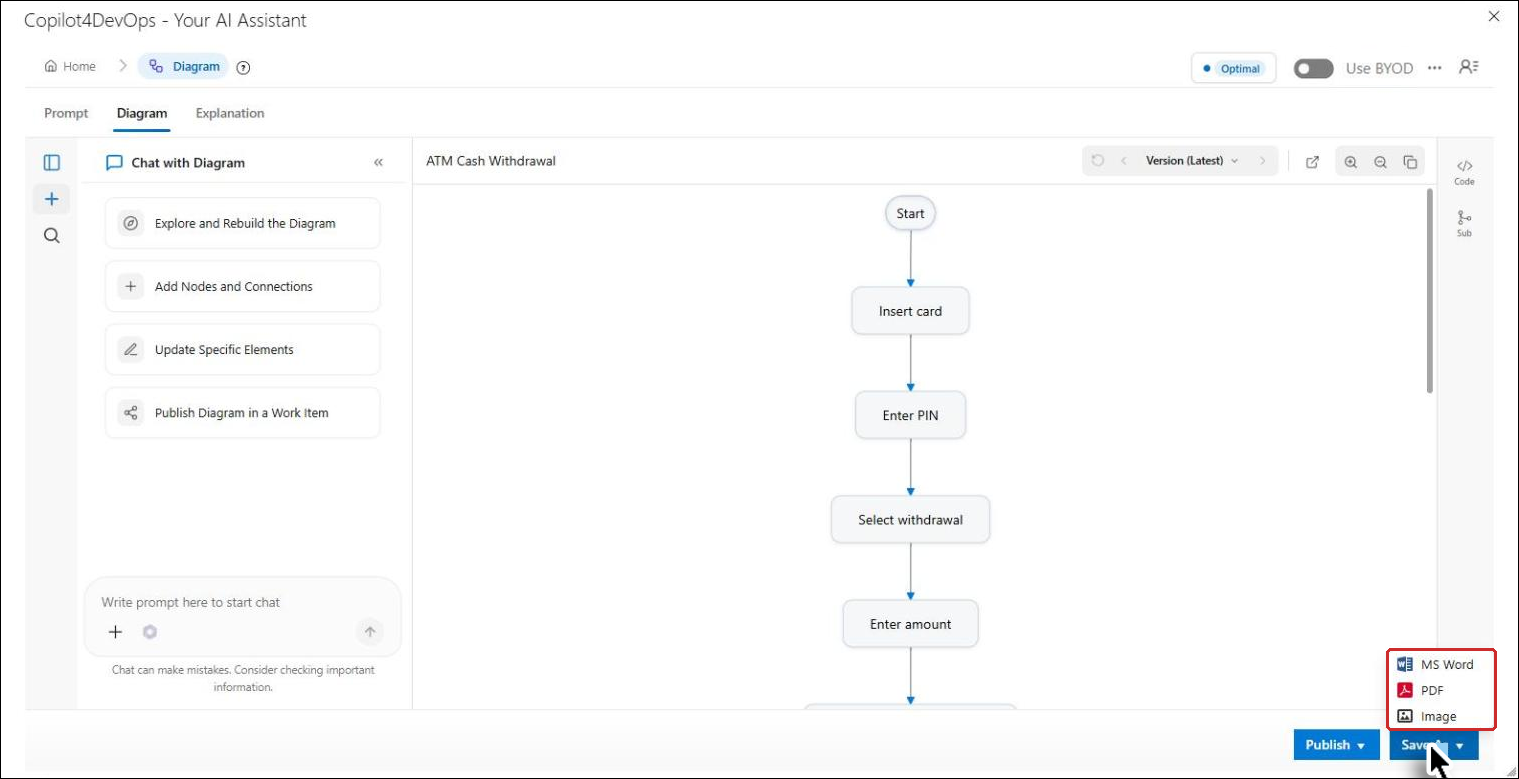
Once the format has been selected the file is downloaded.
3. Click on the downloaded file.
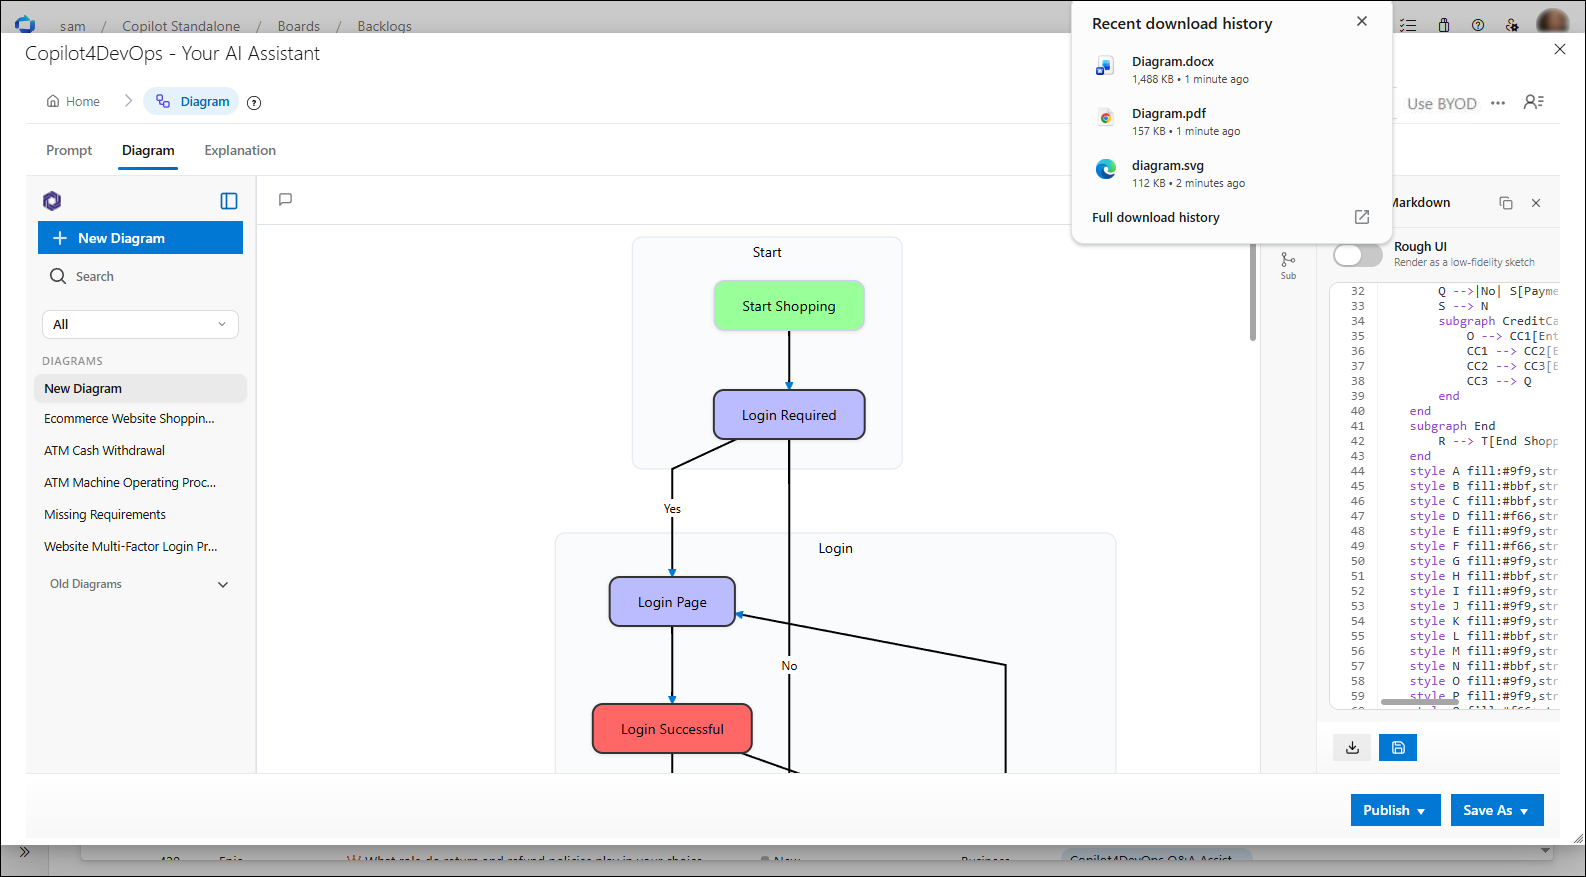
Users can view the downloaded file.
MS Word file:
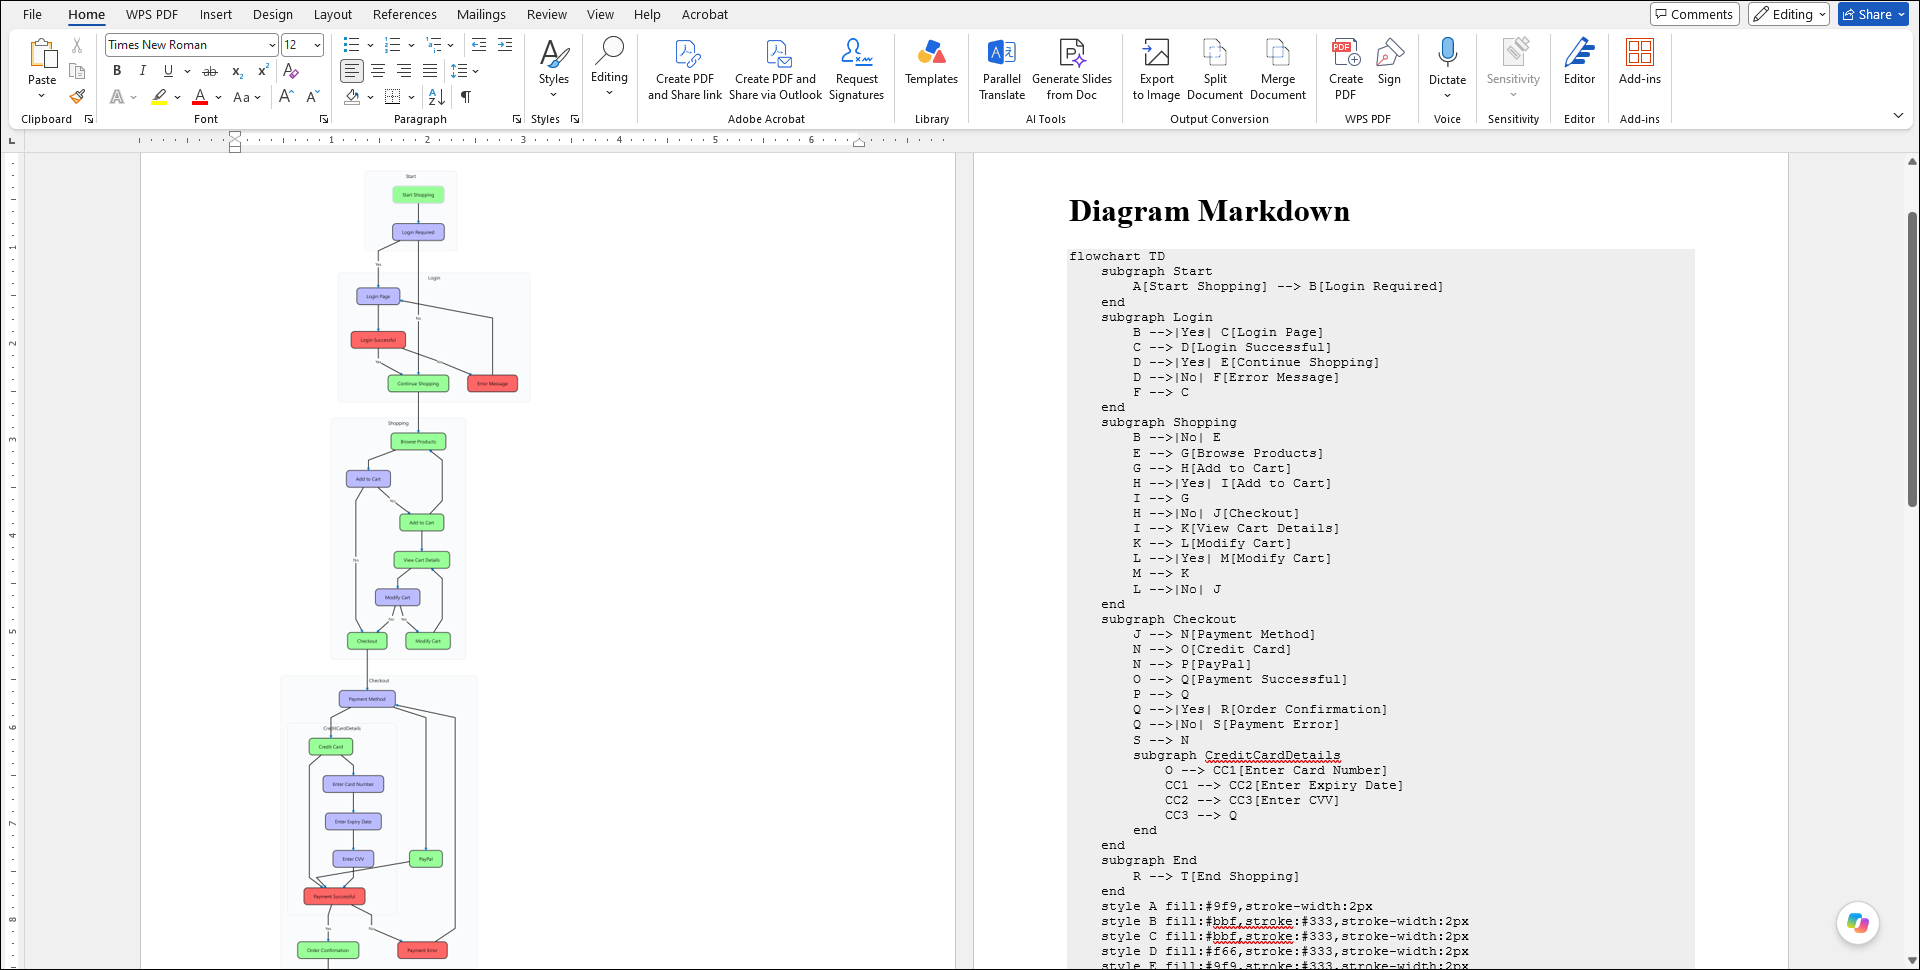
PDF file:
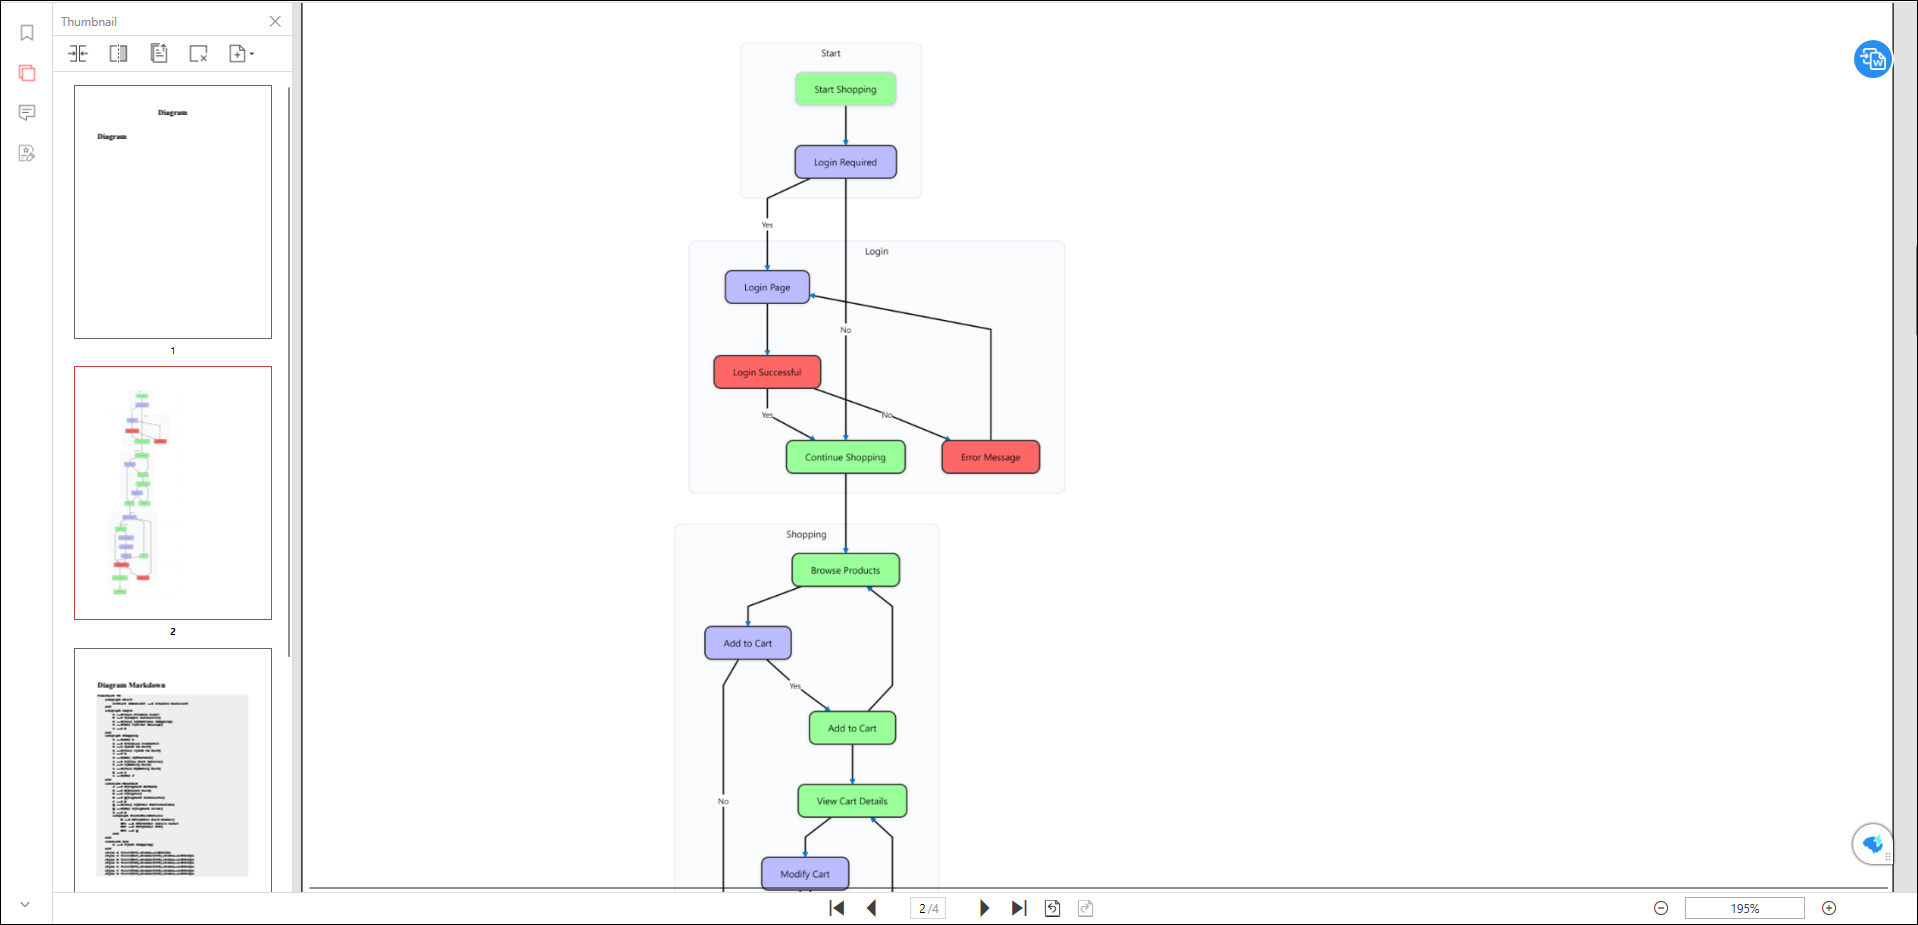
Image file (.svg):
Publishing the Diagram
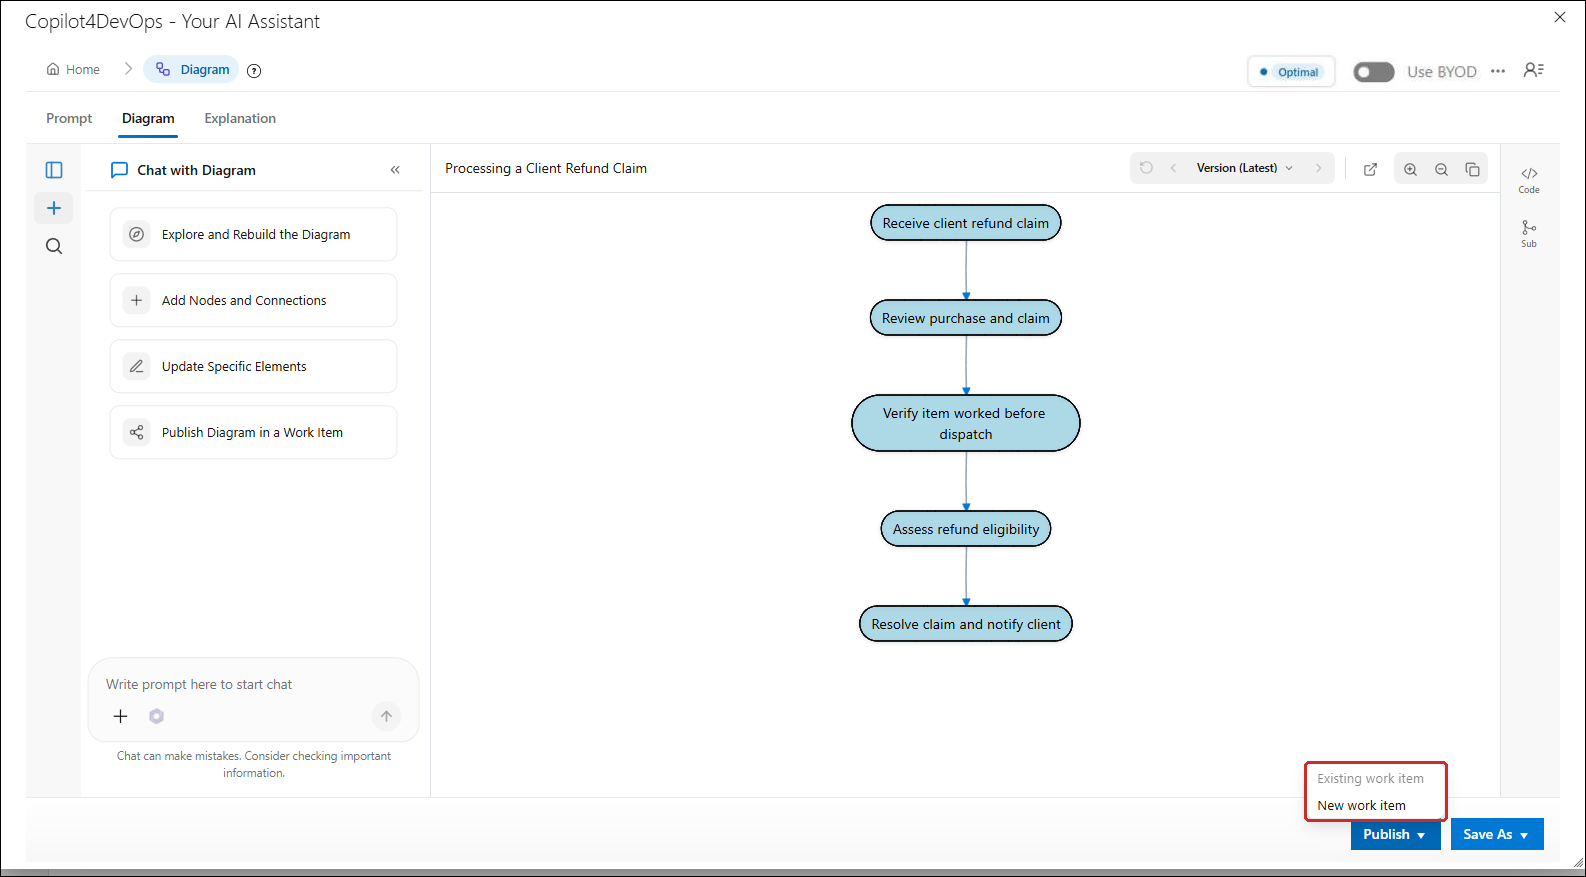
The user can publish diagrams to Work Items (WIs) either by updating an existing WI or creating a new one. Click Publish to open the publishing options:
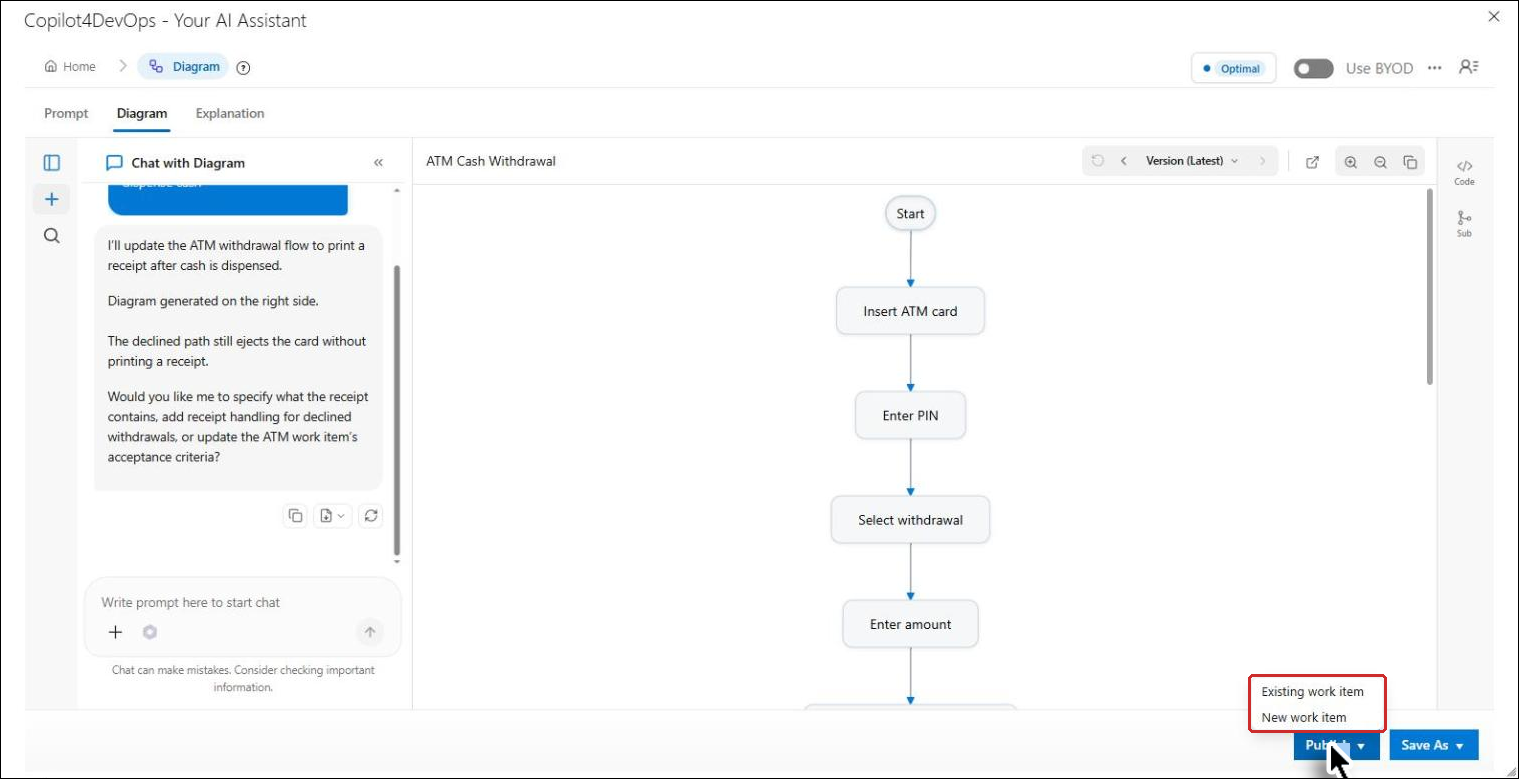
Option 1: Publish to an Existing Work Item
1. Choose the option to publish the diagram to Existing work item.
Note: If the diagram was generated using only a prompt and not a work item, the 'Existing Work Item' option will be disabled.
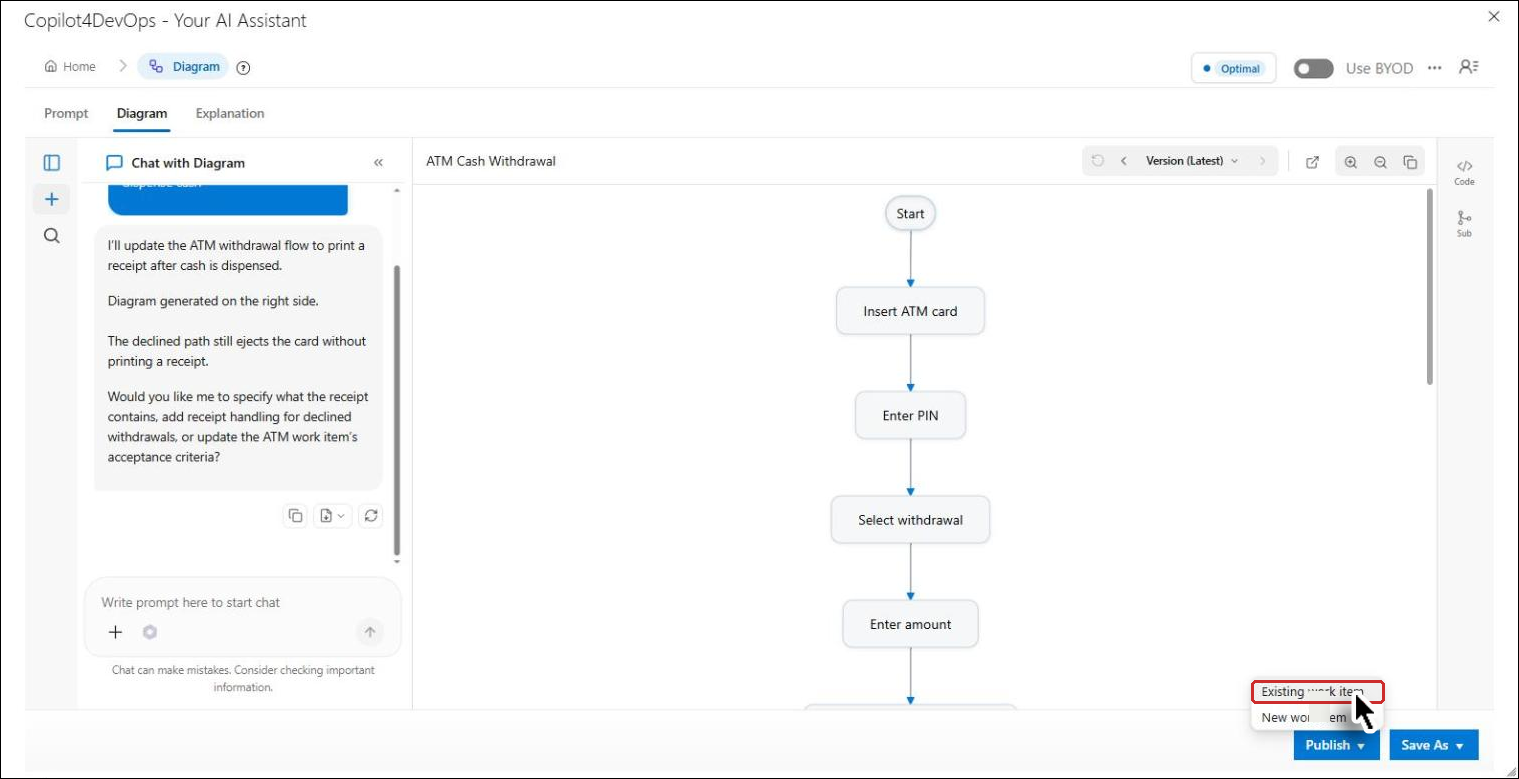
The Publish to existing work item window opens.
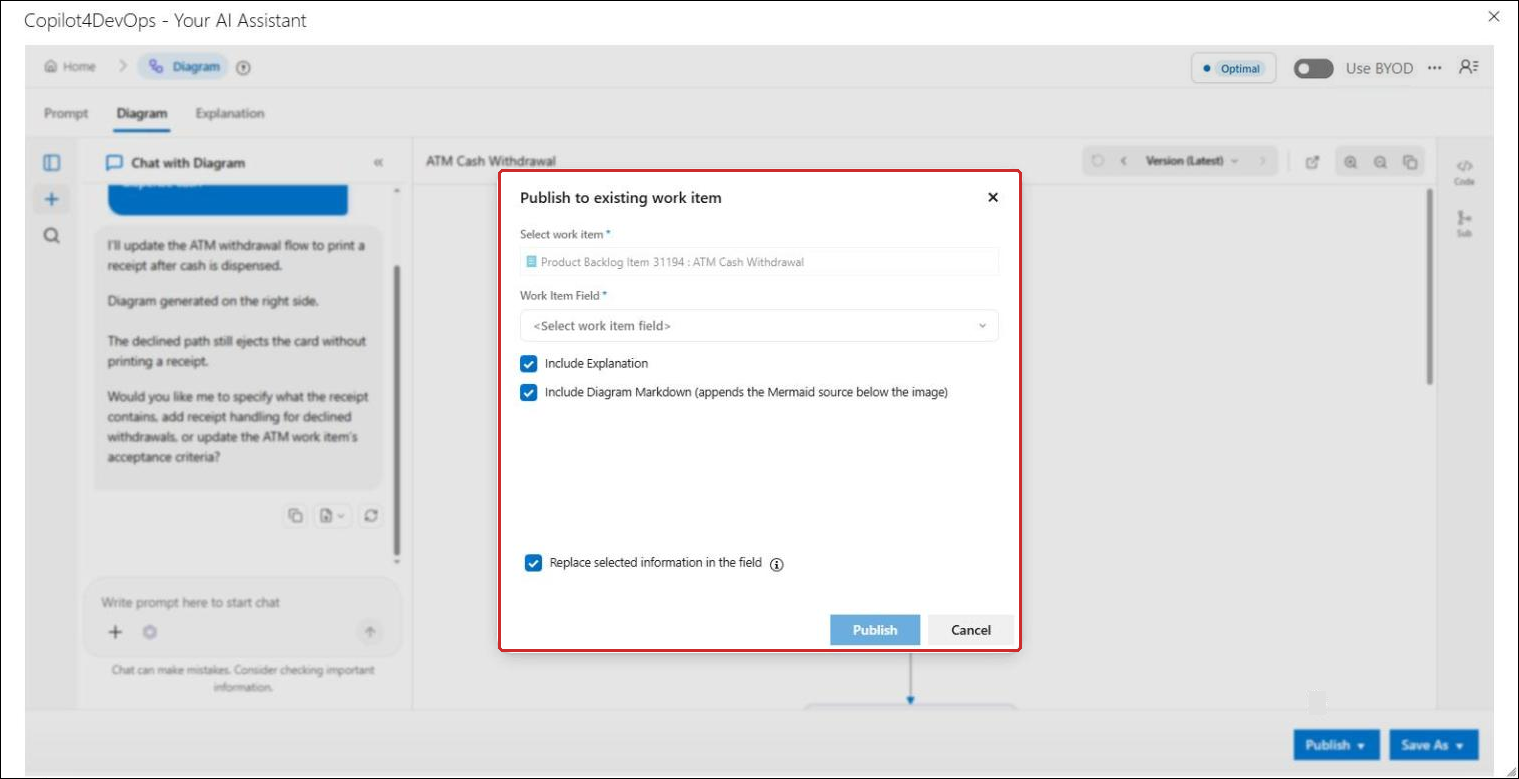
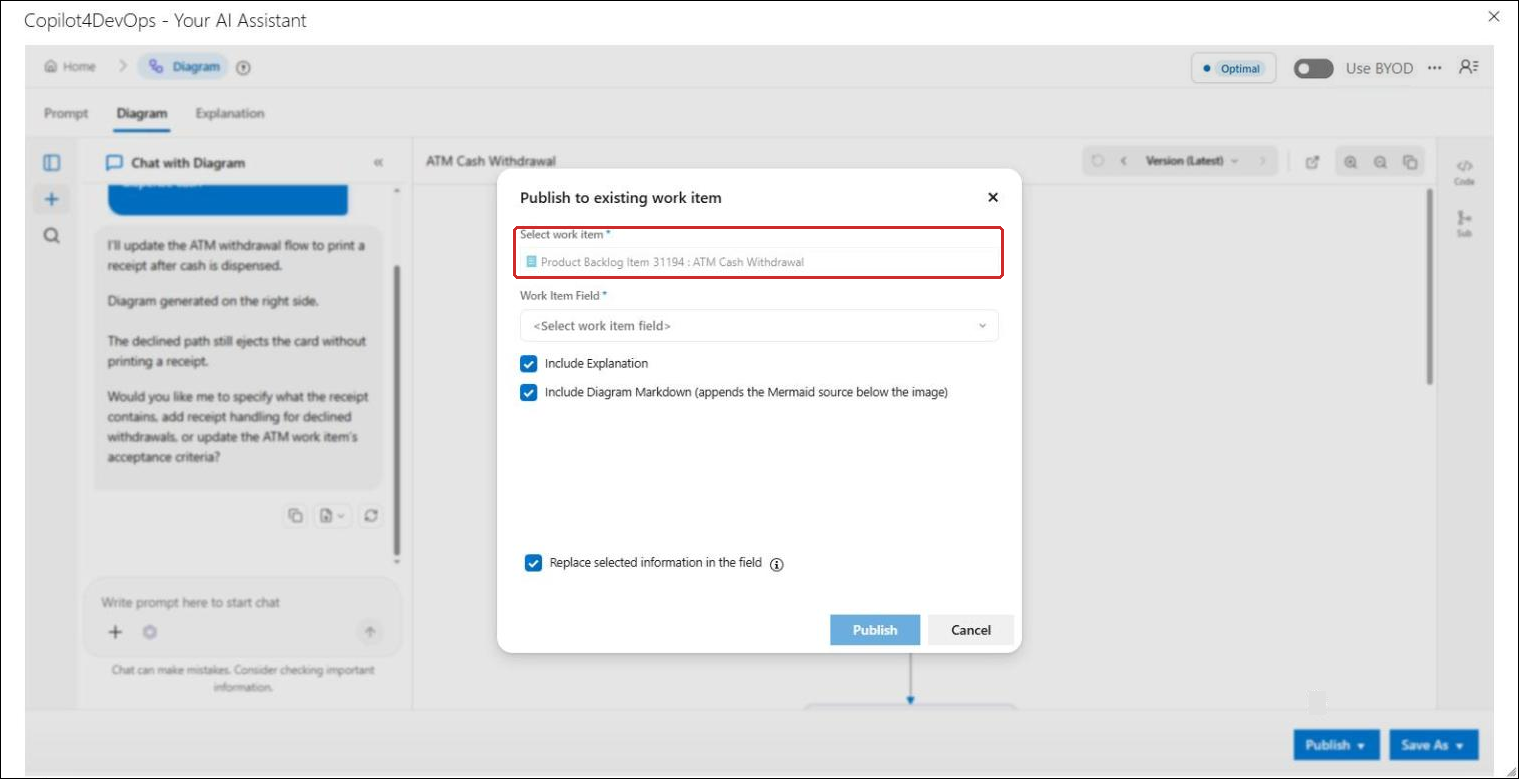
2. The Select work item box shows the work item that was selected for the context of the diagram. Only those work items that have been selected for the context can be used. If no work item has been selected for the context of the diagram user won't be able to publish the diagram to Existing Work Item.
Choose the Work Item Field (for example, Description or Acceptance Criteria). The Publish button is enabled once a field is selected.
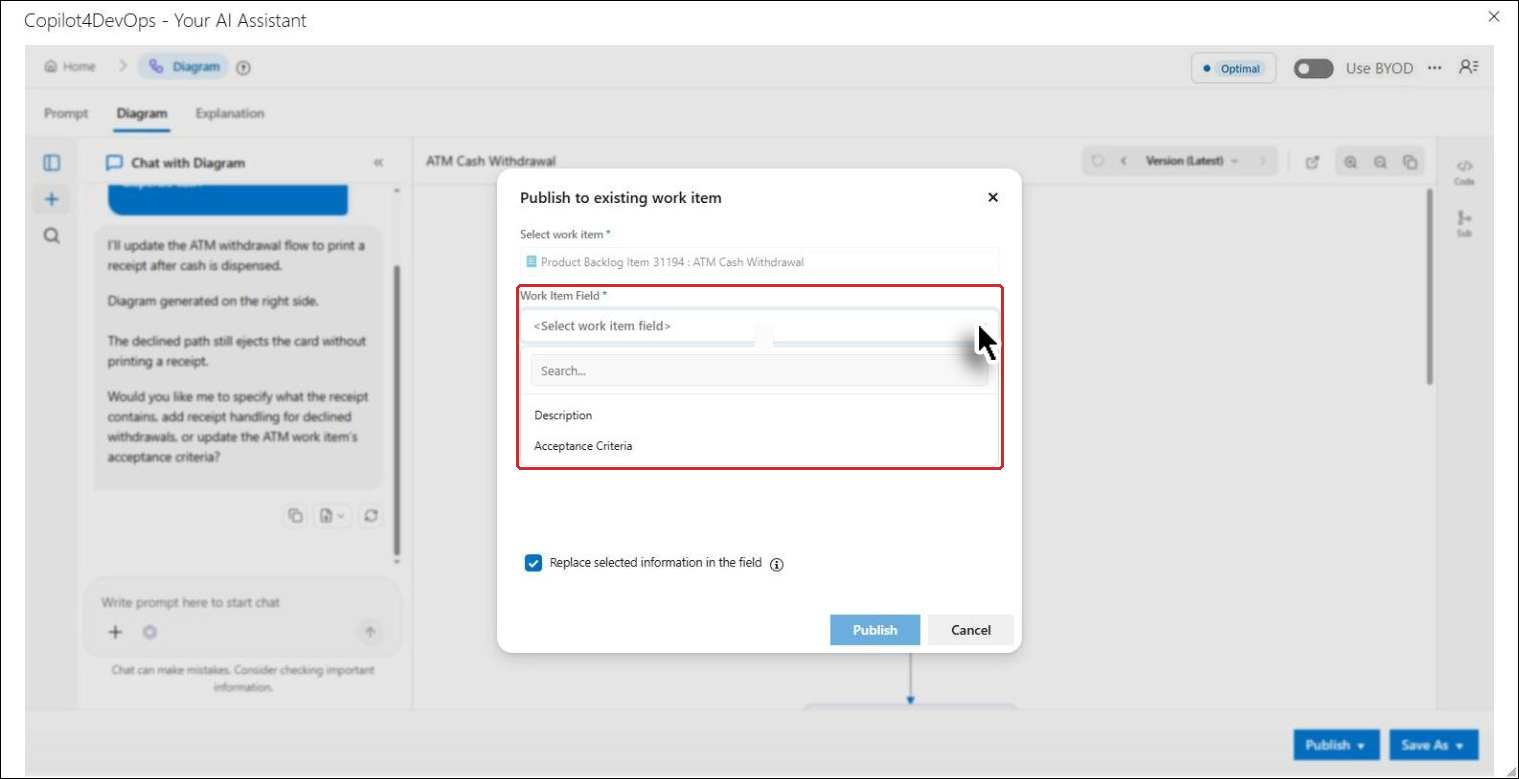
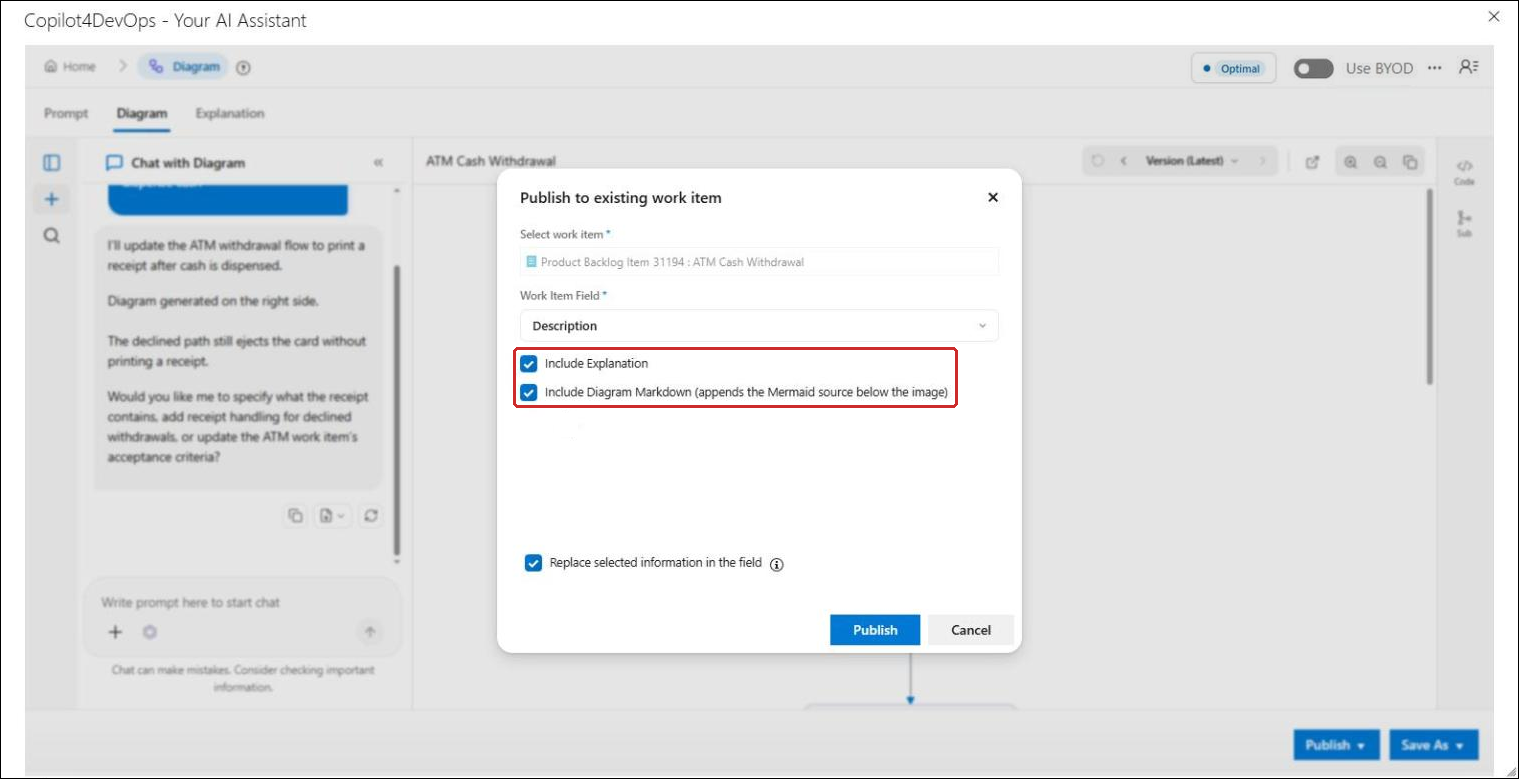
3. Decide whether to include the explanation and diagram Markdown in the Work Item (WI). Include Diagram Markdown appends the Mermaid source below the image.
Note: If the 'Include Explanation' checkbox is not enabled, it indicates that the diagram's explanation has not been generated yet. Should the user click the checkbox, the explanation will be generated in real time. If the explanation has already been generated, the checkbox will be selected by default.
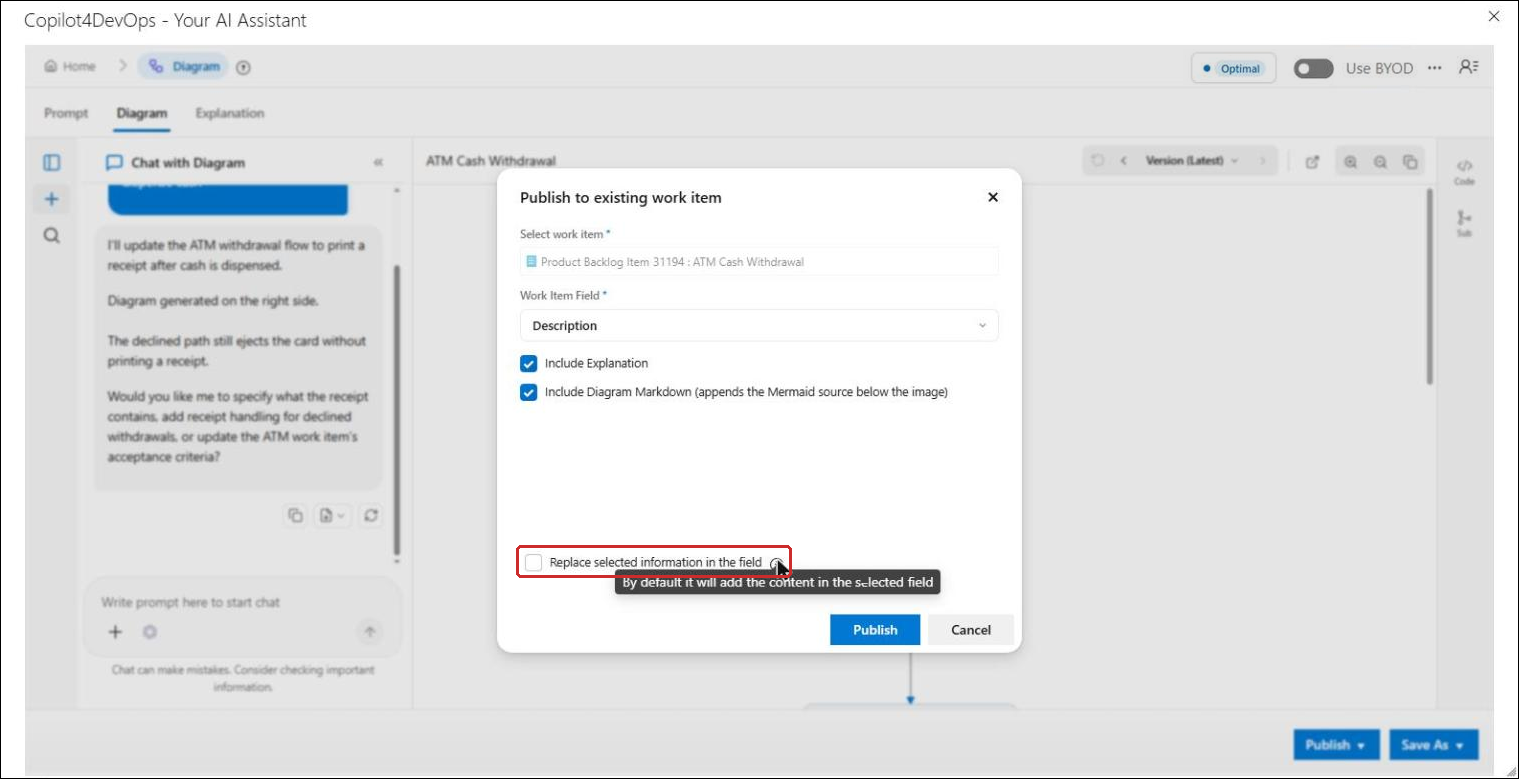
4. Select if you want to replace the selected information in the field. If Replace selected information in the field is not selected, the content is added to the selected field (as the tooltip of its info icon says).
Then click on the Publish button.
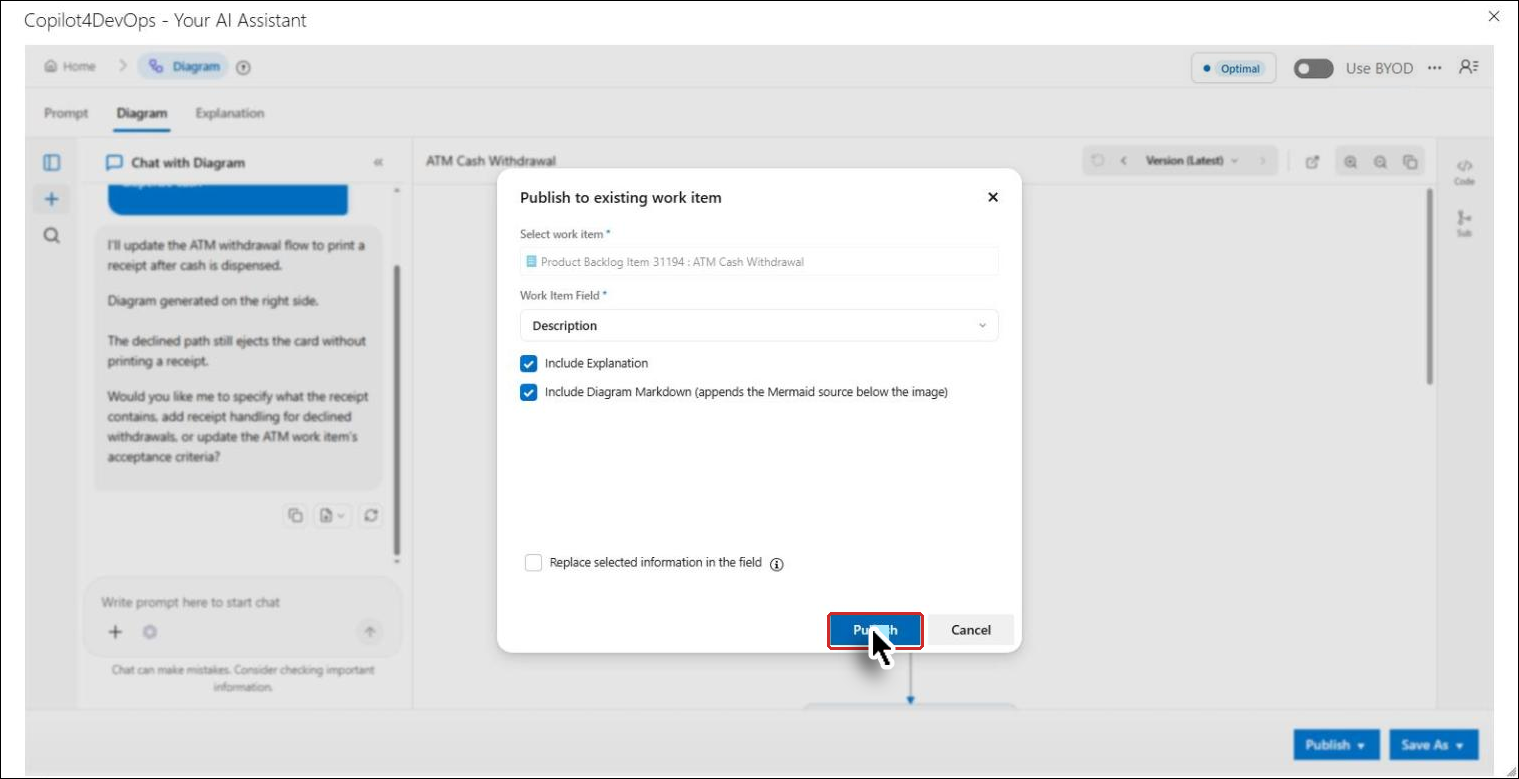
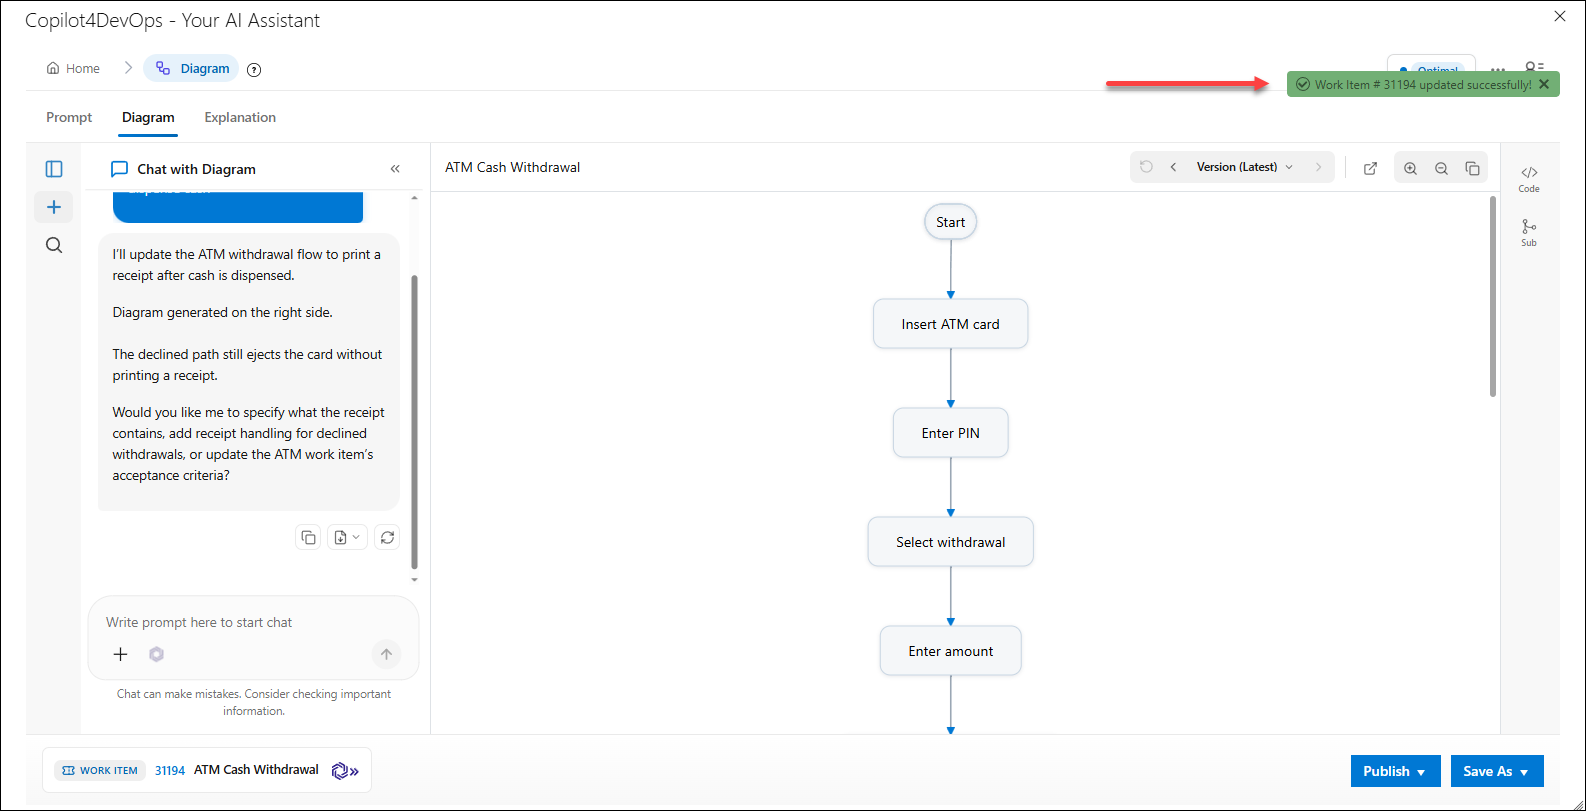
The existing work item has been updated successfully. The message "Work Item # <ID> updated successfully!" is shown, and the work item appears at the bottom left of the Diagram tab.
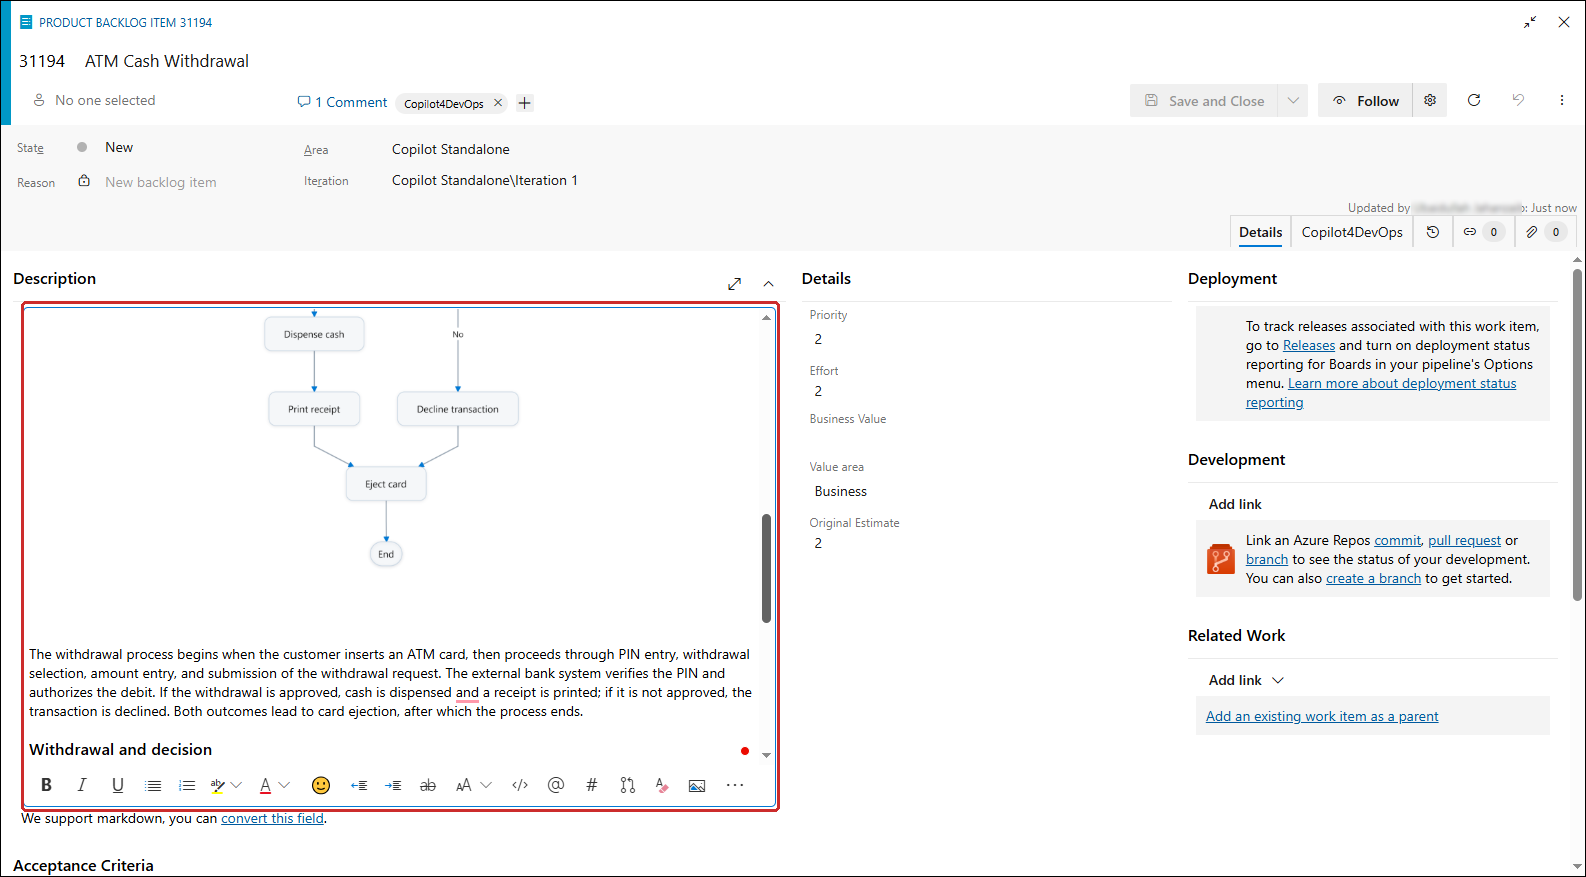
The diagram, with the explanation, is now in the selected field of the work item.
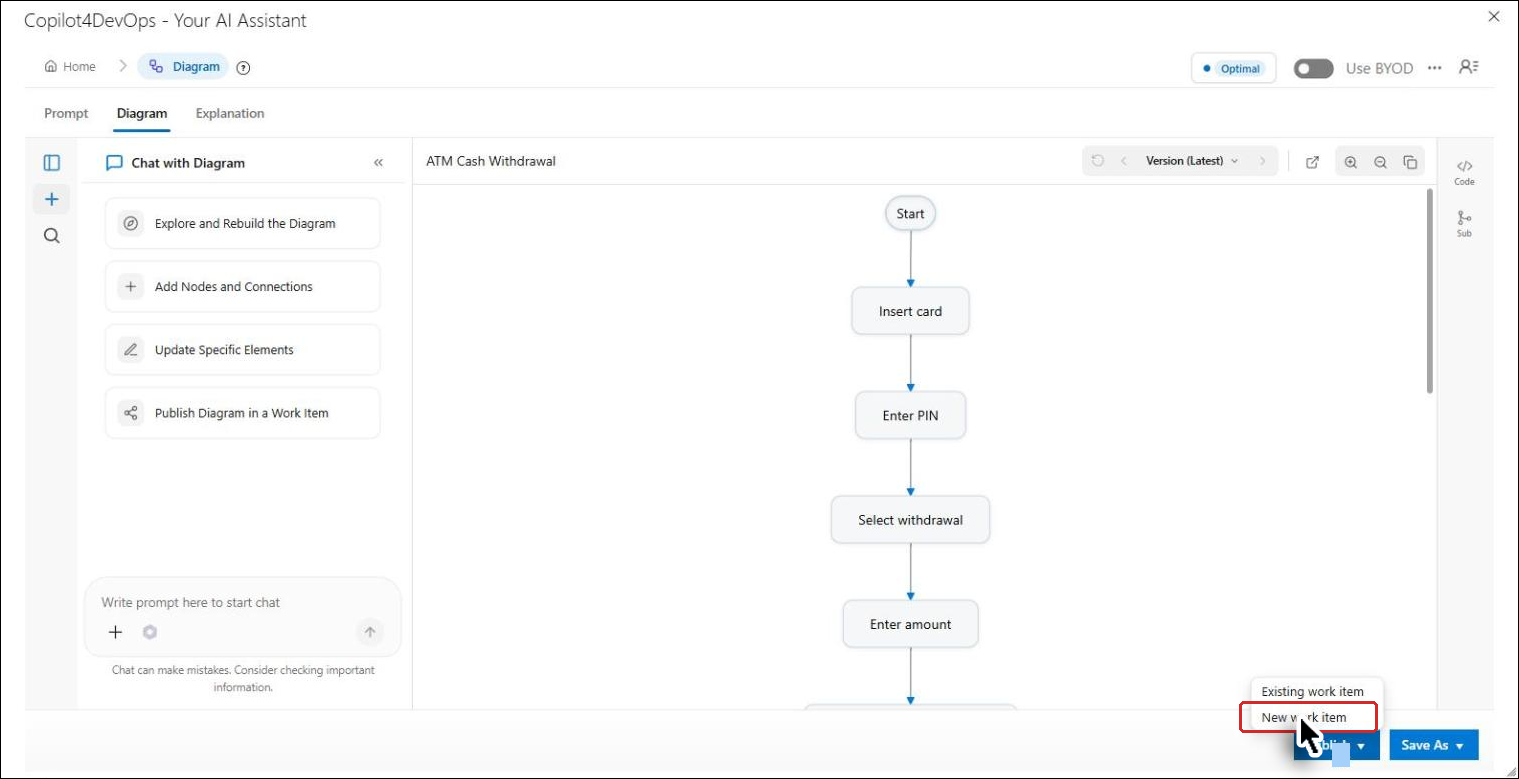
Option 2: Publish to a New Work Item
1. Choose the option to create a New work item during publishing.
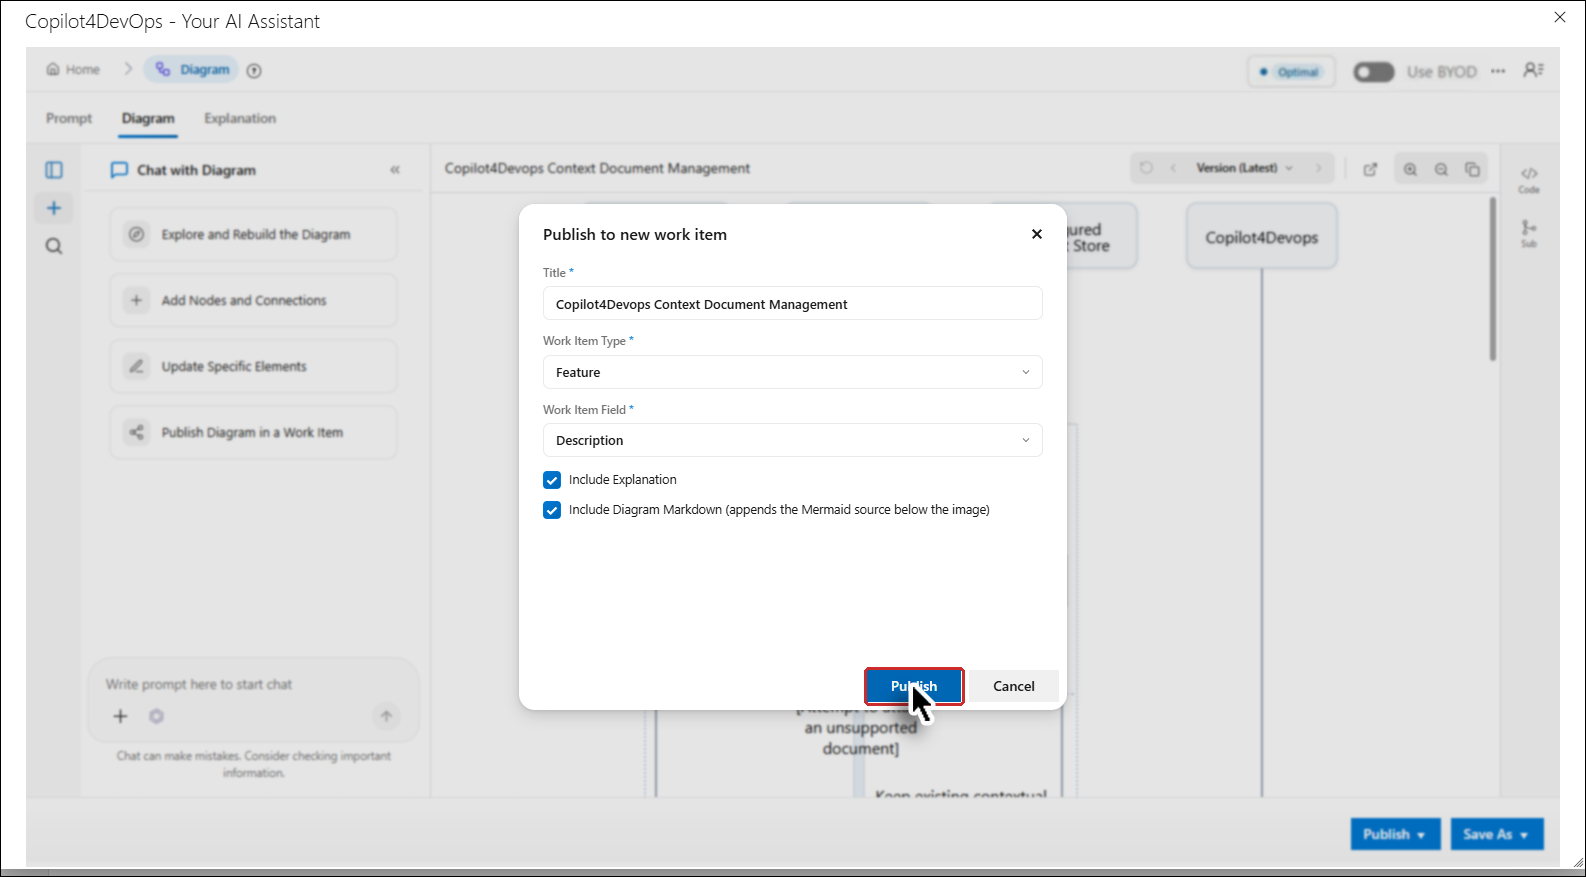
The Publish to new work item window opens.
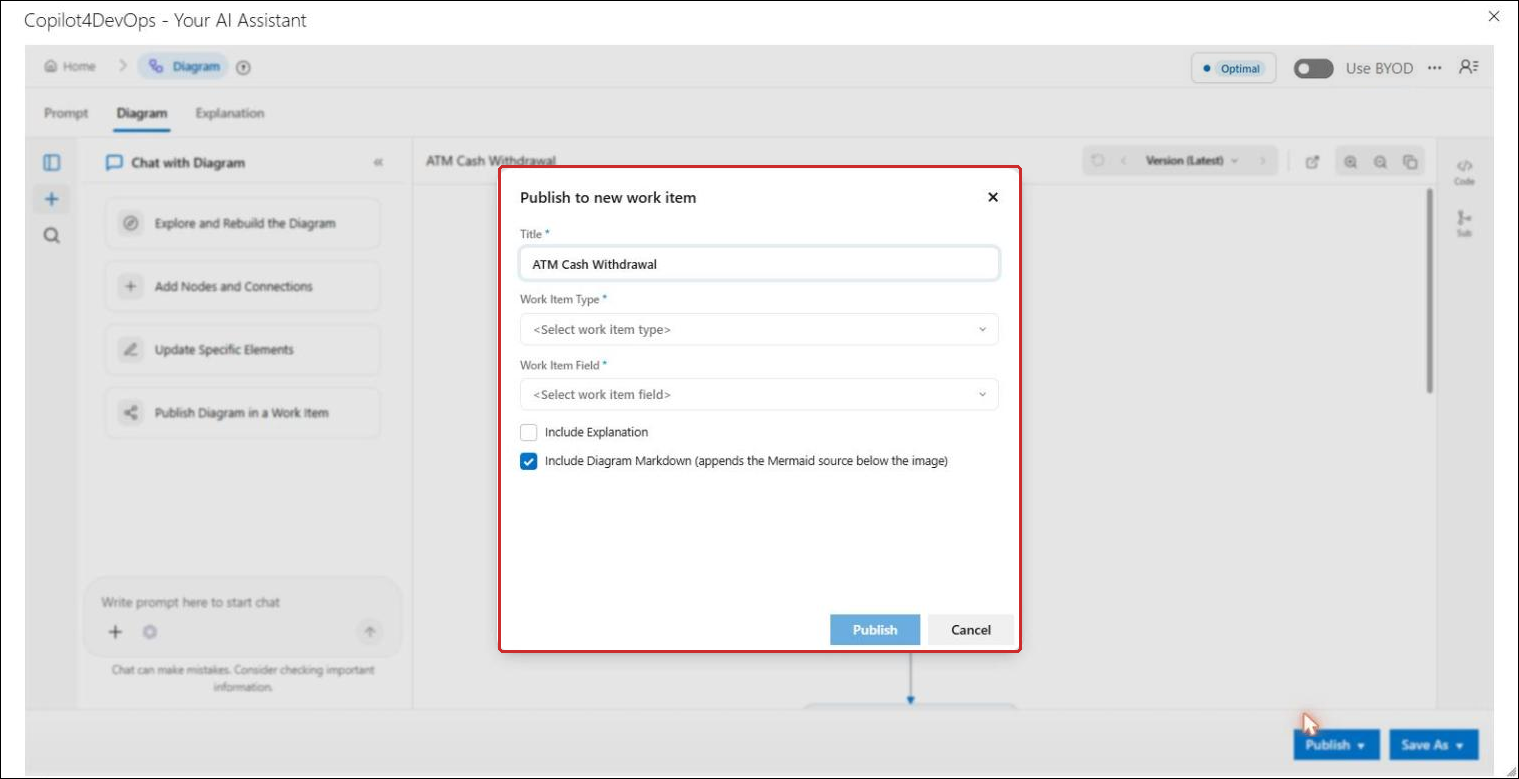
2. The title of the new WI is pre-filled with the name of the diagram. You can edit the title before completing the publishing process. The new work item is created with the title exactly as entered.
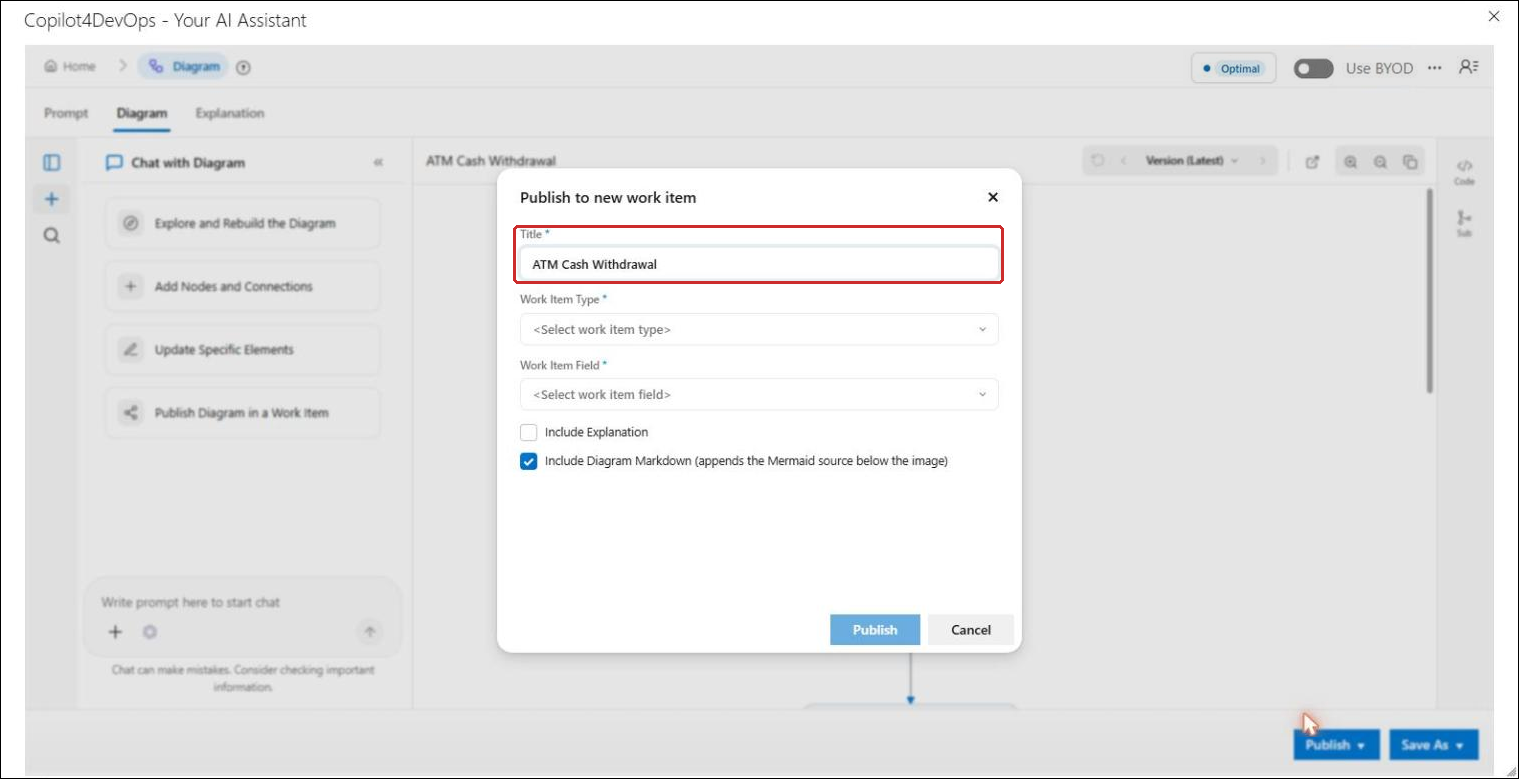
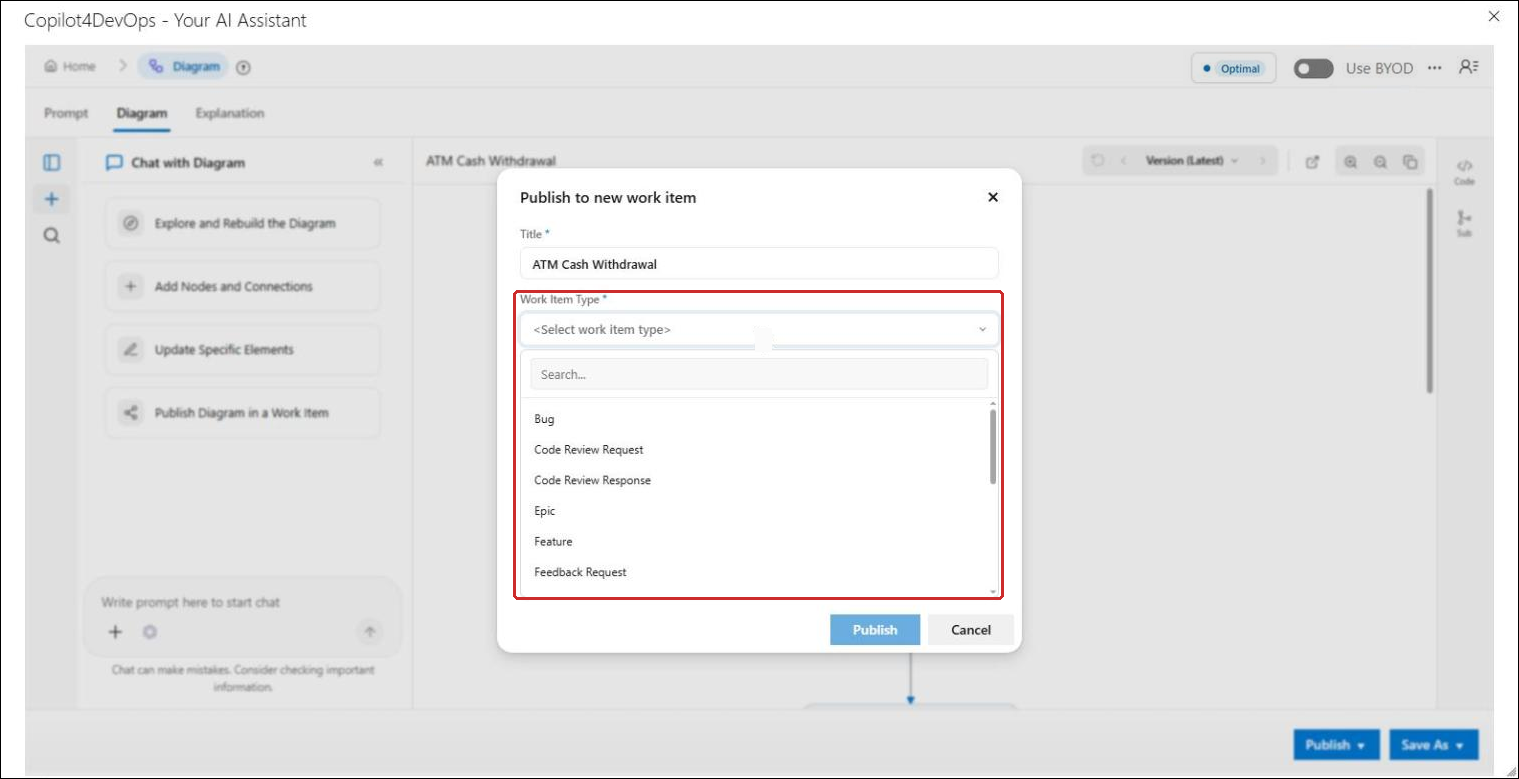
3. Select the Work Item Type.
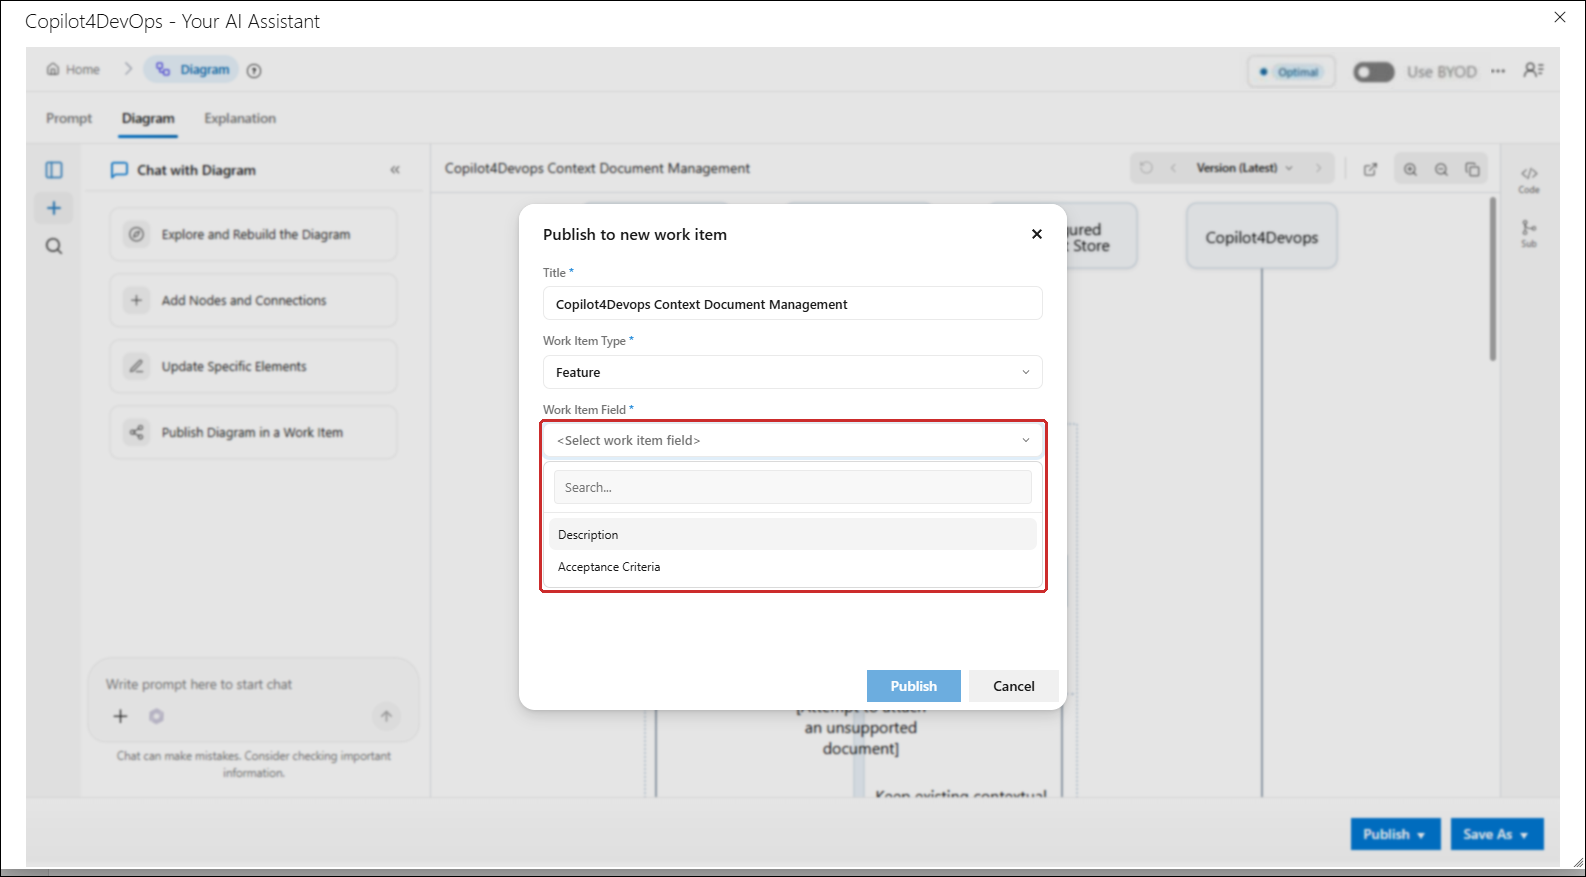
4. Select the Work Item Field.
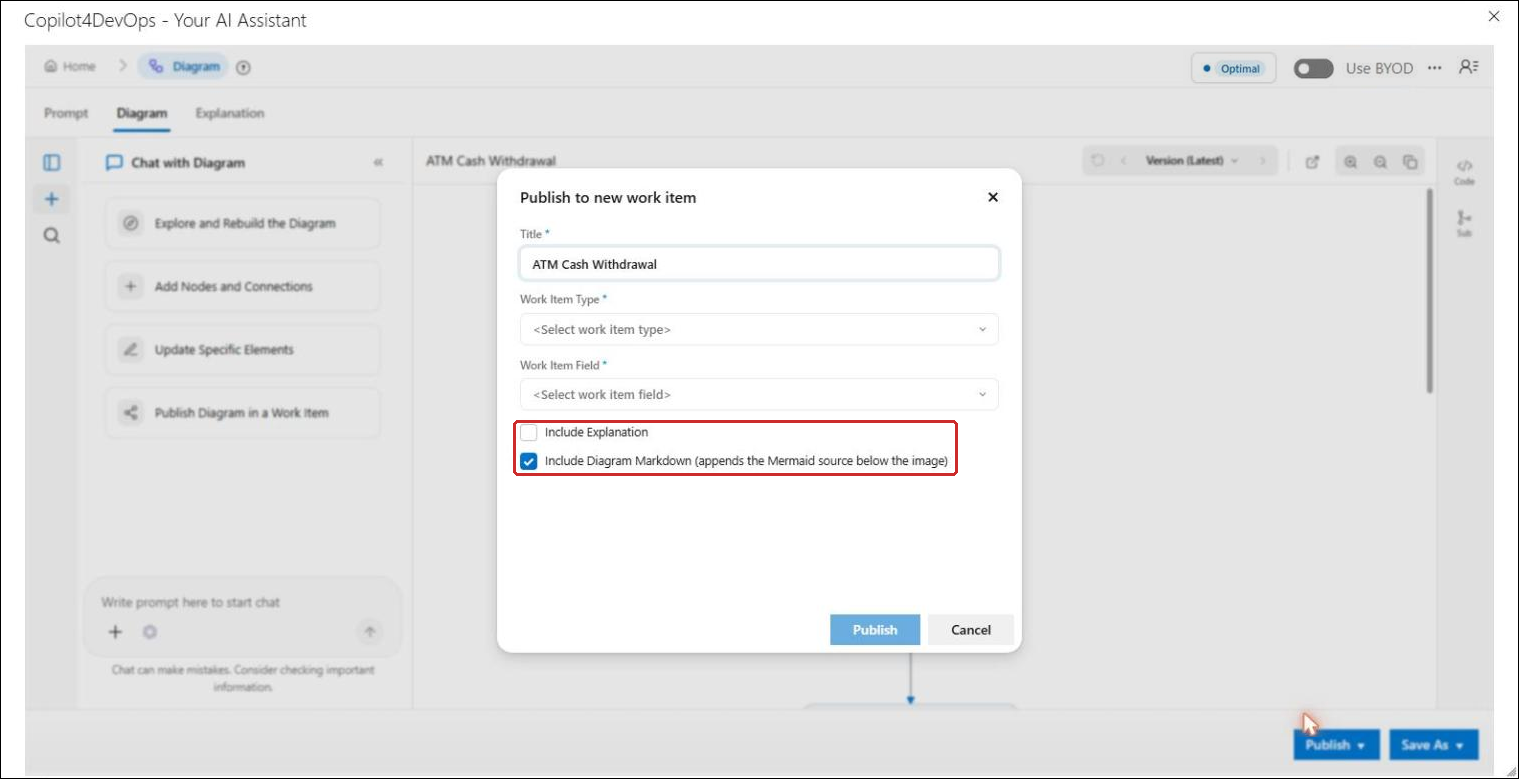
5. Decide whether to include the explanation and diagram Markdown in the new WI.
6. Click on the "Publish" button.
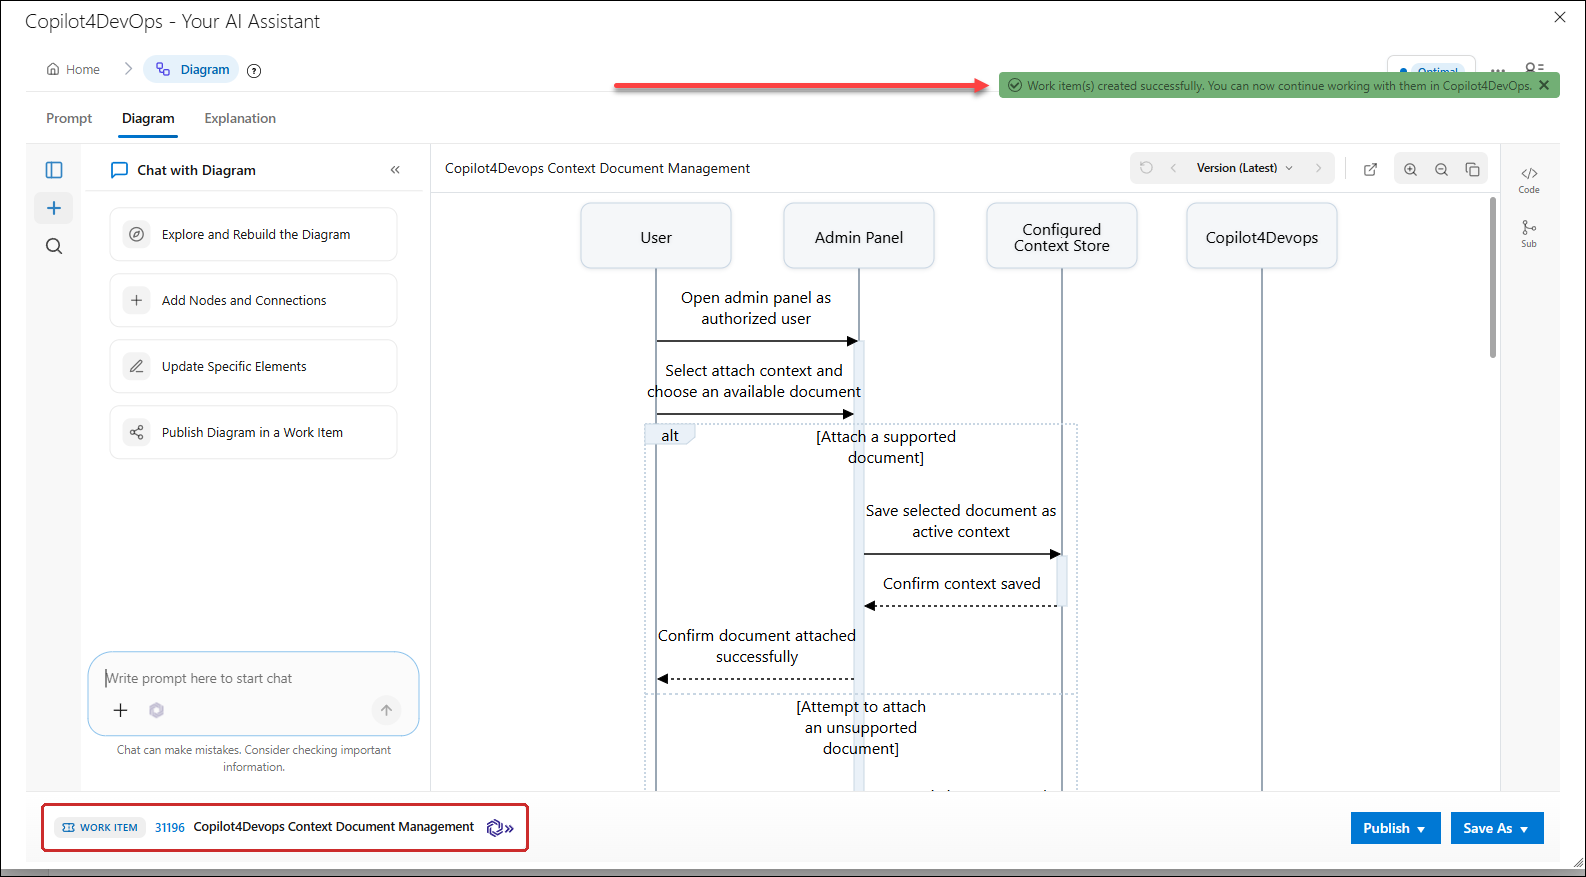
The message "Work item(s) created successfully. You can now continue working with them in Copilot4DevOps." is shown, and the new work item appears at the bottom left of the Diagram tab.
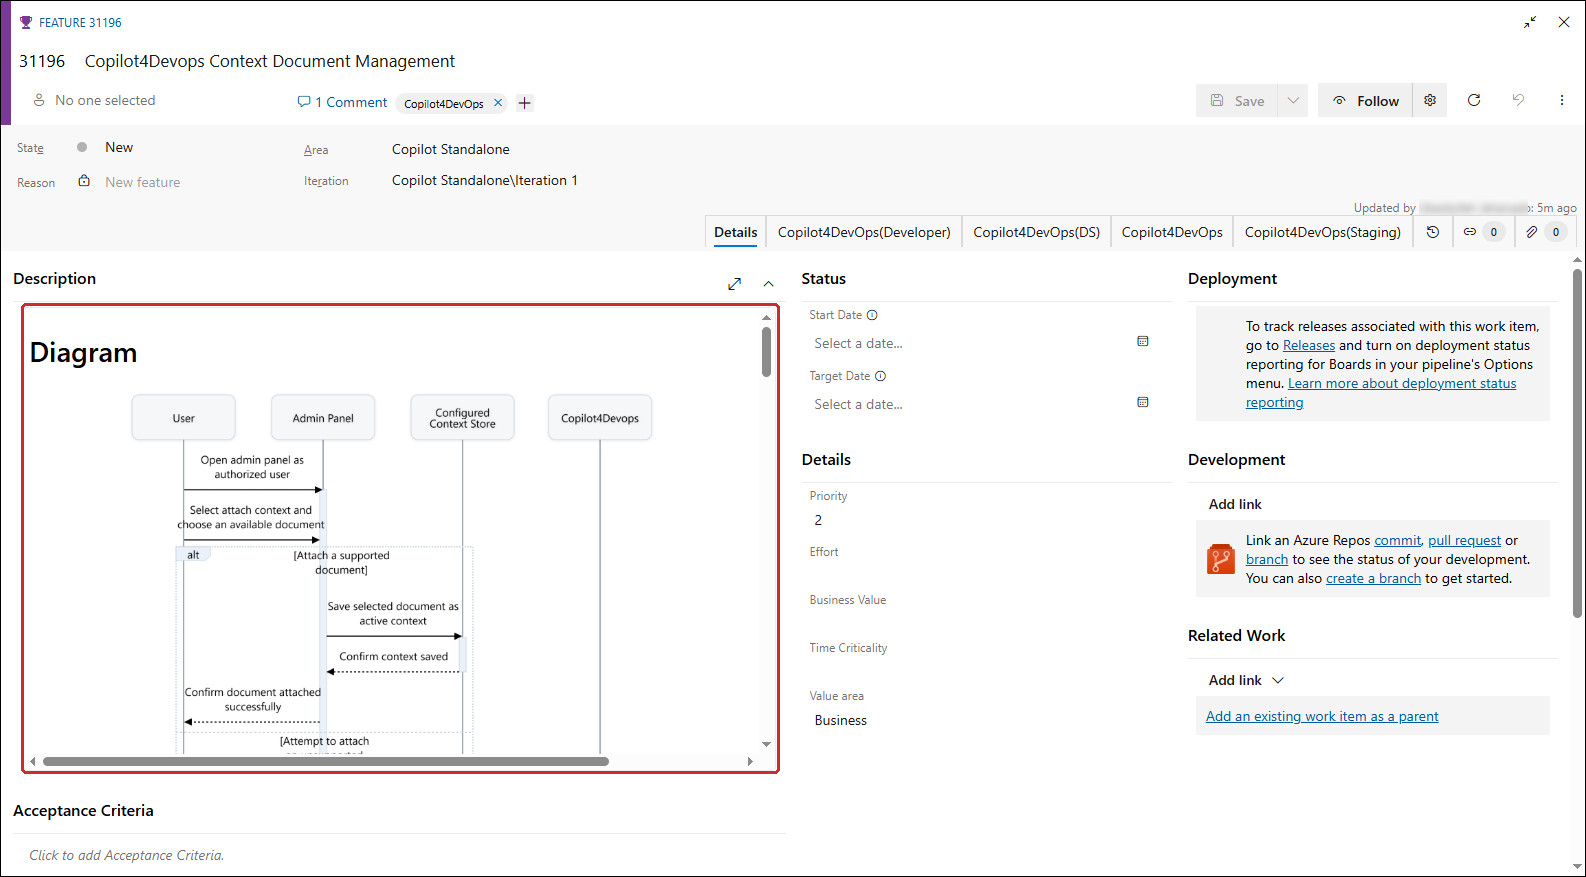
The new work item with diagram has been published successfully. The diagram is added to the selected field of the new work item under a Diagram heading.
Note: When a work item is created from Copilot4DevOps, it automatically inherits both the Area Path and the Iteration Path of the parent (anchor) work item, keeping child items aligned with their parent's area and sprint and reducing manual effort during planning.
-
Before the work item is created, the system validates whether the current user has permission to create or edit work items in the inherited Area Path.
-
If the user has access, the work item is created successfully with the inherited Area Path and Iteration Path.
-
If the user does not have access to the inherited Area Path, the Work Item window opens so the user can change the Area Path before creating the work item.
