


Getting stakeholder sign-off on a UI before development starts is harder than it sounds, as written UI requirements leave too much room for interpretation and everyone on the team misreads them differently. Nobody catches the gap until the screen is already built, and by then, a small misread has turned into days of rework instead of a quick fix.
To solve this problem, teams are using the Mockup tool of Copilot4DevOps. It allows building UI wireframes using AI based on the Azure DevOps work items, and teams can send them to stakeholders for initial design reviews.
In this blog, we will explain what a Mockup tool does and why a team should use it, provide a step-by-step guide to generating UI mockups directly within Azure DevOps, and explain how different team members should use a mockup tool.
What Is the Mockup Tool in Copilot4DevOps?
The Mockup tool is a feature of Copilot4DevOps, an AI assistant for requirements management within Azure DevOps. It takes existing ADO work items like epics, features, user stories, etc., as a context, reads their title, description, and other selected fields, and uses AI to generate UI wireframes.
It doesn’t just take work items as a context, but users can also upload different types of files, including PDFs, images, and Word docs that contain UI specifications or brand guidelines, component libraries, old screens, work item attachments, and web URLs, and the tool uses those as a reference too. As a result, users get a UI mockup that follows the instructions and brand guidelines uploaded in the file.
That’s not all. It also allows editing specific UI components using natural-language instructions, so teams don’t need to manually change them.
The best part of the tool is that it lets you link the mockup to the relevant work item. There is a trail showing which screen came from which requirement. This way, teams can prepare UI prototypes within minutes instead of days.
Why Create a UI Mockup Before You Build
- Requirements get misread constantly: Stakeholders explain something else, the product team prepares something else, and UI designers interpret requirements differently. Then, gaps in designs go unnoticed until the development is done.
- Late fixes cost far more: NASA’s review of error-cost studies found a requirements error fixed after integration costs up to 78 times more than fixing it early.
- Saves time: UI wireframes help teams to get approvals from product teams and stakeholders before any development starts. Hence, teams don’t need to waste time on rework later.
- A screen earns a reaction: Generally, stakeholders can easily review and respond to something they can actually see, while a written requirement usually gets a vague nod.
- Get faster approvals: Feedback from stakeholders on UI requirements gets buried in emails, which slows down the approval. However, a mockup allows for faster approvals.
Overall, UI mockups can solve multiple pain points that product teams are actually facing. So, let’s understand how to prepare mockups without wasting days.
How to Generate a UI Mockup From an Azure DevOps Work Item
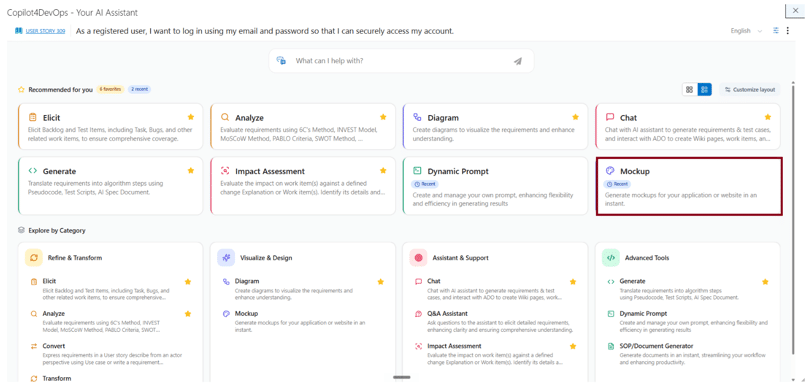
Step 1: Open the Mockup module in Copilot4DevOps.
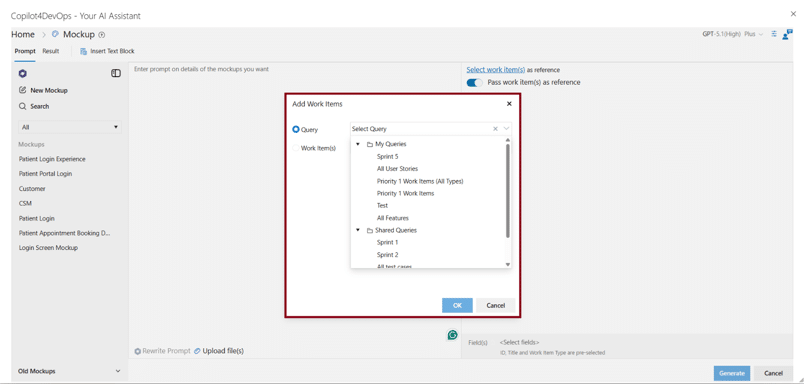
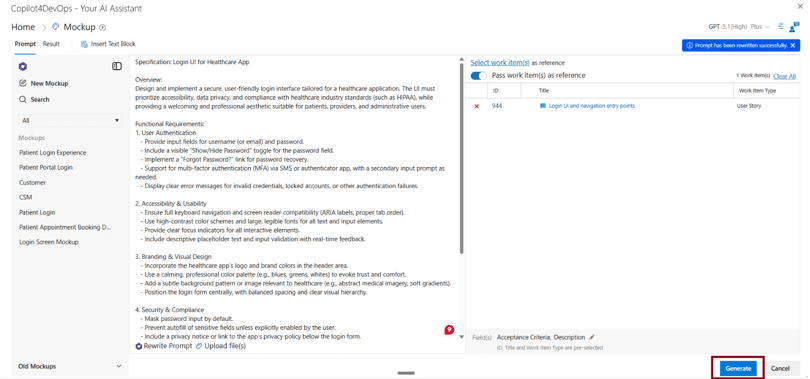
Step 2: Select an ADO work item like epics, features, user stories, tasks, etc., using a title or ID, or select them in bulk using queries, and provide them to the AI as context.
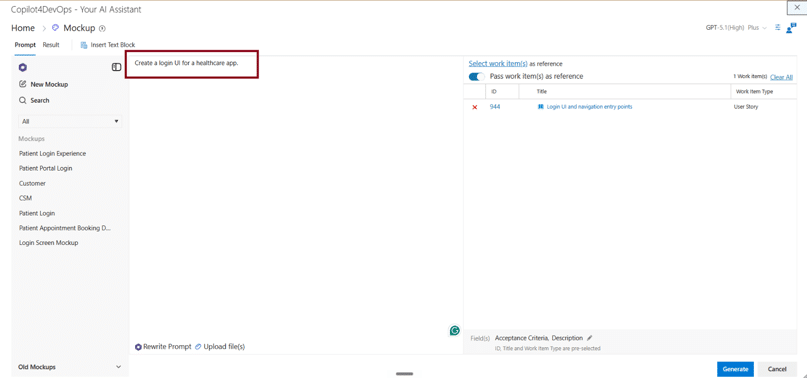
Step 3: Next, enter the prompt to generate a mockup.
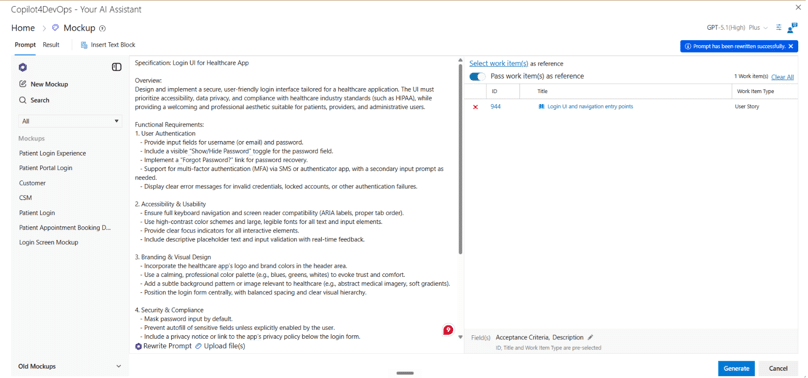
Step 3.1: Use the “Rewrite Prompt” feature at the bottom if you want to improve the prompt to get better results. It will instantly update the prompt.
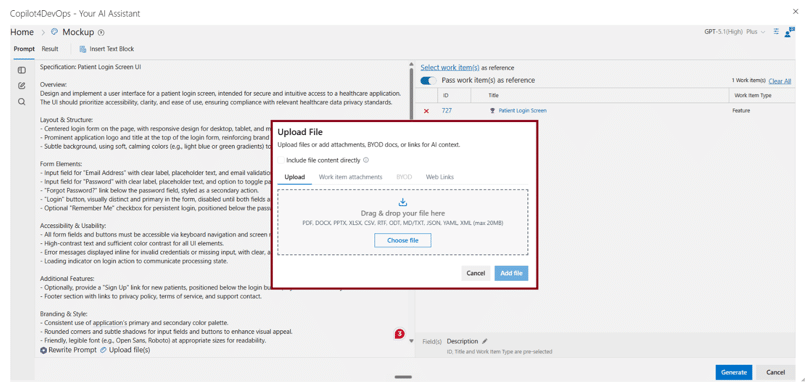
Step 4: If you want to provide more context, like brand guidelines, any instructions, etc., then you can directly upload files, attach files from work item attachments, or add a web URL that it will scrape and follow that.
Step 5: Click the “Generate” button at the bottom right.
Step 6: Next, it generates the UI wireframe based on the given instructions.
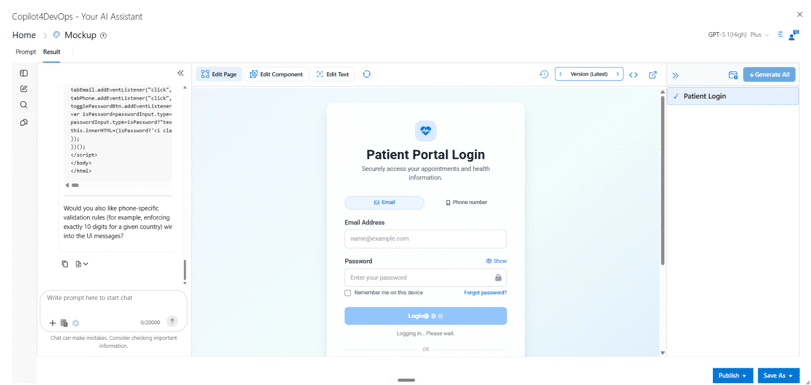
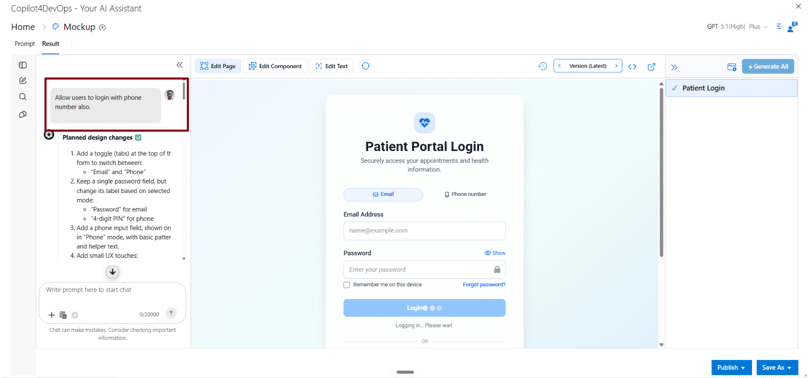
Step 7: You can use AI chat on the left side to update the UI using natural language instructions.
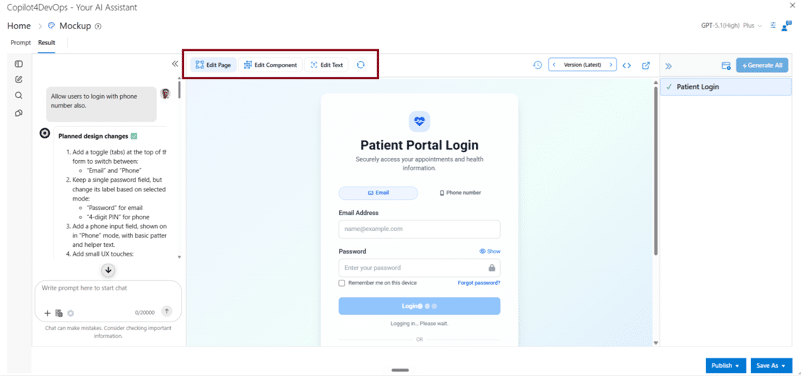
Step 7.1: You can also use “Edit Pages”, “Edit Component”, and “Edit Text” from the top to make changes in a particular field.
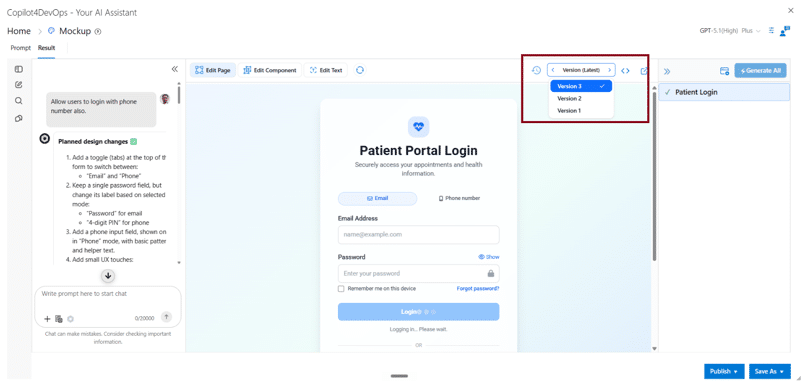
Step 7.2: If you want to see the version history of the mockup, at the top, you can click on the “Version” and see the different versions.
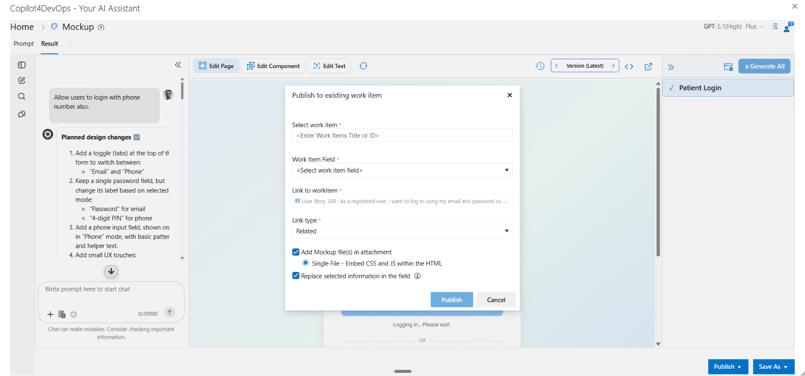
Step 8: If you want to share this mockup with anyone, you can publish it to an existing or new ADO work item. Then, share the work item with team members.
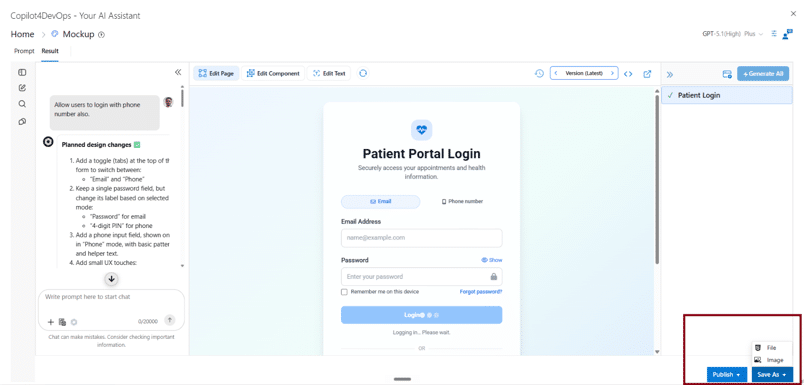
Step 9: If you want to share this mockup with any external member, then you can save it as an image or PDF.
This way, teams can create any UI prototypes that follow brand themes consistently and don’t miss any requirements within seconds.
Who Uses the Mockup Tool: PMs, BAs, Designers, and Stakeholders
Here is how different team members can use the Mockup tool:
- UI/UX Designers: Generate initial UI prototypes directly within Azure DevOps using the Mockup tool and do the A/B testing to analyze which one will work best for the end user.
- Product Owners: Product owners can generate UI prototypes directly from user stories and review requirement scopes before any development starts.
- Frontend Developers: One developer on Reddit mentioned that I can code but can’t design. So, how to find issues in the wireframe? As a solution, they can use a Mockup tool and ask the AI chat a question about what the issues are in this mockup and then use natural language instructions to fix those issues directly within Azure DevOps.
- Business Analysts: They can translate UI requirements into visual screens using AI, reference work items, and send them to stakeholders for UI requirements validation.
- Scrum Masters: They use the Mockup tool during the sprint planning or backlog grooming and make changes to the UI wireframes based on the updated UI requirements and share them with developers.
Each role works from the same source mockup, so nobody’s reacting to a different version of the same idea.
FAQ
No. The Mockup tool gives the first draft of the UI, so designers are still required to shape the final screen, make the real calls on usability, and decide what to ship.
In this case, you don’t need to start from scratch. You can just type what you need to update in plain language, and AI updates that and creates a new version of the mockup.
No. Copilot4DevOps is SOC 2 compliant, which means it does not send your data outside of your ADO workspace and does not use it to train its models.
Probieren Sie es selbst aus
Bereit, Ihr DevOps mit Copilot4DevOps zu transformieren?
Holen Sie sich noch heute eine kostenlose Testversion.